
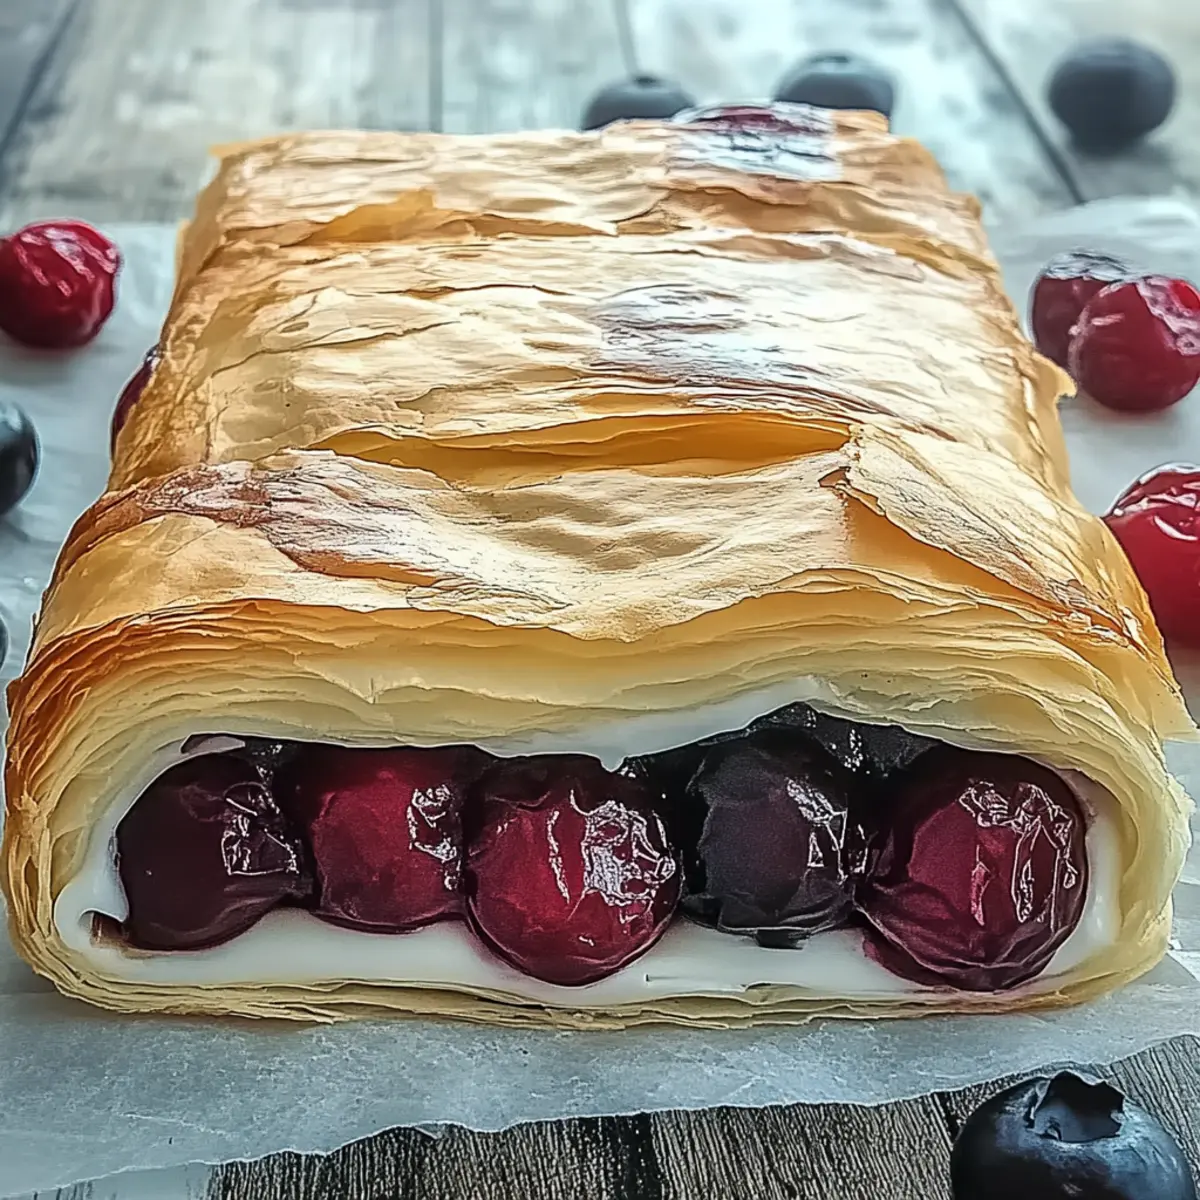
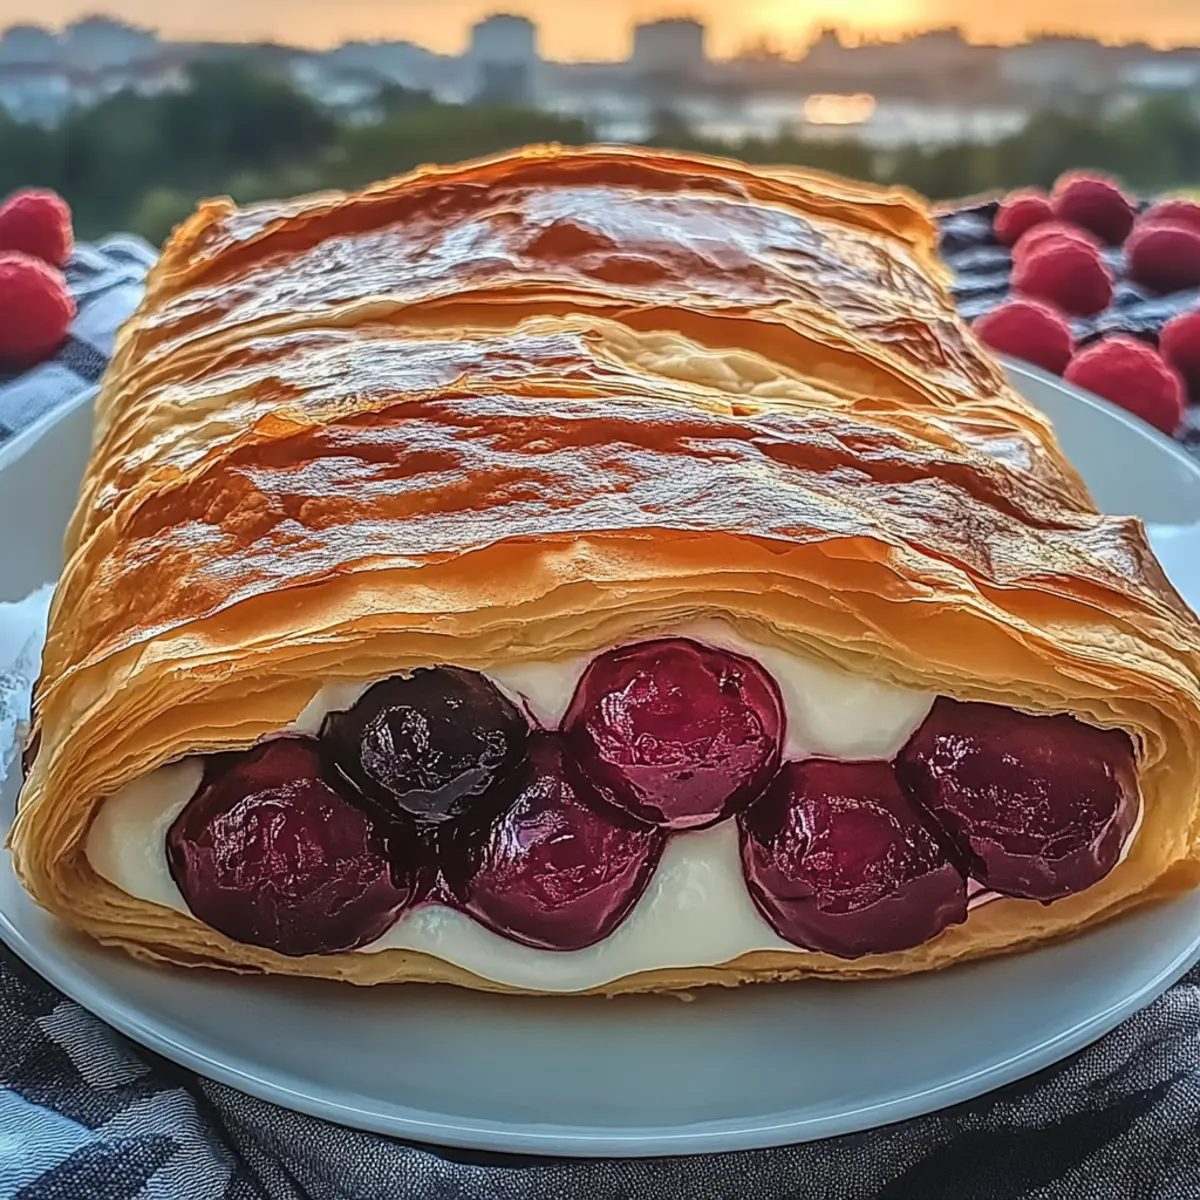
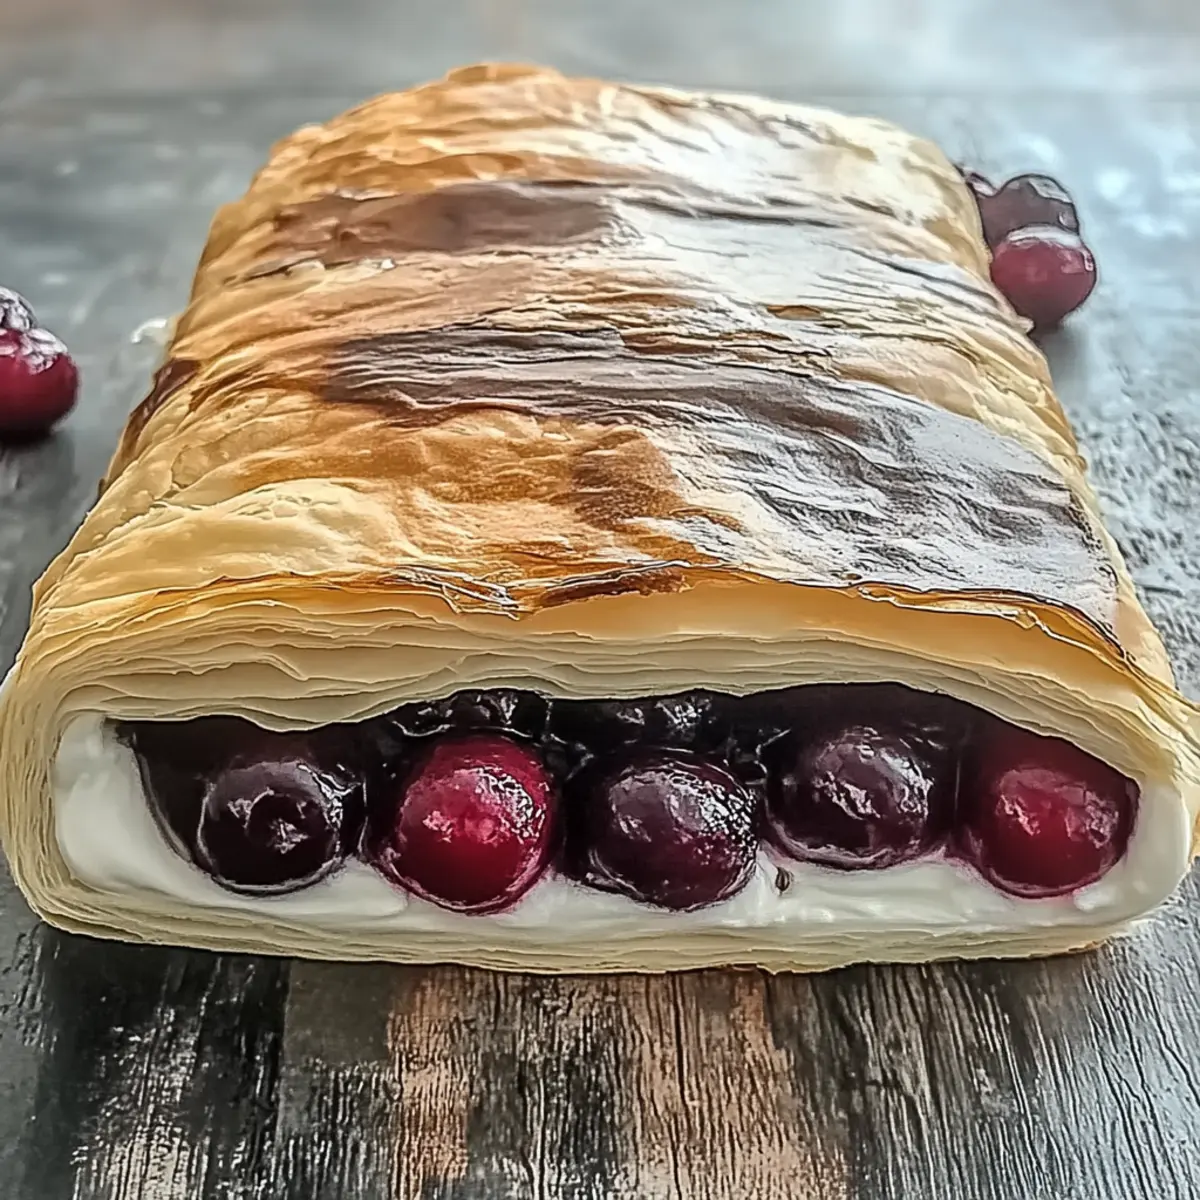
As I pulled the warm Cherry Cheese Danish from the oven, the sweet, buttery aroma spiraled through my kitchen, instantly bringing back memories of weekend brunches at my favorite café. This easy-to-make pastry combines flaky layers of puff pastry with a luscious cream cheese filling, all topped with tangy cherries—perfect for those moments when you crave a homemade treat without the fuss. Not only is this Cherry Cheese Danish a crowd-pleaser, but it also offers the delightful ability to customize it with various fruit fillings. Whether you’re looking for a cozy snack or a show-stopping dessert for guests, this recipe is the answer. Curious about what makes this Danish so irresistible? Let’s dive in!
What Makes Cherry Cheese Danish Irresistible?
Flaky Perfection: This Cherry Cheese Danish boasts beautifully golden puff pastry that envelops a dreamy cream cheese filling—a delightful textural contrast that's simply irresistible.
Quick and Easy: With minimal prep and cooking time, you can whip up these treats in just about 30 minutes, allowing you to savor homemade goodness without the hassle.
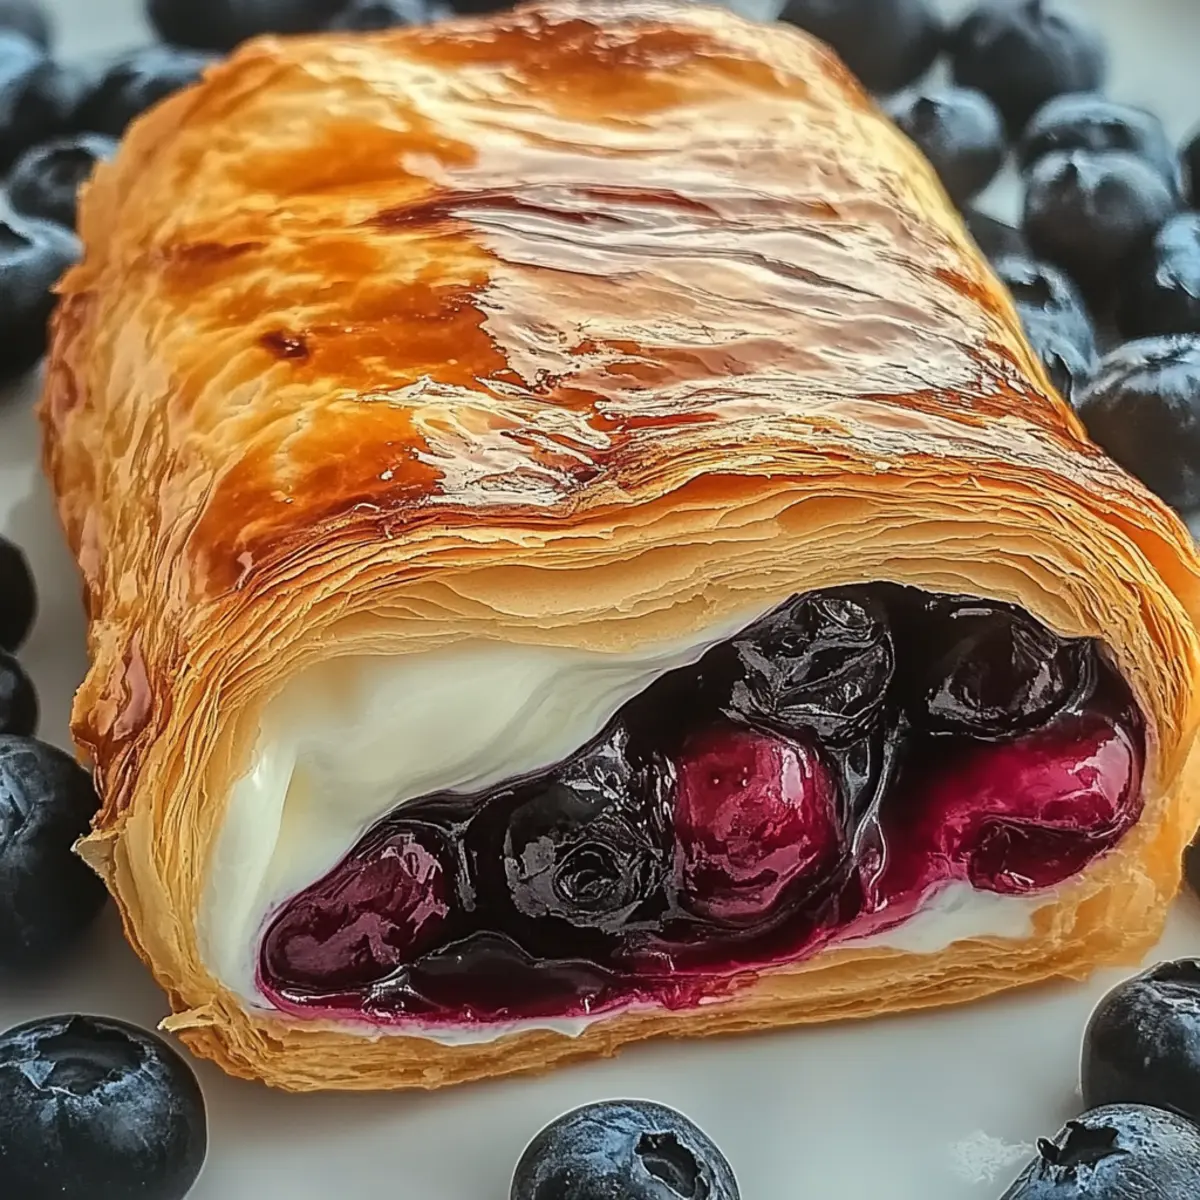
Customizable Delight: Whether you’re in the mood for blueberries, peaches, or a dash of cinnamon, you can easily personalize your danish to fit your taste preferences or seasonal ingredients.
Crowd Favorite: Perfect for brunch with friends or as an evening treat, this pastry is sure to impress and leave guests raving. Pair it with a warm beverage for a café-style experience at home!
Make Ahead Option: Want to save time? Prepare your danish ahead of time and freeze them! Just bake from frozen for an instant gourmet experience. This recipe is truly a game-changer in homemade desserts!
Cherry Cheese Danish Ingredients
• Discover the tasty components for a delightful treat!
For the Danish
- Puff Pastry – Delivers a flaky, textured base; store-bought saves time.
- Cream Cheese (8 oz) – Provides richness and creaminess; can be replaced with mascarpone or ricotta.
- Granulated Sugar (½ cup) – Sweetens the filling to balance the tart cherries.
- Vanilla Extract (1 tsp) – Adds depth to the flavor; essential for a well-rounded taste.
- Cherry Pie Filling (1 can) – Offers vibrant sweetness; consider homemade for freshness or use canned for convenience.
- Egg (1 large) – For egg wash, ensuring a golden-brown finish; substitute with milk if avoiding eggs.
Optional Toppings
- Powdered Sugar – Dust for an elegant finish; adds a touch of sweetness without overpowering the dessert.
- Chocolate Drizzle – For a decadent flair; pairs beautifully with the cream cheese filling.
This array of ingredients will help you create a delicious Cherry Cheese Danish, easily adjustable for your tastes!
Step‑by‑Step Instructions for Cherry Cheese Danish
Step 1: Preheat the Oven
Begin by preheating your oven to 375°F (190°C), positioning the oven rack in the center. This step is essential to ensure the Cherry Cheese Danish bakes evenly, achieving a delightful golden exterior. As the oven warms up, gather the necessary baking equipment, such as a lined baking sheet, and prepare your ingredients for a smooth workflow.
Step 2: Prepare Puff Pastry
On a floured surface, roll out your thawed puff pastry. Carefully cut the pastry into four 4x4-inch squares, ensuring each piece is uniform for even baking. If the pastry feels sticky, lightly dust it with flour to avoid tearing. This flaky base will cradle your creamy filling and cherries, contributing to the Cherry Cheese Danish's wonderful texture.
Step 3: Make Cream Cheese Filling
In a mixing bowl, combine softened cream cheese, granulated sugar, and vanilla extract. Beat the mixture with an electric mixer for 2-3 minutes until it’s smooth and creamy, with no lumps remaining. The filling should be luscious and airy, perfect for imparting a rich flavor to your Cherry Cheese Danish.
Step 4: Assemble Danishes
Take each puff pastry square and place a generous dollop of the cream cheese filling in the center, followed by a spoonful of cherry pie filling. Carefully fold over the corners of each square and pinch them together to seal, creating an enclosed pocket. This step ensures that the filling stays nestled inside during baking, resulting in a delightful treat.
Step 5: Apply Egg Wash
Whisk the large egg in a small bowl and use a pastry brush to gently apply the egg wash over the tops of the assembled Danishes. This step is crucial for achieving a beautifully golden-brown finish after baking. The egg wash will give your Cherry Cheese Danish a shiny and appetizing look, making them irresistible.
Step 6: Bake
Arrange the assembled danishes on the prepared baking sheet, ensuring they have space to puff up as they bake. Place the sheet into the preheated oven and bake for 20-25 minutes. Keep an eye on them as they near the end of the baking time; they should emerge puffed and golden brown, filling your kitchen with an enticing aroma.
Step 7: Cool and Serve
Once done, remove the Cherry Cheese Danishes from the oven and let them cool on a wire rack for about 5 minutes. This will allow the filling to set slightly. They are best enjoyed warm, so serve them alongside a hot cup of coffee or tea for a delightful treat.
How to Store and Freeze Cherry Cheese Danish
Room Temperature: Store leftover Cherry Cheese Danishes at room temperature in an airtight container for up to 2 days for the best taste and texture.
Fridge: To keep them fresh longer, refrigerate the Danishes in an airtight container for up to 5 days; just note that they may lose some flakiness.
Freezer: For longer storage, freeze unbaked, assembled Danishes tightly wrapped in plastic wrap for up to 2 months. Bake straight from frozen, adjusting the baking time as needed.
Reheating: Reheat any leftover baked Cherry Cheese Danishes in the oven at 350°F (175°C) for 10-12 minutes to regain that lovely crispiness. Enjoy!
What to Serve with Easy Cherry Cheese Danish
Warm Cherry Cheese Danish is just the beginning of a delightful breakfast or brunch experience, inviting you to explore wonderful pairings that elevate your meal.
-
Fresh Fruit Salad: A mix of seasonal berries and citrus adds brightness and refreshing contrast to the rich Danish. The balance of flavors enhances the sweet cherry topping.
-
Lightly Whipped Cream: A dollop of freshly whipped cream provides a velvety richness to complement the cream cheese filling. Add a hint of vanilla for a delectable touch.
-
Espresso or Coffee: The bold, robust flavors of a freshly brewed espresso or coffee bring a comforting warmth that pairs beautifully with the sweetness of the Danish. Perfect for a cozy morning.
-
Herbal Tea: Choose a calming herbal tea, like chamomile or mint, to cleanse the palate while adding an aromatic dimension to the meal, enhancing the flavors of the pastry.
-
Vanilla Ice Cream: If you’re serving these Danishes as a dessert, a scoop of smooth vanilla ice cream turns it into an indulgent treat. The creaminess melds perfectly with each flaky bite.
-
Nutty Granola: A sprinkle of granola adds a satisfying crunch, bringing a delightful textural contrast to the soft pastry and rich filling. Serve it on the side for a balanced breakfast option.
-
Savory Scrambled Eggs: The fluffy, buttery eggs introduce a savory element that perfectly offsets the sweetness of the cherry Danish, making it a well-rounded plate for a brunch gathering.
-
Chilled Milk: Enhance your homemade goodness with a glass of cold milk. Its creaminess and refreshing nature make an excellent counterpoint to the pastry's warm, flaky layers.
Explore these delightful options, and create a charming meal experience that turns any occasion into a cherished memory.
Cherry Cheese Danish Variations
Delight in the flexibility of creating your own unique twist on this beloved Cherry Cheese Danish recipe!
- Blueberry Twist: Substitute cherry filling for blueberry pie filling for a fruity alternative that bursts with flavor.
- Peach Perfection: Use peach filling for a sunny variation that brings summer vibes to your brunch table.
- Cinnamon Spice: Add a teaspoon of cinnamon or nutmeg to the cream cheese filling for a cozy, warm flavor profile. The rich spices elevate the classic taste and create a comforting embrace in every bite.
- Dairy-Free Option: Replace cream cheese with cashew cream or silken tofu for a dairy-free delight. This allows everyone to enjoy the treat without compromise!
- Lemon Zest: Boost the flavor by adding a teaspoon of lemon zest to the filling for a refreshing citrus touch that contrasts beautifully with the sweet cherries.
- Chocolate Drizzle: Finish your Danishes with a drizzle of melted chocolate or chocolate chips for an indulgent flair that will satisfy any sweet tooth. Pair it with a warm cup of coffee for a truly decadent experience.
- Nutty Crunch: Sprinkle some chopped pecans or almonds on top before baking for added texture and flavor, enhancing each gooey bite with a satisfying crunch.
- Spicy Kick: Add a pinch of cayenne pepper to the cream cheese filling for a surprising kick that elevates the sweetness, balancing it perfectly for adventurous eaters.
By exploring these delightful variations, you'll discover endless ways to make your Cherry Cheese Danish truly your own!
Make Ahead Options
These Cherry Cheese Danishes are perfect for busy home cooks who want to enjoy a homemade treat without the last-minute rush! You can assemble the Danishes up to 24 hours in advance; simply prepare and seal them, then refrigerate until you’re ready to bake. For longer storage, wrap the unbaked Danishes tightly in plastic wrap and freeze for up to 2 months. When you’re ready to indulge, bake directly from frozen, adjusting the time as needed—just make sure they're puffed and golden brown. To maintain quality, avoid thawing; this will ensure they remain flaky and delicious, just like fresh from the oven. Enjoy this time-saving trick for those delightful Cherry Cheese Danishes any time!
Expert Tips for Cherry Cheese Danish
-
Thaw Properly: Ensure puff pastry is completely thawed before use to prevent tearing or damage during assembly.
-
Chill Dough: Chill the rolled-out puff pastry briefly before filling to maintain its flakiness and prevent it from becoming too soft.
-
Watch the Bake: Keep a close eye on the baking process, particularly towards the end, to avoid over-browning; perfect Danishes should be a light golden color.
-
Fill Generously: Be generous with the cream cheese filling and cherry pie filling, but avoid overfilling to prevent spills during baking.
-
Try Different Flavors: Don't hesitate to experiment with unique fruit fillings or flavor enhancements, creating your personalized Cherry Cheese Danish treats!
Cherry Cheese Danish Recipe FAQs
How do I choose ripe ingredients for my Cherry Cheese Danish?
Absolutely! When selecting cherries, look for those that are plump and firm, with a deep red color and a glossy appearance. Avoid any cherries with dark spots all over, as these indicate overripeness. For the cream cheese, ensure it's at room temperature for easy blending and a silky filling.
What is the best way to store leftover Cherry Cheese Danishes?
You can store leftover Cherry Cheese Danishes at room temperature for up to 2 days in an airtight container. If you want to keep them fresher for longer, refrigerate them for up to 5 days. Just keep in mind that the pastry may lose some flakiness in the fridge, so enjoy them soon!
Can I freeze Cherry Cheese Danishes? If so, how?
Yes, you can! It's one of my favorite tricks. Prepare the danishes but do not bake them. Wrap each assembled Danish tightly in plastic wrap and place them in a freezer-safe container. They can be frozen for up to 2 months. When you're ready to bake, simply take them out of the freezer, unwrap, and bake straight from frozen, adjusting the baking time to around 25-30 minutes.
What if my Danish pastries are not puffing up as expected?
Very! If your Cherry Cheese Danishes aren't puffing up as you’d like, it could be due to a few reasons. First, make sure the puff pastry was fully thawed and kept cold until ready to bake, as warm dough will not create the steam needed for puffing. Also, check your oven temperature; it's crucial to have it preheated to 375°F (190°C) before the pastries go in. Lastly, avoid over-filling the pastries, as this can inhibit their ability to puff.
Are there any dietary considerations for making Cherry Cheese Danishes?
Absolutely! If you’re catering to dietary needs, you can substitute cream cheese with non-dairy alternatives like cashew cream for a dairy-free option. Additionally, if any of your guests have egg allergies, feel free to use milk for the egg wash to help brown the pastries without the need for eggs. Always double-check the filling ingredients if allergens are a concern!
Indulgent Cherry Cheese Danish with Easy Variations to Love
Ingredients
Equipment
Method
- Preheat your oven to 375°F (190°C) and prepare a lined baking sheet.
- Roll out your thawed puff pastry on a floured surface and cut into four 4x4-inch squares.
- In a mixing bowl, combine softened cream cheese, granulated sugar, and vanilla extract. Beat until smooth.
- Place a dollop of cream cheese filling in the center of each square, followed by cherry pie filling, and seal the corners.
- Whisk the egg and brush the mixture over the tops of the assembled Danishes.
- Bake the Danishes for 20-25 minutes or until golden brown.
- Allow the Danishes to cool on a wire rack for about 5 minutes before serving.


Leave a Reply