
As the sweet aroma of baking cookies wafts through your home, you might find yourself transported back to carefree childhood days spent in the kitchen. With my easy-to-make Parent Trap Cookies, you can indulge in a nostalgic chocolate chip experience that requires just 27 minutes from start to finish. This cookie recipe is not only a quick fix for your sweet tooth, but also perfect for those busy weeknights when you want to impress loved ones without spending hours in the kitchen. Feel free to customize your batch with walnuts or swap in your favorite chocolate chips for a touch of fun! Curious about how to achieve that perfect gooey texture? Let’s dive into the delicious details!

Why Are These Cookies So Special?
Nostalgic Delight: With every bite, these Parent Trap Cookies evoke warm memories of childhood, making them a comforting treat for all ages.
Quick and Easy: You can whip these up in just 27 minutes, perfect for busy days when you crave something sweet without the fuss of a long baking session.
Customizable Treat: Whether you prefer classic chocolate chips, creamy white chocolate, or the crunch of walnuts, this recipe allows for your personal touch—the options are endless!
Crowd-Pleasing Experience: Serve them warm, paired with milk or coffee, to impress friends and family at your next gathering. They won’t be able to resist!
Tender Texture: Achieve the ultimate gooeyness by following simple tips, like chilling the dough—your taste buds are in for a treat!
Parent Trap Cookies Ingredients
For the Dough
• Unsalted Butter – Provides richness and moisture for a tender texture; can substitute with margarine, but flavor may vary.
• Granulated Sugar – Adds sweetness and helps with browning, enhancing that nostalgic flavor.
• Brown Sugar – Creates a chewy texture and adds moisture for deliciously soft cookies.
• Large Eggs – Binds ingredients and contributes to rise; for a vegan option, use flaxseed meal mixed with water.
• Vanilla Extract – Adds depth of flavor, making these Parent Trap Cookies irresistibly delectable.
• All-Purpose Flour – Gives structure to your cookies, ensuring they hold together beautifully.
• Baking Soda – Acts as a leavening agent to help your cookies spread and rise perfectly.
• Salt – Balances sweetness and enhances overall flavor.
For the Mix-Ins
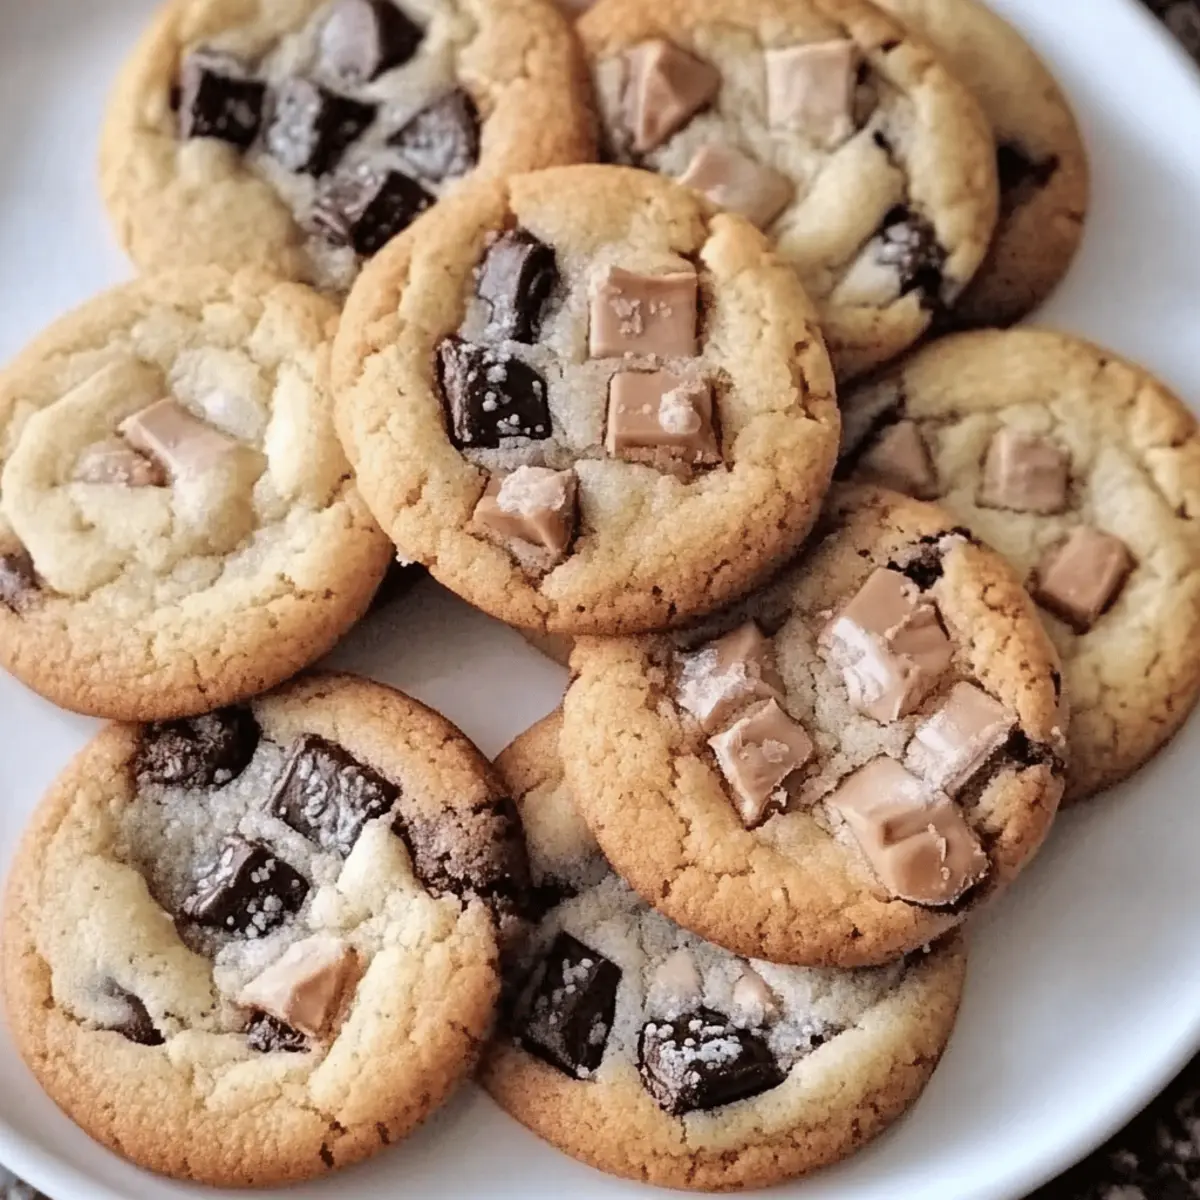
• Semi-Sweet Chocolate Chips – These creamy morsels create pockets of gooey chocolate bliss in every bite.
• Chopped Walnuts (optional) – Adds a delightful crunch and nutty flavor; omit for nut-free cookies or swap with chocolate-covered toffee bits.
Now that you have the ingredients, you’re just a few steps away from baking these delightful cookies filled with warmth and nostalgia!
Step‑by‑Step Instructions for Parent Trap Cookies
Step 1: Preheat and Prepare
Begin by preheating your oven to 350°F (175°C) while you line two baking sheets with parchment paper. This will ensure a non-stick surface for your cookies and prevent them from spreading too much. Having your baking sheets ready will keep the flow of your baking process smooth and efficient.
Step 2: Cream the Butter and Sugars
In a large mixing bowl, cream together 1 cup of unsalted butter, ½ cup of granulated sugar, and ¾ cup of brown sugar using a hand mixer or stand mixer on medium speed. Beat until the mixture is light and fluffy, typically around 2-3 minutes. This step adds air to the dough, resulting in a tender texture for your Parent Trap Cookies.
Step 3: Add Eggs and Vanilla
Next, add in 2 large eggs, one at a time, mixing well after each addition to ensure they are fully combined. Then, stir in 1 teaspoon of vanilla extract. This should take about a minute. The eggs help bind the ingredients together, creating a harmonious mixture that will produce soft and chewy cookies.
Step 4: Mix Dry Ingredients
In a separate bowl, whisk together 2 ¾ cups of all-purpose flour, 1 teaspoon of baking soda, and ½ teaspoon of salt. Gradually add this dry mixture to the wet ingredients, using a spatula or wooden spoon to combine until just incorporated. Take care not to overmix, as this can lead to tougher cookies rather than the soft and chewy Parent Trap Cookies you're aiming for.
Step 5: Fold in Chocolate and Nuts
Gently fold in 2 cups of semi-sweet chocolate chips and 1 cup of chopped walnuts, if desired. Be careful to incorporate them without overworking the dough, as that will affect the texture. The chocolate chips will melt beautifully while baking, creating those delightful, gooey pockets that make these cookies irresistible.
Step 6: Scoop and Shape Dough
Using a cookie scoop or a tablespoon, drop rounded portions of dough onto the prepared baking sheets, spacing them about 2 inches apart. This allows room for the cookies to spread while baking. You should end up with around 24 cookies, giving you that perfect batch of Parent Trap Cookies to share with family and friends.
Step 7: Bake to Perfection
Place the baking sheets in the preheated oven and bake for 10-12 minutes, or until the edges are golden brown but the centers still look slightly soft. Keep an eye on them, as every oven varies. When baking is finished, the aroma of chocolate will fill your kitchen, creating anticipation for the delightful treats to come.
Step 8: Cool and Enjoy
Once baked, remove the cookies from the oven and let them cool on the baking sheets for about 5 minutes. Afterward, gently transfer them to a wire rack to cool completely. This step allows the cookies to firm up while maintaining that soft, melt-in-your-mouth center, perfect for enjoying as homemade Parent Trap Cookies!

Parent Trap Cookies Variations
Feel free to unleash your creativity and make this cookie recipe uniquely yours!
-
Nut-Free: Simply omit the walnuts for a safe and tasty cookie option.
-
Chocolate Swap: Replace semi-sweet chocolate chips with white chocolate or butterscotch chips for a sweeter twist.
-
Peanut Butter Lovers: Add ½ cup of peanut butter chips to the mix for a creamy, nutty flavor that pairs beautifully with chocolate.
-
Small Cookies: Use a teaspoon to scoop out smaller dough portions for bite-sized cookies that are perfect for sharing.
-
Oatmeal Twist: Mix in 1 cup of rolled oats for added texture and a hearty feel. Oatmeal offers a chewy delight that complements the chocolate beautifully.
-
Spice it Up: Incorporate a sprinkle of cinnamon or nutmeg to add warmth and depth to your cookies; this is perfect for cozy gatherings!
-
Double Chocolate: For chocolate enthusiasts, substitute half of the flour with cocoa powder and add the chocolate chips for an extra chocolatey experience.
-
Add Some Heat: If you're feeling adventurous, try adding a pinch of cayenne pepper or chili powder for a surprising kick. The warmth can create an unexpected but delightful contrast with the sweetness!
Exploring these variations will enhance your cookie baking experience, and who knows, you might discover a new favorite! If you're looking for more inspiration, check out our suggestions for crowd-pleasing experiences or tips on achieving that perfect tender texture!
Expert Tips for Parent Trap Cookies
-
Chill the Dough: Let your dough chill for at least 30 minutes before baking to achieve thicker, softer cookies that won’t spread too much.
-
Don’t Overmix: Mix your dry ingredients just until combined with the wet ingredients to maintain a tender texture in your Parent Trap Cookies.
-
Use Room Temperature Eggs: Eggs at room temperature blend better into the mix, ensuring even distribution and a lighter, fluffier cookie.
-
Watch the Baking Time: Keep an eye on your cookies while they bake! Remove them when the edges are golden but the centers are still soft for that perfect chewy texture.
-
Customize Wisely: Feel free to experiment with different kinds of chocolate chips or nuts, but remember to maintain the right balance to keep the cookies deliciously gooey.
Storage Tips for Parent Trap Cookies
-
Room Temperature: Store your baked Parent Trap Cookies in an airtight container at room temperature for up to 1 week to maintain their soft and chewy texture.
-
Freezer: If you want to keep them longer, freeze the baked cookies by placing them in a single layer in a freezer-safe container, separated by parchment paper. They can stay fresh for up to 3 months.
-
Cookie Dough: For even quicker access to fresh cookies, freeze the unbaked dough portions in a single layer on a baking sheet, then transfer them to a freezer bag. They can be baked directly from frozen, adding a couple of extra minutes to the baking time.
-
Reheating: To enjoy a warm treat, simply reheat the cookies in the microwave for about 10-15 seconds or in a preheated oven at 300°F (150°C) for 5 minutes, restoring that gooey goodness!
Make Ahead Options
These Parent Trap Cookies are perfect for meal prep enthusiasts! You can prepare the cookie dough up to 24 hours in advance by mixing the ingredients as usual and then covering it tightly with plastic wrap or placing it in an airtight container to prevent drying out. If you want to prep even further in advance, you can scoop the dough onto baking sheets, flash freeze them for about an hour, and then transfer the dough balls to a freezer-safe bag for up to 3 months. When you're ready to bake, just place the frozen dough on a baking sheet and bake as directed, adding an extra minute or two to the baking time. Your cookies will be just as delicious and fresh, saving you time while allowing you to enjoy a warm, nostalgic treat in no time!
What to Serve with Parent Trap Cookies
As you whip up a batch of these nostalgic delights, consider adding a few perfect companions to elevate your cookie experience!
-
Ice Cream Sundae: Top your warm cookies with a scoop of vanilla ice cream and a drizzle of chocolate sauce for a decadent treat. The cold ice cream perfectly contrasts the gooey, warm cookies.
-
Fresh Berries: A burst of tartness from blueberries or strawberries complements the richness of the cookies, offering a refreshing balance that's lovely for your taste buds.
-
Milk: Serve your cookies with a chilled glass of milk to toast childhood memories, as nothing pairs better with chocolate than a creamy sip!
-
Decadent Coffee: Enjoy your cookies alongside a rich, aromatic cup of coffee or espresso, enhancing those chocolatey flavors while adding warmth to your cozy experience.
-
Nutty Granola: A side of nutty granola sprinkled over yogurt can add crunch and a healthy zest, creating a wonderful interplay of textures to enjoy with your cookies.
-
Chocolate Dipping Sauce: Drizzle some melted chocolate on top of your cookies for an indulgent touch that elevates each sweet bite to pure bliss.
-
Creamy Hot Chocolate: For a truly nostalgic pairing, a steaming cup of hot chocolate topped with whipped cream brings back childhood warmth and joy, perfectly accompanying your Parent Trap Cookies.
By pairing these delightful options with your Parent Trap Cookies, you can create a memorable experience that turns your treat into a fun full meal!
Parent Trap Cookies Recipe FAQs
How do I choose ripe ingredients for the cookies?
Absolutely! When selecting your ingredients, ensure that the unsalted butter is at room temperature for easy creaming. The eggs should also be room temperature, which helps the batter come together smoothly. For the best chocolate experience, choose high-quality semi-sweet chocolate chips. If you’re opting for nuts, make sure they’re fresh and free from dark spots or signs of rancidity.
What’s the best way to store my Parent Trap Cookies?
Very! To keep your baked Parent Trap Cookies fresh, store them in an airtight container at room temperature for up to 1 week. To maintain their delightful chewiness, layer them with parchment paper if stacking. If you have leftover dough, you can freeze it by placing the portions on a baking sheet, letting them freeze, then transferring to a freezer bag for up to 3 months.
Can I freeze the cookie dough?
Absolutely! Freezing your Parent Trap Cookies dough is easy and a real time-saver. After scooping the dough into rounded portions, place them on a baking sheet lined with parchment paper and freeze until firm. Then, transfer the dough balls to a freezer-safe bag, and they can last for up to 3 months. When you're ready to bake, place them directly in the oven from frozen; just add a couple of extra minutes to the baking time for gooey perfection!
What if my cookies come out flat?
This can happen sometimes! If your cookies spread too much, it might be due to melted butter or overmixing the dough. Make sure to cream the butter until it's light and fluffy, and avoid overmixing once the dry ingredients are added. Also, chilling the dough for at least 30 minutes before baking helps maintain shape and yields the perfect gooey texture!
Are there any dietary considerations for these cookies?
Definitely! If you're making these cookies for someone with allergies, remember that you can easily omit the walnuts for a nut-free version. For a vegan alternative, substitute the eggs with 1 tablespoon of flaxseed meal mixed with 2.5 tablespoons of water per egg. Ensure that your chocolate chips are dairy-free if necessary, and enjoy the delightful nostalgia without worry!
How do I achieve the perfect gooey texture?
Great question! To get that melt-in-your-mouth consistency, ensure you bake the cookies just until the edges are golden but the centers are still slightly soft—around 10-12 minutes at 350°F (175°C). After removing them from the oven, let them sit on the baking sheet for about 5 minutes before transferring to wire racks. This way, they continue to cook slightly while cooling without losing their gooey centers!

Indulge in Parent Trap Cookies: Easy Chocolate Chip Bliss
Ingredients
Equipment
Method
- Preheat your oven to 350°F (175°C) and line two baking sheets with parchment paper.
- Cream together 1 cup of unsalted butter, ½ cup of granulated sugar, and ¾ cup of brown sugar until light and fluffy.
- Add in 2 large eggs one at a time, mixing well, then stir in 1 teaspoon of vanilla extract.
- Whisk together 2 ¾ cups of all-purpose flour, 1 teaspoon of baking soda, and ½ teaspoon of salt in a separate bowl.
- Gradually add the dry mixture to the wet ingredients, combining until just incorporated.
- Fold in 2 cups of semi-sweet chocolate chips and 1 cup of chopped walnuts.
- Drop rounded portions of dough onto the prepared sheets, spacing about 2 inches apart.
- Bake for 10-12 minutes until edges are golden brown but centers are slightly soft.
- Let cool for 5 minutes before transferring to a wire rack to cool completely.


Leave a Reply