
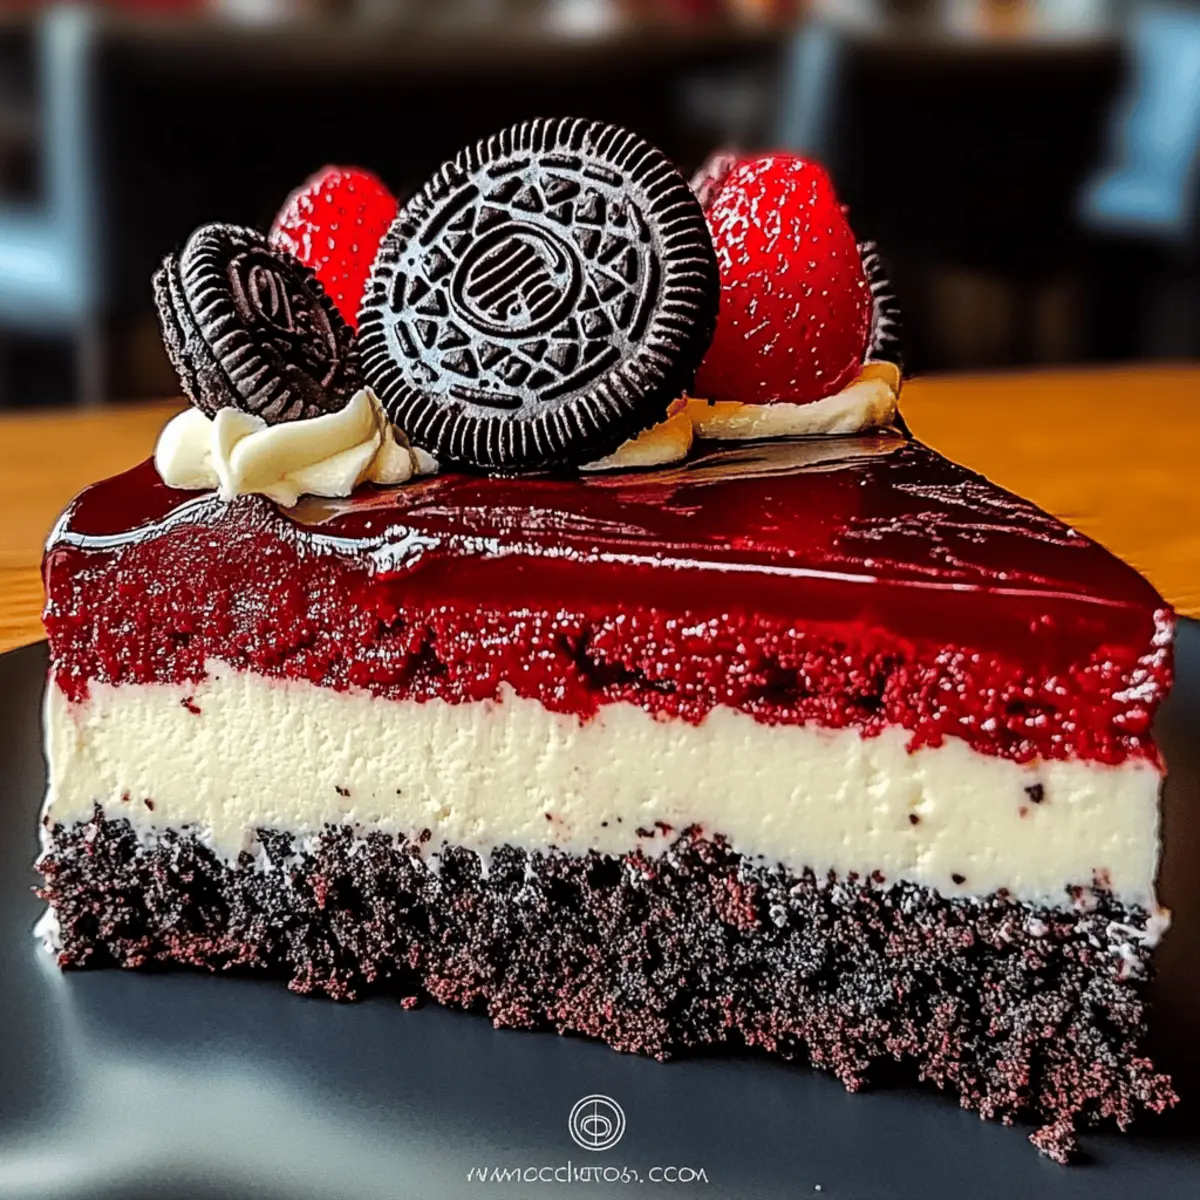
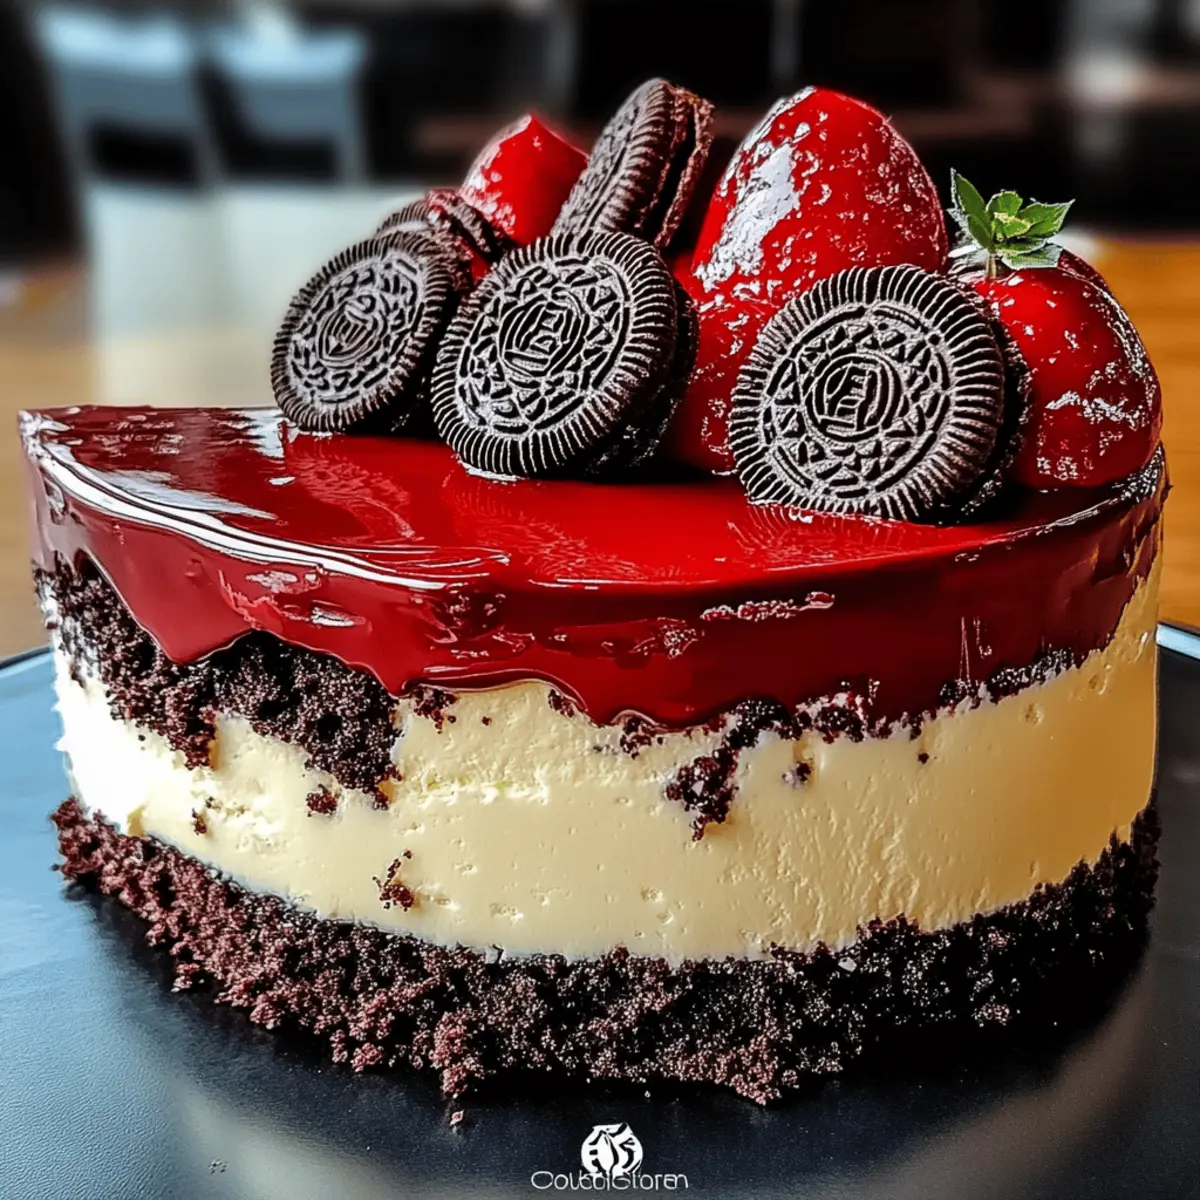
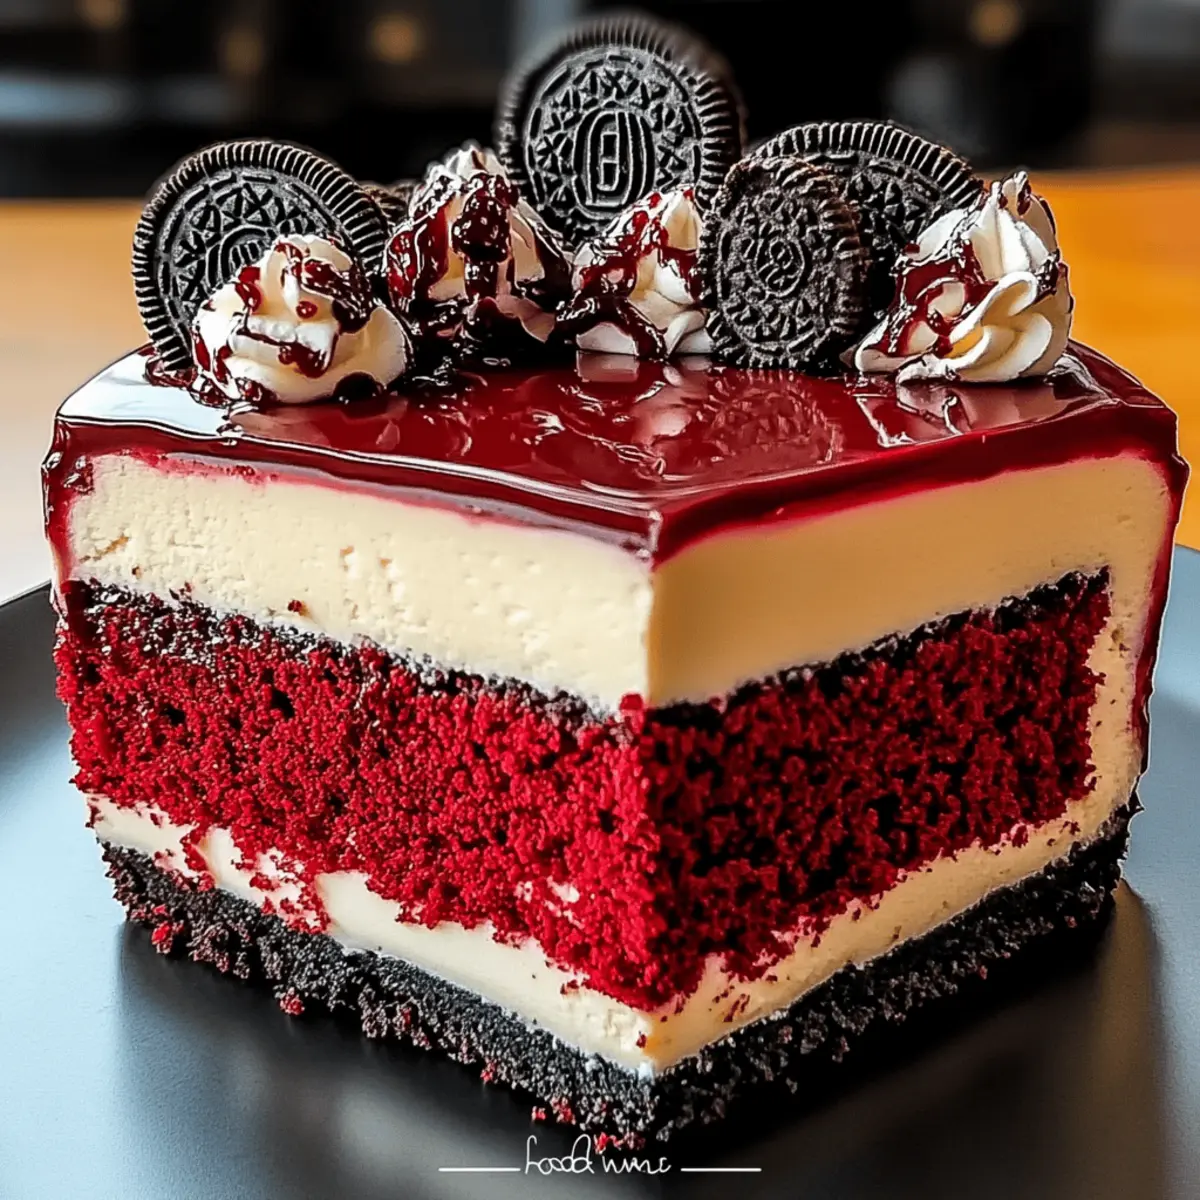
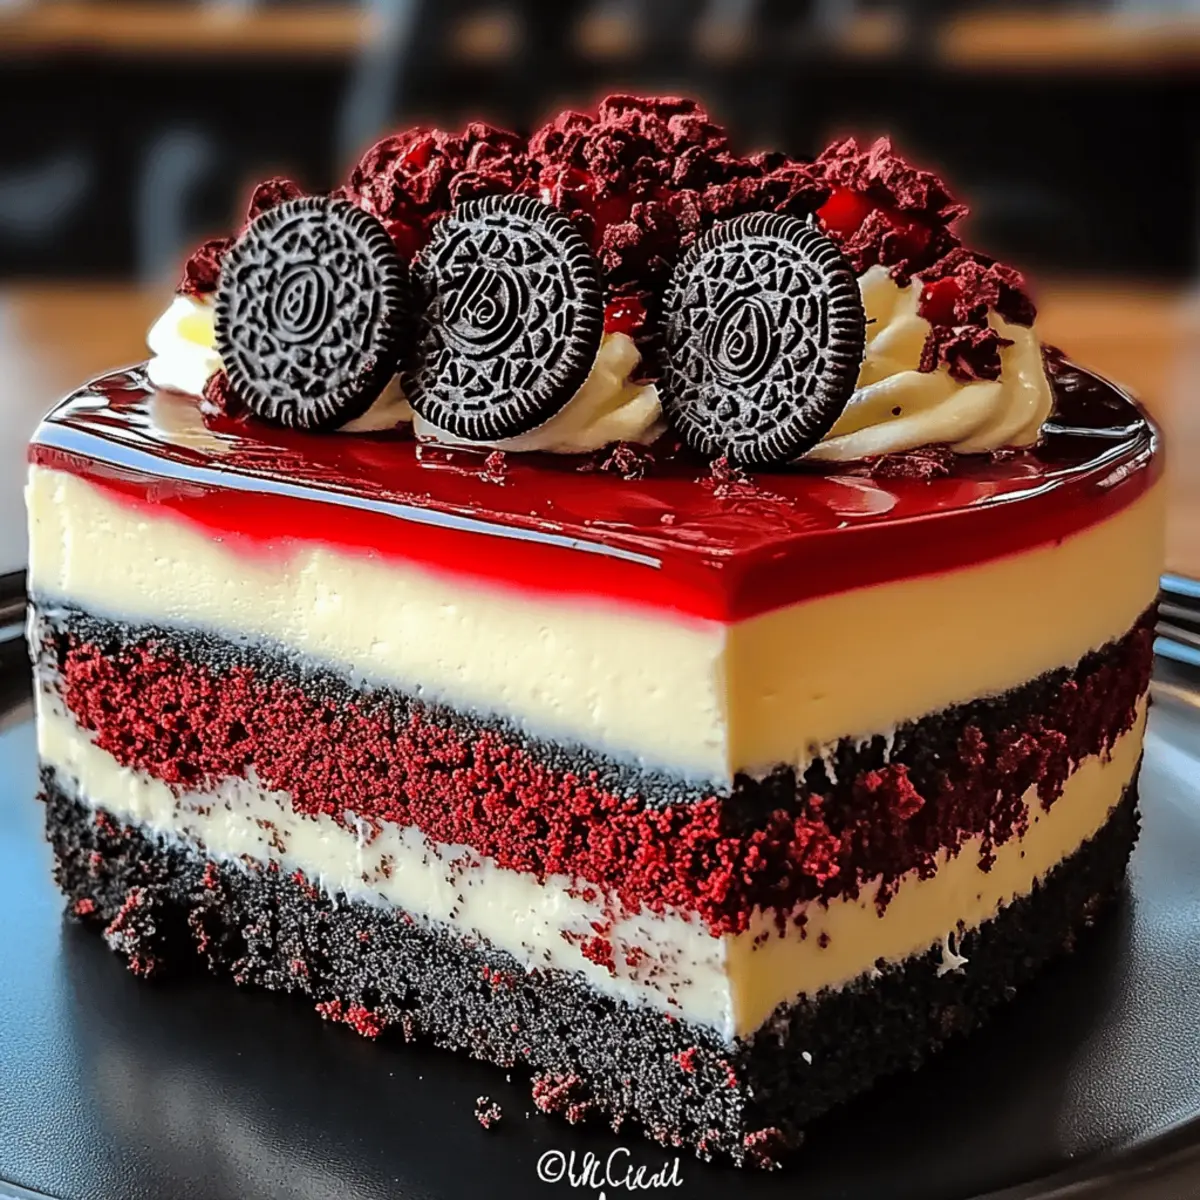
As I rummaged through my kitchen cupboards last weekend, I stumbled upon a forgotten box of red velvet cake mix. Suddenly, inspiration hit! I envisioned a dessert that would not only be a feast for the eyes but also a symphony of flavors: a Red Velvet Oreo Cheesecake. This indulgent dessert is a perfect answer for anyone craving a quick, elegant treat that impresses at gatherings or feels like a luxurious reward after a long day. With its luscious layers of velvety goodness complemented by a crunchy Oreo crust, it's a delightful combination you don’t want to miss. Curious about how to create this showstopper that’s guaranteed to become a crowd-pleaser? Let’s dive into this heavenly recipe!
Why is this cheesecake a must-try?
Simplicity: Preparing this Red Velvet Oreo Cheesecake is a breeze, making it perfect for both novice and experienced bakers.
Rich Flavors: The combination of creamy cheesecake, chocolatey Oreos, and the unique taste of red velvet creates a flavor explosion that will tantalize your taste buds.
Versatile Options: Feel free to mix things up! Swap Oreos for your favorite cookie or add a zesty twist with citrus zest for a refreshing spin.
Stunning Presentation: Elegant in appearance, this cheesecake is sure to become the centerpiece of any dessert table.
Crowd-Pleasing: Ideal for parties, potlucks, or simply a sweet escape, this decadent treat is sure to impress anyone who takes a bite. Don’t forget to check out our tips on serving suggestions to elevate your dessert!
Red Velvet Oreo Cheesecake Ingredients
Ready to create a delightful masterpiece? Here are the essential ingredients you’ll need!
For the Crust
- Oreo Cookies – Provides a crunchy, chocolatey base. You can substitute with chocolate graham crackers for a different flavor profile.
- Unsalted Butter – Binds the cookie crumbs together; use melted for easy mixing.
For the Cheesecake Layer
- Cream Cheese – Establishes the cheesecake's creamy texture; full-fat is recommended for the best richness.
- Granulated Sugar – Adds the perfect sweetness to the cheesecake layers; feel free to adjust to your taste.
- Eggs – Provides structure and sets the cheesecake; ensure they're at room temperature for the best texture.
- Red Velvet Cake Mix – Infuses flavor and color; you can also replace it with a homemade red velvet batter for freshness.
- Vanilla Extract – Enhances the cheesecake's flavor; using fresh or vanilla bean paste can create a more intense flavor profile.
For the Ganache
- Heavy Cream – Creates a silky ganache that adds a delicious finish; coconut cream can be a great dairy-free alternative.
- Dark Chocolate – Delivers a rich ganache flavor; choose milk chocolate for a sweeter version.
Gather these ingredients, and you’ll be well on your way to whipping up a delightful Red Velvet Oreo Cheesecake that will leave everyone enchanted!
Step‑by‑Step Instructions for Red Velvet Oreo Cheesecake
Step 1: Prepare the Crust
Preheat your oven to 350°F (175°C). In a food processor, blend the Oreo cookies into fine crumbs, then transfer to a mixing bowl. Stir in the melted unsalted butter until well combined. Press the mixture firmly into the bottom of a 9-inch springform pan to form a solid crust. Bake for 10 minutes until set, then let it cool.
Step 2: Make Red Velvet Layer
In a large mixing bowl, beat the cream cheese and granulated sugar together until smooth and creamy. Add the eggs one at a time, mixing well after each addition. Gradually whisk in the red velvet cake mix and vanilla extract, ensuring there are no lumps. The mixture should be velvety and vibrant, ready to enhance your Red Velvet Oreo Cheesecake.
Step 3: Prepare Vanilla Layer
In a separate bowl, beat the cream cheese again until soft, then add granulated sugar and vanilla extract. Blend this mixture until creamy, ensuring it’s smooth. This layer will contrast beautifully with the red velvet and add a delightful flavor to your gorgeous Red Velvet Oreo Cheesecake.
Step 4: Layer and Bake
Pour the prepared red velvet mixture over the cooled Oreo crust, spreading it evenly. Gently spoon the vanilla layer on top of the red velvet, smoothing the surface. Bake the cheesecake in the preheated oven for 45-50 minutes until the edges are set but the center jiggles slightly. The contrasting layers will create a stunning visual!
Step 5: Cool
Once baked, turn off the oven and leave the cheesecake inside for 1 hour to cool gradually. This will help prevent cracks. Afterward, let the cheesecake cool to room temperature before refrigerating for at least 6 hours or overnight, allowing the flavors to meld beautifully in your Red Velvet Oreo Cheesecake.
Step 6: Prepare Ganache
In a saucepan, heat the heavy cream until it simmers, then remove it from heat. Pour the hot cream over chopped dark chocolate in a bowl and let it sit for a minute. Stir until smooth and creamy, then let it cool slightly. This rich ganache will elegantly finish your gorgeous dessert.
Step 7: Decorate
Carefully remove the cheesecake from the springform pan. Drizzle the cooled ganache over the top, allowing it to cascade down the sides. Optionally, garnish with whipped cream or crushed Oreos for an extra touch. Slice and serve your beautiful Red Velvet Oreo Cheesecake to impress everyone!
Expert Tips for the Best Red Velvet Oreo Cheesecake
-
Room Temperature Ingredients: Ensure all dairy ingredients, including cream cheese and eggs, are at room temperature for a smooth batter and to achieve that perfect texture in your Red Velvet Oreo Cheesecake.
-
Avoid Cracks: Keep the oven door closed during baking. Sudden temperature fluctuations can lead to cracks, so patience is key for this indulgent dessert!
-
Chill Overnight: For the best flavor development and texture, refrigerate your cheesecake overnight. This will make every bite taste sensational and melt in your mouth.
-
Layer with Care: When adding the vanilla layer, make sure to spoon it gently over the red velvet layer. This helps maintain the stunning visual contrast that makes your cheesecake a showstopper.
-
Make-Ahead Advantage: You can prepare this cheesecake up to 24 hours in advance. This not only saves you time but allows the flavors to meld beautifully, making it an ideal dessert for gatherings.
Storage Tips for Red Velvet Oreo Cheesecake
Fridge: Store leftovers in an airtight container in the refrigerator for up to 5 days, ensuring the creamy layers maintain their delightful texture.
Freezer: For longer storage, freeze slices tightly wrapped in plastic wrap and aluminum foil for up to 3 months. This way, you can savor the indulgent Red Velvet Oreo Cheesecake anytime!
Thawing: To enjoy frozen cheesecake, thaw it in the fridge overnight to preserve its rich flavors and creamy consistency, making every bite just as heavenly as the first.
Reheating: If you prefer to warm it up slightly, place a slice in the microwave for 10-15 seconds; just enough to take the chill off without melting!
Make Ahead Options
Preparing the Red Velvet Oreo Cheesecake ahead of time is a fantastic way to save time and ensure a stress-free dessert experience! You can assemble the cheesecake (steps 1-4) up to 24 hours in advance—just be sure to refrigerate it immediately after cooling to maintain its rich flavors and creamy texture. For a quicker finish, prepare the ganache (step 6) and store it in the fridge; simply reheat slightly before drizzling over the cheesecake when you're ready to serve. This make-ahead approach not only enhances the flavors, making the cheesecake just as delicious, but it also allows you to impress your guests with minimal last-minute effort!
What to Serve with Red Velvet Oreo Cheesecake
Elevate your dessert experience by pairing this delightful cheesecake with surprising accompaniments that enhance its flavors.
- Fresh Berries: Juicy strawberries or raspberries add a refreshing burst of color and tartness that cuts through the cheesecake’s richness.
- Vanilla Ice Cream: A scoop of creamy vanilla ice cream offers a classic contrast that melts beautifully against the velvety texture of the cheesecake.
- Chocolate-Covered Strawberries: These decadent treats amplify the chocolatey notes of the Oreo crust while providing a gorgeous visual presentation.
- Whipped Cream: Light and fluffy, a dollop of whipped cream brings a luxurious touch, making each bite even more indulgent.
- Mint Leaves: Garnishing with fresh mint not only adds a pop of color but also a hint of aromatic freshness that brightens the palate.
For a truly memorable dessert experience, consider a drizzle of rich raspberry sauce alongside your slices. The sweet and tangy flavors will beautifully complement the creamy layers, creating a symphony of tastes that's hard to resist!
Red Velvet Oreo Cheesecake Variations
Feel free to let your creativity shine as you customize this delectable cheesecake recipe!
-
Alternative Cookies: Swap Oreos for chocolate graham crackers or even ginger snaps for a unique flavor twist. Each cookie adds its own delightful character!
-
Zesty Infusion: Incorporate grated lemon or orange zest into the cheesecake batter to elevate it with a refreshing citrusy brightness. It’s a delightful contrast that will surprise your taste buds!
-
No-Bake Option: For a lighter version, whip the cream cheese and fold in whipped cream, skipping the baking step. Perfect for warm days when you crave something sweet without the fuss.
-
Nutty Crust: Crushed nuts mixed with your cookie crust can add lovely crunch and flavor. Pecans or walnuts work beautifully, making each slice even more enticing.
-
Chocolate Cheesecake Layer: Replace half the cream cheese in the vanilla layer with melted chocolate or cocoa powder for a rich chocolate twist! It lends a delightful depth to the cheesecake.
-
Fruity Finish: Top your cheesecake with fresh berries or a berry compote. The tartness of berries beautifully balances the creamy richness of the cheesecake.
-
Spicy Kick: For heat lovers, add a pinch of cayenne pepper to the cheesecake batter for an unexpected kick! Just a tad will create a warm and intriguing layer of flavor.
-
Swirls of Delight: Create marble swirls by swirling the vanilla layer into the red velvet layer before baking. This not only looks stunning but adds an exciting visual element to each slice!
Experiment and embrace the joy of customization in your delightful Red Velvet Oreo Cheesecake adventure! And don’t forget to explore our tips on serving suggestions for that perfect presentation.
Red Velvet Oreo Cheesecake Recipe FAQs
How do I choose the right red velvet cake mix?
Absolutely! When selecting your red velvet cake mix, look for one that has no artificial colors or flavors for the best taste. A mix that contains cocoa powder and buttermilk will enhance the richness and flavor. If you're feeling adventurous, trying a homemade red velvet recipe can take your cheesecake to the next level!
What’s the best way to store leftovers?
Very! To keep your Red Velvet Oreo Cheesecake fresh, store leftovers in an airtight container in the refrigerator for up to 5 days. If you'd like to store it longer, tightly wrap individual slices in plastic wrap and aluminum foil before freezing them. This ensures you can enjoy this indulgent dessert later while maintaining its delightful texture and flavor.
Can I freeze the Red Velvet Oreo Cheesecake?
Absolutely! You can freeze your Red Velvet Oreo Cheesecake by slicing it first, then wrapping each slice in plastic wrap followed by aluminum foil. Store the wrapped slices in the freezer for up to 3 months. When you're ready to enjoy, simply thaw them in the refrigerator overnight. This method preserves the cheesecake's creamy quality while enabling you to indulge whenever you crave a sweet escape!
What if my cheesecake cracks during baking?
Very! If you notice cracks, it’s usually due to temperature changes. To minimize this risk, avoid opening the oven door during baking, as the sudden change in temperature can shock the cheesecake. Also, cooling the cheesecake gradually in the oven after baking helps. If cracks do occur, consider covering them with ganache or whipped cream as a delicious disguise!
Are there dietary considerations with this recipe?
Indeed! If you have dietary restrictions, feel free to substitute ingredients: use low-fat cream cheese to cut some calories or opt for dairy-free cream cheese for a vegan twist. For gluten-free options, ensure you choose gluten-free cookie alternatives for the crust. Enjoying dessert can be inclusive!
What type of cookies can I use for the crust?
The more the merrier! Although Oreos give the best flavor, feel free to experiment with chocolate graham crackers, or even flavored cookies like mint or peanut butter varieties for a creative spin. Just make sure they are finely crushed for a crust that holds together nicely!
Indulgent Red Velvet Oreo Cheesecake for a Sweet Escape
Ingredients
Equipment
Method
- Preheat your oven to 350°F (175°C). Blend the Oreo cookies into fine crumbs in a food processor, transfer to a bowl, and mix with melted butter. Press into a 9-inch springform pan to form a crust. Bake for 10 minutes and let cool.
- In a large mixing bowl, beat cream cheese and granulated sugar until smooth. Add eggs one at a time, mixing well. Gradually whisk in red velvet cake mix and vanilla extract until velvety.
- Beat cream cheese with sugar and vanilla extract until creamy for the vanilla layer.
- Spread the red velvet mixture over the cooled crust and add the vanilla layer on top. Bake for 45-50 minutes until edges are set and center jiggles slightly. Let cool in the oven for 1 hour.
- Cool the cheesecake to room temperature, then refrigerate for at least 6 hours or overnight.
- Heat heavy cream until simmering. Pour over chopped dark chocolate and stir until smooth. Let cool slightly.
- Remove cheesecake from the pan, drizzle ganache over the top, and optionally garnish with whipped cream or crushed Oreos. Slice and serve.


Leave a Reply