
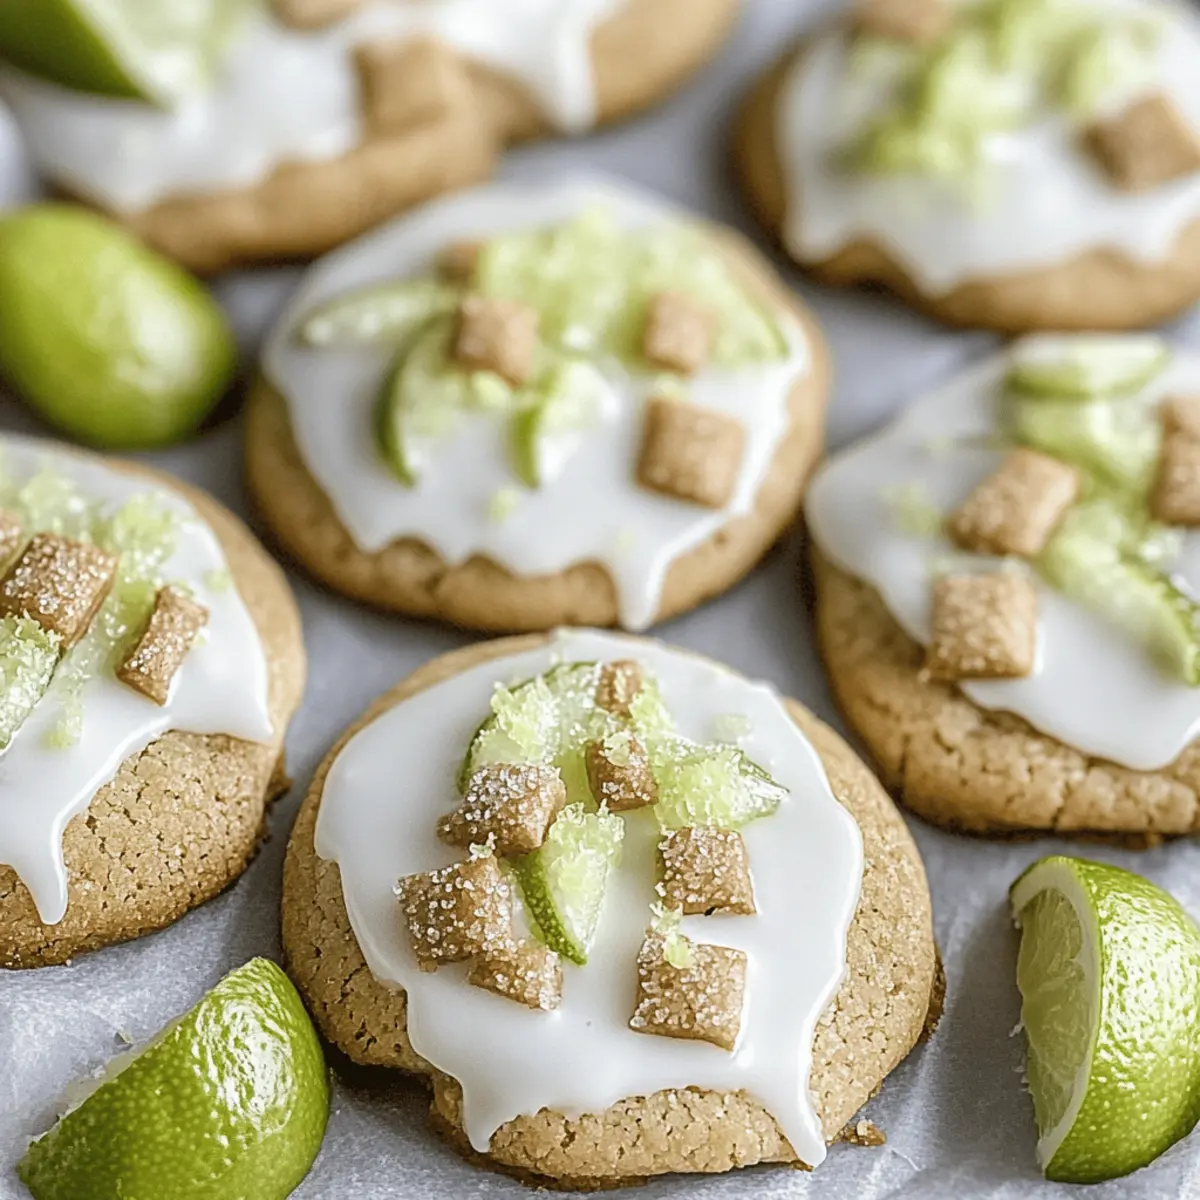
As I took a bite of my freshly baked cookie, the bright zest of key limes danced on my tongue, transporting me straight to a sun-kissed beach. These Key Lime Cookies are not just any treat; they evoke the joy of summer with their delightful blend of chewy texture and tart flavor, reminiscent of that classic key lime pie we all adore. What makes these cookies even better is that they cater to a variety of dietary needs—being gluten-free, nut-free, and eggless means everyone can enjoy this refreshing dessert. Perfect for a light snack or as a show-stopping addition to your dessert table, they are also quick to whip up, allowing you more time for what matters. Ready to elevate your cookie game? Let's dive into these irresistible delights!
Why Are These Key Lime Cookies Irresistible?
Unique Flavor Profile: The tangy sweetness of key lime juice perfectly complements the chewy texture, offering a refreshing twist.
Dietary Compliant: These cookies are gluten-free, nut-free, and eggless, making them accessible to a wide range of diets.
Quick and Easy: Get your cookie fix without all the fuss—this recipe is simple and can be made in just a few steps!
Perfect for Any Occasion: Whether it's a summer BBQ or a cozy afternoon treat, these cookies are sure to delight your guests. Pair them with coconut ice cream or a glass of iced tea for a fun treat that really shines!
Key Lime Cookies Ingredients
For the Cookie Dough
• Gluten-Free Flour (2 cups) – Provides structure to the cookies; opt for a 1:1 blend with xanthan gum for the best texture.
• Baking Powder (1 teaspoon) – Helps the cookies rise to perfection.
• Kosher Salt (½ teaspoon) – Enhances the sweetness while balancing the flavors beautifully.
• Unsalted Butter or Vegan Baking Stick (½ cup) – Adds richness and deep flavor; substitute with a vegan stick for a dairy-free option.
• Granulated Sugar (1 cup) – Sweetens the cookies and complements the tartness of key lime, crucial for delicious Key Lime Cookies.
• Sweetened Condensed Milk (½ cup) – Adds creaminess and moisture; use sweetened condensed coconut milk for a vegan variation.
• Key Limes (4 for zest, 8 for juice) – Infuses the cookies with vibrant citrus flavor; fresh juice yields the best taste.
• Gluten-Free Graham Crackers (¾ cup, chopped) – Delivers a crunchy texture that echoes the delightful essence of key lime pie.
For Topping
• Graham Cracker Chunks (½ cup) – Provides an enjoyable crunch and flavor on top of the baked cookies.
• Cream Cheese Glaze (½ cup) – Adds a sweet, creamy finish that elevates these cookies to the next level.
Step‑by‑Step Instructions for Key Lime Cookies
Step 1: Prepare Ingredients
Begin by zesting and juicing 8 key limes, ensuring to capture all the vibrant citrus goodness. Next, chop ¾ cup of gluten-free graham crackers into small pieces that will add delightful crunch to your Key Lime Cookies. Set these ingredients aside to incorporate later into the cookie batter.
Step 2: Mix Dry Ingredients
In a medium mixing bowl, whisk together 2 cups of gluten-free flour, 1 teaspoon of baking powder, and ½ teaspoon of kosher salt. This dry mixture will form the base of your Key Lime Cookies. Make sure to blend them thoroughly, so the baking powder and salt are evenly distributed for a perfect rise during baking.
Step 3: Cream Butter and Sugar
Using an electric mixer, cream together ½ cup of unsalted butter (or a vegan baking stick) and 1 cup of granulated sugar in a large bowl. Beat this mixture on medium speed until it becomes light and fluffy, which should take about 3-5 minutes. This step is key for adding richness and ensuring your cookies have a delightful texture.
Step 4: Combine Ingredients
Gradually mix in ½ cup of sweetened condensed milk, along with the zest and juice of the key limes. Continue to blend everything until fully incorporated. You’ll notice a smooth, creamy batter forming, enriched with the fragrant essence of key lime, ready to be transformed into delicious cookies.
Step 5: Incorporate Dry Mixture
Gently fold the dry ingredient mixture into the wet ingredients using a spatula, mixing just until combined. Be careful not to over-mix as this can affect the tenderness of your Key Lime Cookies. After the dough is formed, softly fold in the chopped graham crackers for that added crunch.
Step 6: Chill Dough
Cover the cookie dough with plastic wrap and refrigerate it for at least 1 hour. Chilling the dough is crucial as it helps prevent the cookies from spreading too much while baking. This time allows the flavors to meld, resulting in wonderfully tender cookies.
Step 7: Preheat Oven
Once the dough is chilled, preheat your oven to 325°F (160°C). While the oven heats, scoop the dough and form it into discs, flattening them slightly. For a fun twist, roll the edges in a mix of key lime zest and sugar to enhance the cookies' vibrant flavor.
Step 8: Bake
Line a baking sheet with parchment paper and place the cookie discs on it, ensuring they are spaced apart. Bake the cookies for about 8 minutes, or until the edges turn a beautiful golden brown. This indicates they are perfectly baked, soft in the center, and deliciously chewy.
Step 9: Cool & Glaze
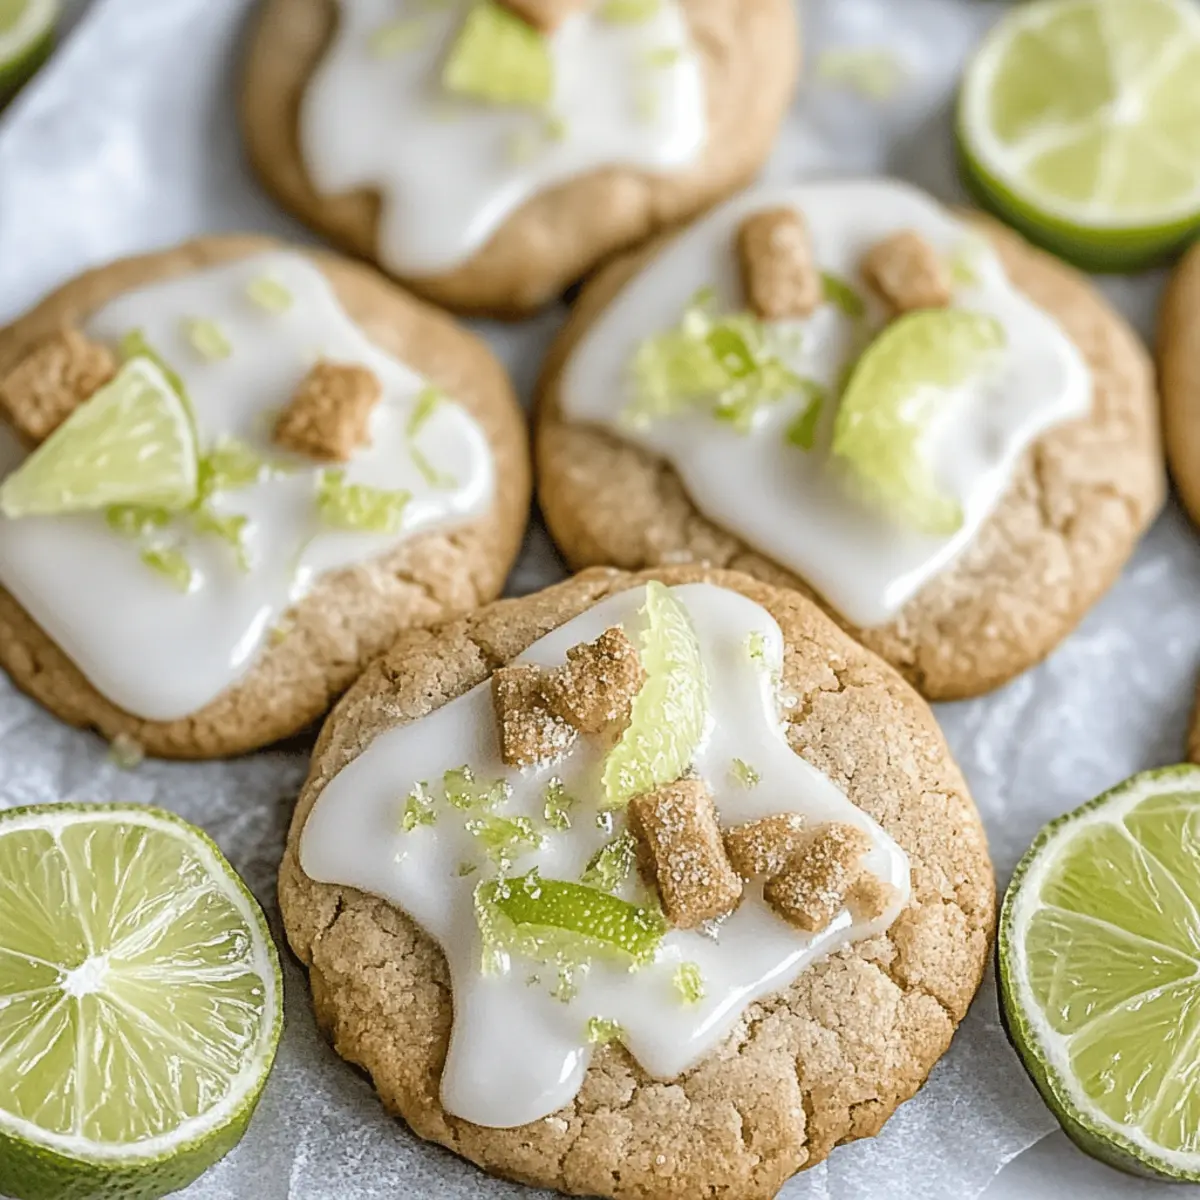
After baking, let the cookies cool on the baking sheet for about 5 minutes before transferring them to a wire rack. This cooling period helps them set perfectly. Once cooled, top each cookie with graham cracker chunks and drizzle the cream cheese glaze over them, enhancing their charm and flavor.
Make Ahead Options
These Key Lime Cookies are perfect for meal prep, allowing you to savor their zesty delight even on the busiest days! You can prepare the dough up to 24 hours in advance by covering and refrigerating it, which helps the flavors meld beautifully. For longer storage, shape the unbaked cookie dough into discs and freeze them for up to 30 days; just make sure to wrap them in plastic wrap to prevent freezer burn. When you’re ready to enjoy your cookies, simply bake from frozen for an extra minute or two. You'll get the same tender, chewy texture and refreshing flavor, making your dessert experience just as delicious with minimal effort!
What to Serve with Gluten-Free Key Lime Cookies?
Indulging in these delightful cookies opens the door to a world of delicious pairings that can elevate your dessert experience.
-
Coconut Ice Cream: The creamy, tropical flavors of coconut ice cream harmonize beautifully with the zesty brightness of key lime, creating a refreshing treat.
-
Fresh Fruit Salad: A medley of juicy fruits adds a vibrant touch and balances the sweetness of the cookies, making each bite a burst of freshness.
-
Iced Green Tea: This light and refreshing beverage complements the cookies’ bright flavors, providing a soothing contrast on a warm day.
-
Chocolate Dipped Strawberries: The rich chocolate paired with tart strawberries provides a luxurious touch that enhances the cookie's citrus notes remarkably.
Imagine serving these cookies at a sunny picnic, surrounded by laughter and cheerful chatter. Each pairing not only enhances the flavor of the cookies but also creates a delightful experience for all your guests!
-
Lemonade: A classic, tangy lemonade balances the sweetness and provides a refreshing, thirst-quenching companion to your cookies.
-
Cheesecake Bites: Mini cheesecake bites add a creamy decadence that pairs sublimely with the light and tangy notes of key lime.
-
Mint Mojito: A refreshing mint mojito offers a cooling effect that complements the cookie perfectly, enhancing the overall taste experience.
-
Mango Sorbet: The tropical sweetness of mango sorbet creates a delightful flavor contrast, making every moment feel like a vacation!
Key Lime Cookies Variations
Feel free to get creative with these delightful cookies and make them your own!
-
Citrus Swap: Replace key lime juice with lemon or orange juice for a refreshing citrus twist. Each brings its own unique brightness that’s sure to please!
-
Chocolate Delight: Add white chocolate chips to the dough for an extra touch of sweetness. The creamy chocolate pairs beautifully with the tangy lime, making each bite irresistible.
-
Nutty Crunch: Mix in chopped pecans or walnuts for added texture and flavor. Their natural richness complements the cookies, giving a satisfying crunch that elevates the entire experience.
-
Spicy Kick: Incorporate jalapeño zest or finely chopped jalapeños for an unexpected heat that balances the sweetness. It’s a daring twist that adventurous eaters will absolutely love!
-
Coconut Bliss: Stir in ** shredded coconut** for a tropical vibe. The added coconut will enhance the tropical essence, reminiscent of a key lime pie.
-
Alternative Flours: Experiment with almond or coconut flour for a different texture and flavor. Each will contribute a unique taste, allowing you to find your perfect cookie balance.
-
Frosting Variations: Instead of cream cheese glaze, try a coconut cream frosting for a different decadent layer. This switch will bring a delightful creaminess that pairs perfectly with the citrusy cookies.
With these variations, your Key Lime Cookies can become a whole new experience with every batch! And why not pair these with a scoop of refreshing coconut ice cream or a cup of tea to elevate your dessert experience?
Expert Tips for Key Lime Cookies
-
Chill the Dough: Refrigerate the dough for at least an hour to prevent spreading. This step is key to maintaining the chewy texture of your Key Lime Cookies.
-
Under-Mix for Tenderness: Be careful not to over-mix after adding dry ingredients. Gentle folding helps keep the cookies tender and prevents them from becoming tough.
-
Use Fresh Ingredients: For the best flavor, use fresh key lime juice rather than bottled. The freshness shines through in the final product.
-
Experiment with Sweeteners: Feel free to adjust the sugar according to your taste, but remember that too little can affect the texture of your gluten-free Key Lime Cookies.
-
Watch Baking Time: Keep an eye on your cookies while baking. Oven temperatures can vary, and overbaking can lead to dryness; you want them slightly soft in the middle.
Storage Tips for Key Lime Cookies
Room Temperature: Store the Key Lime Cookies in an airtight container at room temperature for up to 3 days to maintain their chewy texture and vibrant flavor.
Fridge: If you want to keep them longer, refrigerate the cookies in a sealed container for up to 5 days. This can enhance their taste and freshness.
Freezer: For longer storage, freeze unbaked dough for up to 30 days. Wrap it tightly in plastic wrap and place in a freezer bag. When ready to bake, simply thaw and follow the baking instructions.
Reheating: To enjoy the cookies warm, microwave them for about 10-15 seconds. This will bring back their delightful softness and enhance the key lime flavor.
Key Lime Cookies Recipe FAQs
How do I select ripe key limes?
Absolutely! When selecting key limes, look for ones that are small, smooth, and firm, with a vibrant green color. They should feel heavy for their size, indicating juiciness. Avoid any limes with dark spots or wrinkles, as these can indicate over-ripeness or spoilage.
What is the best way to store Key Lime Cookies?
These cookies perform best when stored in an airtight container at room temperature for up to 3 days. Keep them away from direct sunlight to maintain their freshness. If you want to keep them longer, refrigerate them in a sealed container for up to 5 days; this can actually enhance their flavors!
Can I freeze the cookie dough for later use?
The more the merrier! You can definitely freeze your unbaked Key Lime Cookies dough. Simply wrap it tightly in plastic wrap and place it in a freezer bag. It will stay fresh for up to 30 days. When you’re ready to bake, just thaw in the refrigerator overnight and proceed with the baking instructions as normal!
What do I do if my cookies spread too much during baking?
Oh no, that can happen sometimes! To avoid excessive spreading during baking, make sure to chill your dough for at least 1 hour. If this happens, you can reduce the baking time slightly or make sure to scoop your dough into taller mounds instead of flattening them too much before baking.
Are Key Lime Cookies safe for those with allergies or dietary restrictions?
Very much so! These cookies are gluten-free, nut-free, and eggless, making them a great option for various dietary needs. However, always check your ingredients, especially the graham crackers and sweetened condensed milk, to ensure they meet your specific dietary requirements. If you have concerns about cross-contamination, consider using certified gluten-free products.
How long do Key Lime Cookies remain fresh after baking?
Typically, you can expect these cookies to remain delicious for about 3 days at room temperature. If stored properly in an airtight container, they retain their delightful chewiness and zesty flavor. For the freshest taste, I often recommend enjoying them within the first couple of days!
Irresistibly Chewy Key Lime Cookies You'll Love
Ingredients
Equipment
Method
- Zest and juice 8 key limes, and chop ¾ cup of gluten-free graham crackers. Set aside.
- Whisk together gluten-free flour, baking powder, and kosher salt in a medium bowl.
- Cream together unsalted butter (or vegan stick) and granulated sugar in a large bowl until light and fluffy.
- Gradually mix in sweetened condensed milk, lime zest, and juice until fully incorporated.
- Gently fold in dry mixture, followed by chopped graham crackers.
- Refrigerate dough for at least 1 hour.
- Preheat oven to 325°F (160°C) and scoop dough into discs.
- Bake cookies for about 8 minutes until edges are golden brown.
- Cool cookies on sheet for 5 minutes, then transfer to a wire rack and top with graham cracker chunks and glaze.


Leave a Reply