
As the sun sets and the day winds down, your kitchen can be transformed into a vibrant haven of flavors with this 30-Minute Easy Mongolian Chicken. The sizzle of chicken tenderizing in hot oil, accompanied by the aromatic blend of ginger and garlic, creates an enticing atmosphere that beckons family and friends to gather. This quick meal not only ensures you skip the takeout woes but also brings a gluten-free, restaurant-quality dish right to your home. Perfectly versatile, the recipe is easily adaptable; whether you prefer a kick of spice or a sweeter twist, it caters to every palate. Ready to dive into a culinary adventure that turns busy weeknight dinners into tasty triumphs? Let’s get cooking!
Why Is Mongolian Chicken So Adaptable?
Versatile Base: This recipe serves as an ideal canvas for your creative culinary ideas!
Quick and Easy: Rushed nights don’t mean sacrificing flavor—this dish comes together in only 30 minutes!
Gluten-Free Goodness: Enjoy a delicious meal that caters to gluten-free diets without compromise.
Customizable Options: Swap proteins or throw in extra veggies for a personal touch that suits everyone's taste.
Family-Friendly: With its rich, savory flavor profile, even picky eaters will be asking for seconds!
Takeout Taste at Home: Enjoy the comforting and authentic flavors of takeout right from your kitchen without the wait.
Mongolian Chicken Ingredients
For the Chicken
• Canola Oil – Essential for frying the chicken; prevents sticking. Substitute with vegetable oil if preferred.
• Chicken Tenders – Main protein component; cut into bite-sized pieces. Chicken breast or thighs are good alternatives.
• Salt & Pepper – Adds flavor to the chicken. Adjust quantities based on your taste preference.
• Cornstarch – Coats chicken for a crispy texture. Can substitute with arrowroot powder for a gluten-free version.
For the Sauce
• Garlic, Minced – Provides aromatic flavor. Fresh garlic is best; garlic powder can be used if necessary.
• Fresh Grated Ginger – Enhances flavor profile with warmth. Ground ginger can replace fresh ginger if needed.
• Red Pepper Flakes or Asian Chili Oil – Adds spice; adjust according to heat preference. Omit for a milder option.
• Water – Adjusts sauce consistency. No substitutes needed.
• Reduced-Sodium Tamari Sauce (or Soy Sauce) – Provides umami flavor. Use soy sauce for a non-gluten-free option.
• Brown Sugar – Adds sweetness to balance the savory sauce. Coconut sugar can be used as a healthier alternative.
• Rice Vinegar – Adds acidity and depth. Can substitute with apple cider vinegar if needed.
For Garnish
• Scallions (Green Onions) – Offers freshness and crunch. Regular onions can substitute in a pinch.
Embrace the delightful world of Mongolian Chicken as you gather these key ingredients to create a fast and flavorful meal that the whole family will love! Get ready to whip up deliciousness in no time.
Step‑by‑Step Instructions for Mongolian Chicken
Step 1: Prepare the Chicken
Begin by cutting the chicken tenders into 1-inch pieces, ensuring uniform sizing for even cooking. Sprinkle the pieces with salt and pepper to enhance the flavor before lightly coating them with cornstarch, which will give the chicken a crispy texture once cooked.
Step 2: Heat the Oil
In a large sauté pan, heat 1-2 tablespoons of canola oil over medium-high heat. Wait until the oil shimmers and feels hot to the touch, which will take around 2 minutes. This ensures that your Mongolian Chicken cooks evenly and develops a delightful golden-brown color.
Step 3: Cook the Chicken
Carefully add the coated chicken pieces in batches, avoiding overcrowding the pan. Sauté each batch for about 3-4 minutes without moving them, allowing one side to become golden. Once browned, flip the pieces and cook for an additional 2-3 minutes, until they reach an internal temperature of 165°F.
Step 4: Sauté Aromatics
After the chicken is cooked, remove it from the pan and set aside. In the same pan, add a bit more oil if necessary, then toss in minced garlic, grated ginger, and red pepper flakes. Sauté for about 15-30 seconds until fragrant, making sure not to burn the garlic for the best flavor profile in your Mongolian Chicken.
Step 5: Make the Sauce
Pour in the reduced-sodium tamari sauce along with water, brown sugar, and rice vinegar into the fragrant mix. Stir everything well and bring the sauce to a gentle simmer over medium heat. This process builds the rich, sweet, and savory flavor that is essential for your Mongolian Chicken.
Step 6: Thicken the Sauce (Optional)
If you prefer a thicker sauce for your Mongolian Chicken, mix a tablespoon of cornstarch with a few teaspoons of water to form a slurry. Add this mixture to the simmering sauce, stirring continuously for 1-2 minutes until the sauce thickens to your desired consistency.
Step 7: Combine Chicken and Sauce
Return the cooked chicken pieces to the pan, ensuring they are well-coated in the luscious sauce. Toss gently to combine as the heat continues to warm the chicken through. This step allows all those delicious flavors to meld perfectly together in your Mongolian Chicken.
Step 8: Add Finishing Touches
Just before serving, sprinkle in the sliced scallions. Give everything a gentle toss to incorporate their fresh flavors, which beautifully complement the savory richness of the sauce. This final touch elevates your dish, presenting a lovely contrast in texture and taste.
Step 9: Serve and Enjoy
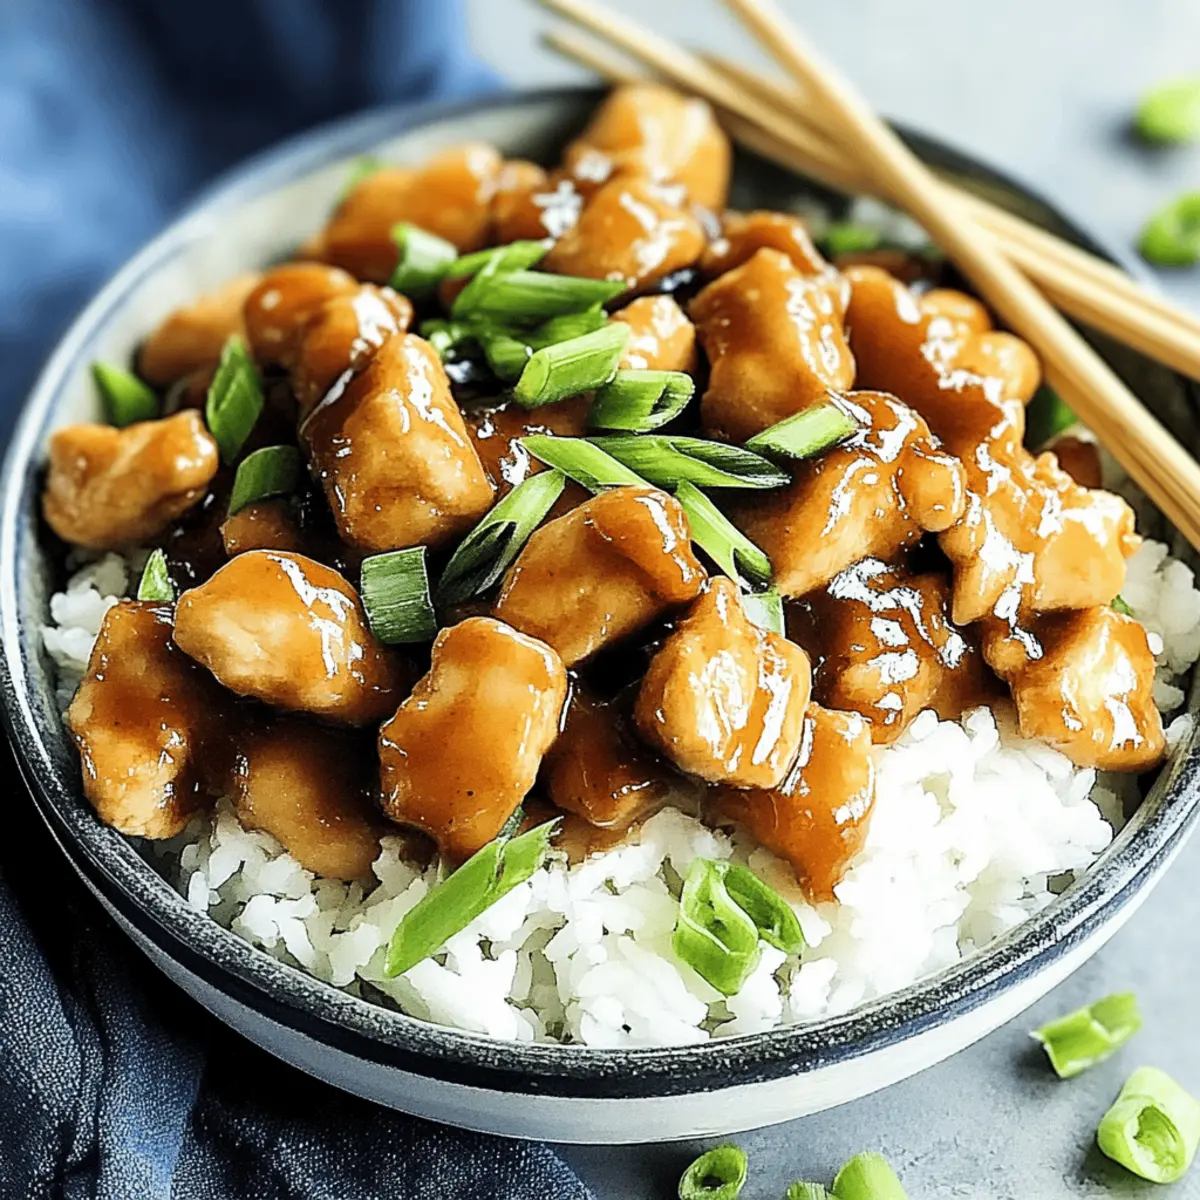
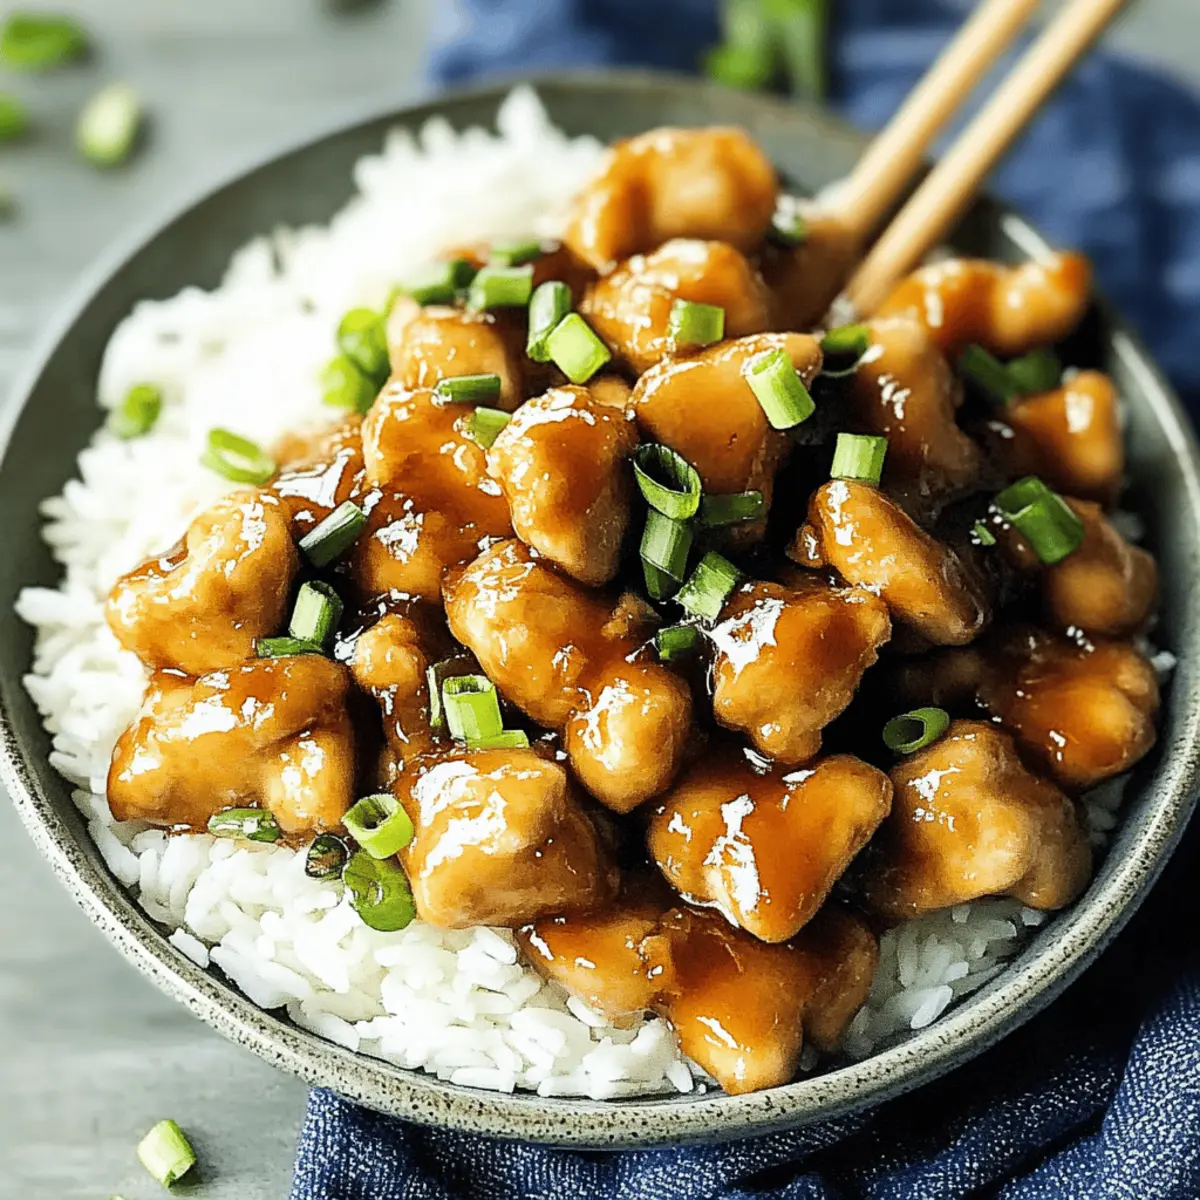
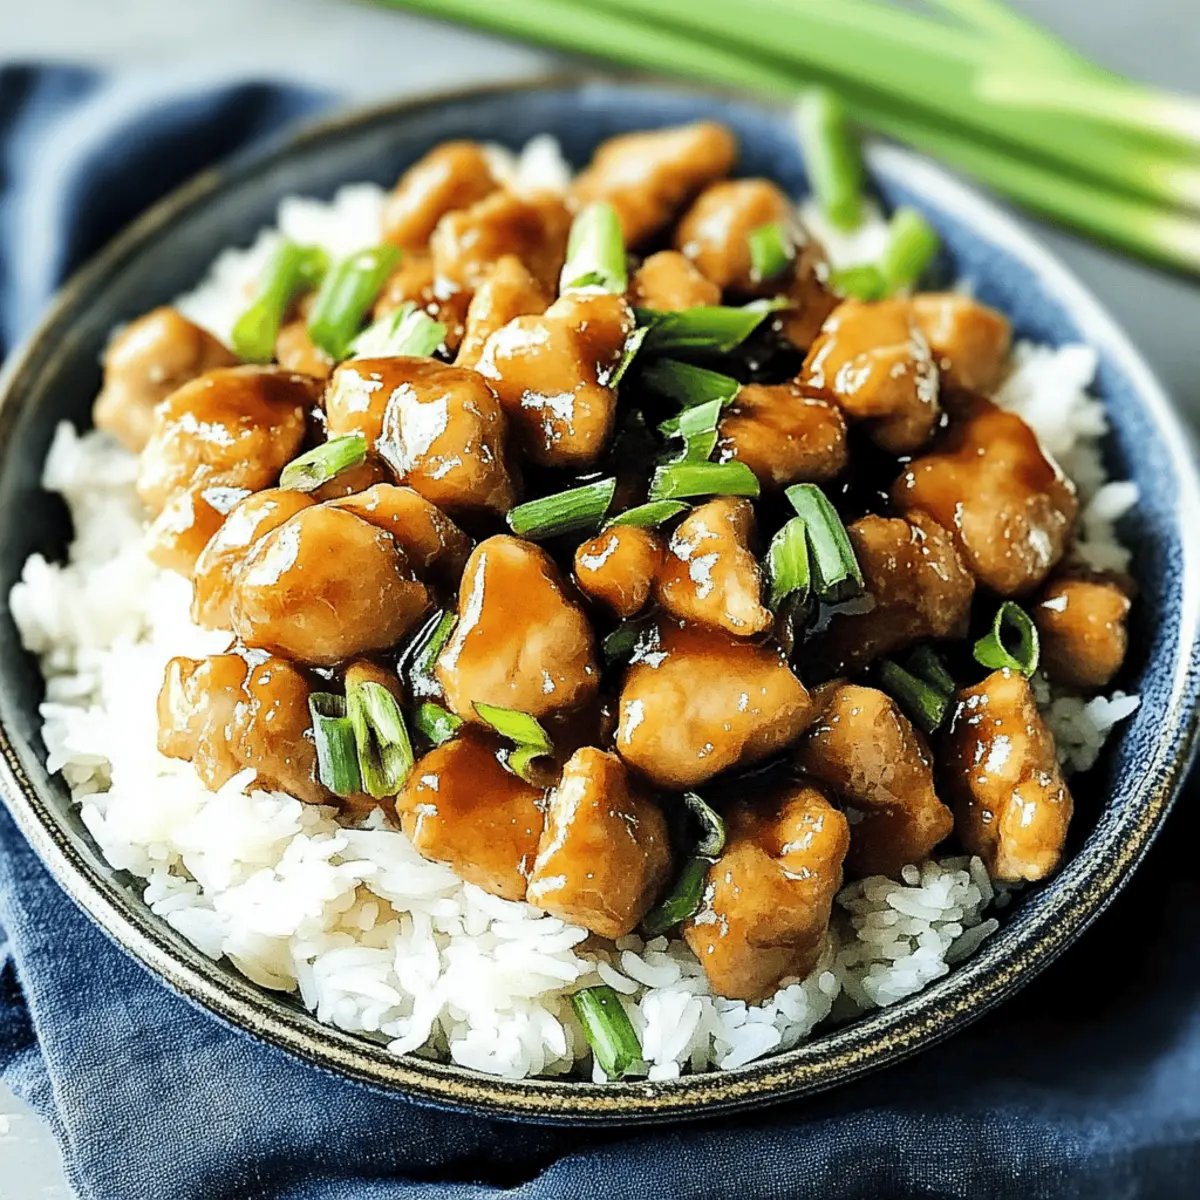
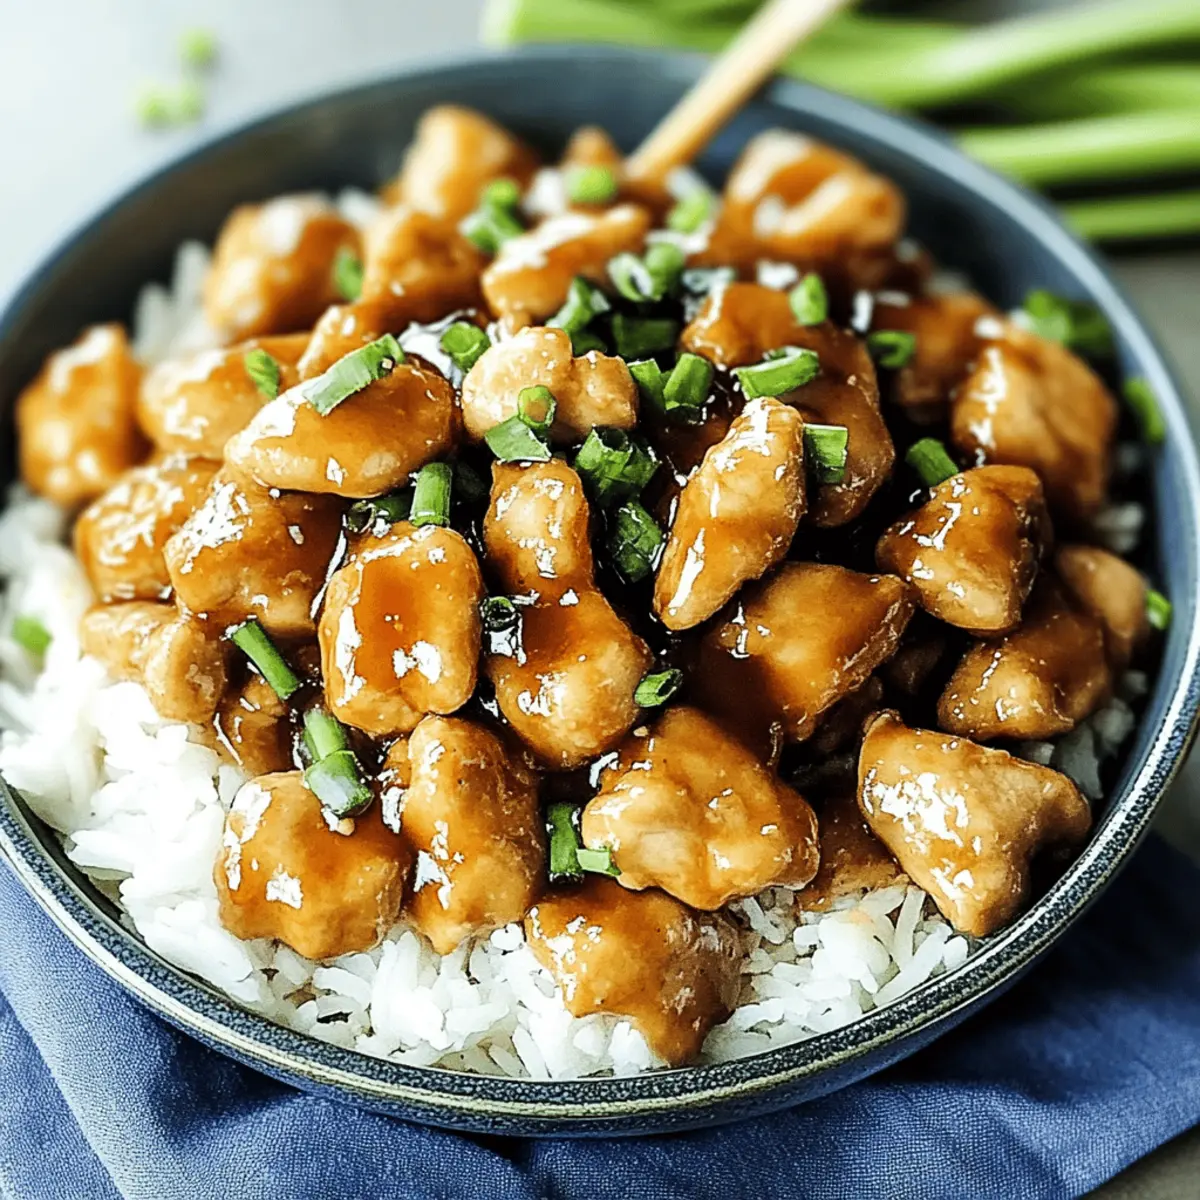
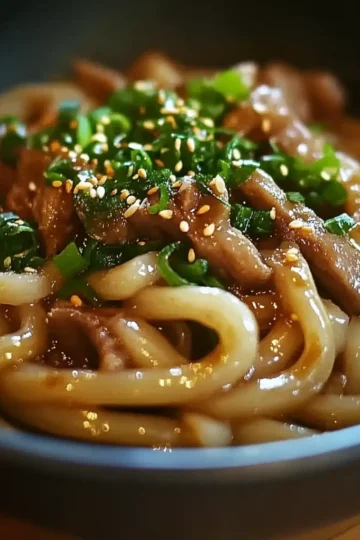
Your Mongolian Chicken is now ready to shine on the dinner table! Serve it over a bed of fluffy steamed jasmine rice, noodles, or use it in lettuce wraps for a delightful meal. Enjoy the vibrant flavors and the satisfaction of a homemade dish that rivals takeout!
Make Ahead Options
These 30-Minute Easy Mongolian Chicken preparations are perfect for busy home cooks looking to save time during hectic weeknights! You can cut the chicken tenders and coat them with cornstarch up to 24 hours in advance; simply refrigerate them in an airtight container to maintain that crispy texture. Additionally, you can prepare the sauce (mixing tamari sauce, water, brown sugar, and rice vinegar) and store it in the fridge for up to 3 days. When you're ready to cook, just sauté the chicken and finish by adding the sauce and aromatics, resulting in a quick, restaurant-quality dish that feels as good as freshly made!
Expert Tips for Mongolian Chicken
- Hot Oil is Key: Ensure the oil is hot before adding chicken to achieve that crispy texture everyone loves.
- Batch Cooking: Avoid overcrowding your pan; cook chicken in batches to ensure even cooking and browning.
- Check Temperature: Use a meat thermometer to ensure your chicken reaches an internal temperature of 165°F for safety and tenderness.
- Thickening Trick: For a lump-free thick sauce, mix cornstarch with water separately before adding to the simmering sauce.
- Fresh Scallions Last: Add scallions right before serving to maintain their crunch and vibrant flavor, enhancing the overall dish.
What to Serve with 30-Minute Easy Mongolian Chicken
Transform a delightful dish into a full-fledged feast with these irresistible pairings that bring out the best of your meal.
-
Steamed Jasmine Rice: The subtle sweetness of jasmine rice perfectly absorbs the savory sauce, balancing flavors beautifully.
-
Asian Cucumber Salad: Crisp cucumbers drenched in a light vinegar dressing provide a refreshing crunch that contrasts the rich chicken.
-
Garlic Broccoli: Sautéed with just the right amount of garlic, this side adds a vibrant green element packed with nutrition.
-
Noodle Stir-Fry: Udon or rice noodles tossed with fresh vegetables soak up the delicious sauce, creating a satisfying and hearty option.
-
Egg Drop Soup: This light, silky soup is comforting and easy to prepare, making it an excellent starter that warms up appetites.
-
Crispy Spring Rolls: Crunchy on the outside and filled with crisp veggies, spring rolls are the perfect finger food to accompany the meal.
-
Miso Soup: Earthy and slightly salty, miso soup adds depth and warmth, enhancing the comforting vibe of your dinner.
-
Chilled Sake: A glass of chilled sake adds an authentic touch to your meal, with its smoothness complementing the savory notes of Mongolian Chicken.
-
Chocolate Mousse: End your meal on a sweet note with a rich chocolate mousse; its silky texture contrasts beautifully with the savory flavors and leaves everyone satisfied.
How to Store and Freeze Mongolian Chicken
Fridge: Store leftovers in an airtight container in the refrigerator for up to 3 days. This way, you can enjoy delicious Mongolian Chicken without any hassle!
Freezer: For longer storage, freeze portions in an airtight container or freezer bag for up to 2 months. Be sure to label with the date before freezing!
Reheating: When ready to enjoy, thaw in the fridge overnight, then reheat in a skillet over medium heat until warmed through. Add a splash of water or soy sauce to refresh the sauce.
Tip: For best results, freeze the chicken before adding the sauce to maintain texture upon reheating.
Mongolian Chicken Variations & Substitutions
Feel free to mix things up and discover a world of flavors tailored perfectly to your taste preferences!
-
Beef Option: Substitute chicken with thinly sliced beef for a heartier version that brings robust flavors to the table. The richness of the beef adds a satisfying twist that's bound to impress!
-
Vegetable Medley: Include bell peppers, snap peas, or broccoli for added nutrition and vibrant color. Loading up on veggies creates a delightful crunch and enhances the dish's visual appeal.
-
Tofu Delight: Use cubed firm tofu for a vegetarian alternative that absorbs the delicious sauce beautifully. This swap not only caters to dietary needs but also introduces a unique texture that pairs wonderfully with the flavors.
-
Spicy Kick: Add fresh jalapeños or extra chili oil for those who crave a fiery taste. A little heat elevates the dish, making every bite an exciting experience!
-
Sweet Twist: Use honey or maple syrup instead of brown sugar for a different flavor profile that balances the savory notes with delightful sweetness. It's a wonderful way to change the dish's character!
-
Serve with Noodles: Swap rice for your favorite noodles to soak up the delicious sauce. This pasta option transforms the meal into a comforting bowl of goodness that is deeply satisfying.
-
Coconut Cream: For a creamy touch, stir in a splash of coconut cream towards the end of cooking. This rich addition creates a luxurious sauce that enchants the senses.
-
Fresh Herbs: Toss in fresh cilantro or basil just before serving for an aromatic uplift. These herbs add brightness and a touch of elegance that can elevate your dining experience.
Exploring these variations and substitutions is not only fun but also a way to make this Mongolian Chicken recipe uniquely yours! Enjoy the delicious adventure in your kitchen.
30-Minute Easy Mongolian Chicken Recipe FAQs
How do I select the best chicken for Mongolian Chicken?
Absolutely! When selecting chicken tenders, look for those that are plump and have a nice pink color with minimal visible veins. Avoid any that appear dull or have dark spots, as this may indicate they are not fresh. If you opt for chicken breasts, choose ones that are firm and have a similar pink hue.
What is the best way to store leftover Mongolian Chicken?
Very important! Store the leftovers in an airtight container in the refrigerator and they’ll stay fresh for up to 3 days. Make sure to cool it down to room temperature before sealing. This way, you can savor the delightful flavors again without compromise!
Can I freeze Mongolian Chicken for later?
Of course! You can freeze your Mongolian Chicken for up to 2 months. For best results, it’s advisable to freeze the chicken before adding the sauce. Once you’ve cooked and cooled it, portion the chicken into airtight containers or freezer bags, label them with the date, and pop them in the freezer. When you’re ready, thaw in the fridge overnight and reheat on the stovetop.
What should I do if my sauce is too thin?
Not a problem! If you find that your sauce is thinner than desired, you can create a cornstarch slurry. Mix one tablespoon of cornstarch with two tablespoons of cold water. Stir this mixture into the sauce while it’s simmering, and cook for an additional 1-2 minutes until it thickens to your liking. This method prevents lumps and ensures a smooth, glossy sauce.
Is Mongolian Chicken suitable for gluten-free diets?
Yes, indeed! To keep this dish gluten-free, ensure you use reduced-sodium tamari sauce instead of standard soy sauce. Additionally, use cornstarch as a thickener. Always check labels, as some brands of sauces may contain hidden gluten, so it’s best to stick with those marked gluten-free.
Could pets eat Mongolian Chicken?
While most ingredients in Mongolian Chicken are safe for pets in small amounts, it’s wise to avoid giving them any dish seasoned with salt, garlic, or spices. If you're sharing, remove any seasoning and only offer plain, cooked chicken. Always consult your vet about introducing new foods to your pet’s diet.
Mongolian Chicken Recipe FAQs
Now that the stage is set with these tips and tricks, you’re all set to create a bowl of delicious Mongolian Chicken that your whole family will love!
Quick & Easy Mongolian Chicken for Busy Weeknights
Ingredients
Equipment
Method
- Cut the chicken tenders into 1-inch pieces and sprinkle with salt and pepper before coating with cornstarch.
- Heat 1-2 tablespoons of canola oil in a large sauté pan over medium-high heat until the oil shimmers.
- Add the coated chicken pieces in batches, sautéing for 3-4 minutes on one side, then flip and cook for another 2-3 minutes.
- Remove the chicken and add minced garlic, grated ginger, and red pepper flakes to the pan, sautéing for 15-30 seconds.
- Pour in tamari sauce, water, brown sugar, and rice vinegar, stirring and bringing to a simmer.
- (Optional) Mix cornstarch with water to form a slurry, adding it to the sauce to thicken.
- Return the cooked chicken to the pan, tossing to coat in the sauce.
- Sprinkle in sliced scallions before serving and give a gentle toss.
- Serve over steamed rice, noodles, or in lettuce wraps.
Leave a Reply