
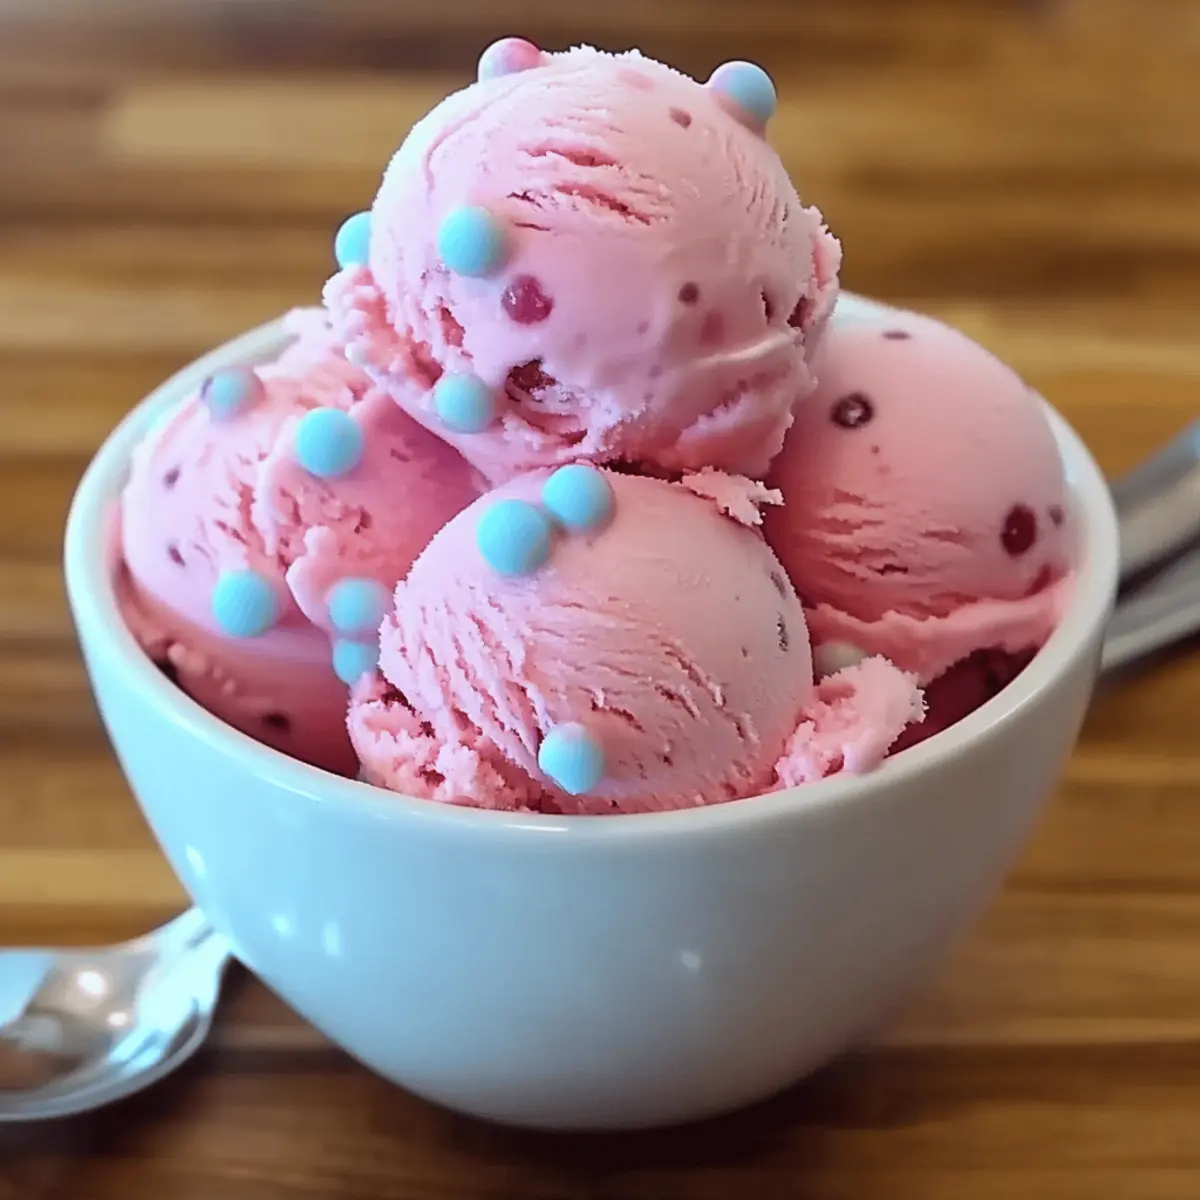
As a child, summer afternoons felt like a treasure chest of delight, especially when a vibrant pink ice cream cone was never too far away. Today, I’m excited to share my Irresistibly Creamy Bubblegum Ice Cream recipe—a nostalgic concoction that marries the playful sweetness of Bazooka bubblegum with the rich decadence of homemade ice cream. This delightful dessert is not only easy to whip up, but it’s also customizable, allowing you to create unique toppings that truly express your creative flair. Plus, for those who prefer a dairy-free alternative, I’ve got you covered with a simple substitution that doesn’t skimp on taste. Are you ready to take a scoop down memory lane? Let’s dive in!
Why Is Homemade Bubblegum Ice Cream Special?
Nostalgic Experience: This creamy bubblegum ice cream brings back childhood memories with every scoop, making it a perfect treat for both kids and adults, especially on warm summer days.
Customizable Delight: Enjoy the freedom to personalize your ice cream with toppings like sprinkles, mini chocolate chips, or even fruity swirls. The possibilities are endless!
Simple Process: With easy-to-follow steps, even beginner cooks can create this decadent dessert at home, ensuring a fun and rewarding experience.
Dairy-Free Option: For those with dietary restrictions, I’ve included a dairy-free substitute that retains all the rich flavor and smooth texture you desire.
Great for Gatherings: Serve it at parties or family gatherings, and watch everyone savor this delightful throwback. This bubblegum ice cream is sure to be a crowd-pleaser, so prepare to share this homemade goodness with your loved ones!
Creamy Bubblegum Ice Cream Ingredients
• To create this nostalgic treat, you'll need the right ingredients to achieve the perfect creamy texture and signature bubblegum flavor.
For the Base
- Bazooka Bubblegum – Provides that iconic bubblegum flavor; choose a high-quality gum for the best results.
- Substitution: Consider Double Bubble for a twist on the classic taste.
- Whole Milk – Adds creaminess to the ice cream base, essential for that rich texture.
- Substitution: Use full-fat coconut milk for a delicious dairy-free version.
- Heavy Cream – Gives the ice cream its luxurious and silky mouthfeel, a must-have for indulgence.
- Cornstarch – Functions as a thickening agent, ensuring your ice cream has that delightful creamy consistency.
- Sugar – Sweetens the mixture perfectly, enhancing the bubblegum flavor; adjust to suit your taste.
- Salt – Balances the sweetness and elevates the overall flavor profile.
Feel free to indulge in your creativity with toppings and add-ins later on to make this Creamy Bubblegum Ice Cream truly your own!
Step‑by‑Step Instructions for Irresistibly Creamy Bubblegum Ice Cream
Step 1: Prepare the Cornstarch Slurry
In a small bowl, whisk together cornstarch with a splash of whole milk until smooth and free of lumps. This slurry will help thicken your creamy bubblegum ice cream base later on. Set it aside while you focus on creating the bubblegum flavor that will define your delightful treat.
Step 2: Blend the Bubblegum Base
In a blender, combine Bazooka bubblegum, remaining whole milk, and heavy cream. Blend on high for 1-2 minutes until the mixture is smooth and the bubblegum is well incorporated. The vibrant pink hue will start to emerge, signaling that you’re one step closer to your nostalgic creamy bubblegum ice cream.
Step 3: Heat the Mixture
Pour the blended bubblegum mixture into a medium saucepan over medium heat. Add sugar and a pinch of salt, stirring gently. Heat the mixture until it begins to simmer, ensuring you do not let it boil. Keep an eye on it, as the creamy base should get hot and fragrant without bubbling over.
Step 4: Thicken the Base
Slowly pour the cornstarch slurry into the simmering mixture, whisking continuously. Cook for an additional 3-5 minutes, until the ice cream base thickens slightly and coats the back of a spoon. This step is crucial for achieving that irresistibly creamy bubblegum ice cream texture.
Step 5: Cool the Mixture
Once thickened, transfer the saucepan off the heat. Pour the hot mixture into a resealable bag or bowl, then submerge it in a larger bowl filled with ice water. Let it cool for about 15 minutes, ensuring the mixture reaches room temperature before adding it to the ice cream maker.
Step 6: Strain the Mixture
After cooling, strain the mixture through a cheesecloth-lined strainer into a clean bowl to remove any leftover bubblegum pieces. This ensures your creamy bubblegum ice cream is silky-smooth and free from any unwanted bits, providing a wonderfully velvety texture.
Step 7: Churn the Ice Cream
Pour the smooth mixture into your ice cream maker and churn according to the manufacturer’s instructions, usually for about 20-25 minutes. Watch as the creamy bubblegum ice cream begins to take shape, transforming into a thick, fluffy dessert that’s reminiscent of your childhood favorite.
Step 8: Freeze and Firm Up
Once the churning is complete, transfer your creamy bubblegum ice cream to an airtight container. Smooth the top, then cover and freeze for at least 4 hours, or until firm. This final step is key to developing that perfect scoopable texture that will bring back joyful memories with every bite.
What to Serve with Irresistibly Creamy Bubblegum Ice Cream?
Indulging in a scoop of this delightful bubblegum ice cream opens the door to endless flavor possibilities that enhance your dessert experience.
-
Waffle Cones: Perfectly crunchy and lightly sweet, they create a delightful contrast to the creamy bubblegum ice cream, making each bite a true pleasure.
-
Fresh Berries: Juicy strawberries or blueberries add a refreshing, tart burst that balances the sweet nostalgia of the ice cream, creating a harmonious blend of flavors.
-
Chocolate Sauce: Rich and decadent, a drizzle of chocolate sauce elevates the playful bubblegum flavor with its luxurious depth; it’s a classic pairing that never goes out of style.
-
Whipped Cream: Fluffy and airy, whipped cream adds an element of lightness to the creamy bubblegum ice cream, giving it a dreamy presentation that looks almost too good to eat.
-
Sprinkles: Vibrantly colorful sprinkles bring fun and nostalgia, enhancing not only the visual appeal but also adding a delightful crunch with each bite.
-
Bubblegum Float: Combine your ice cream with lemon-lime soda for a fizzy, whimsical twist—every sip is a refreshing delight that evokes summer memories.
-
Mini Chocolate Chips: For a little indulgent surprise, fold in mini chocolate chips before freezing to add texture and a hint of chocolate that beautifully complements the bubblegum flavor.
-
Caramel Drizzle: Sweet, buttery caramel sauce introduces a rich, silky element to your sundae, making it a decadent treat that’s hard to resist.
-
Toasted Coconut: Sprinkle toasted coconut for a tropical flair; its chewy texture works wonderfully alongside the creamy bubblegum ice cream, transporting you to a dreamy paradise.
-
Nuts: Chopped almonds or pecans add a satisfying crunch and earthy tone that counterbalances the sweetness, creating a well-rounded dessert experience.
Creamy Bubblegum Ice Cream Variations
Feel free to unleash your creativity and make this ice cream truly your own with delightful twists and swaps!
-
Dairy-Free Delight: Replace whole milk with full-fat coconut milk for a tropical, creamy version that everyone can enjoy.
-
Flavorful Add-Ins: Incorporate mini chocolate chips, crushed nuts, or a swirl of fruity jam before the freezing step for added texture and fun.
Imagine each scoop bursting with chocolatey or fruity surprises that complement the bubblegum flavor!
-
Bubblegum Float: Turn your creamy bubblegum ice cream into a bubbly treat by pouring over lemon-lime soda or cream soda for a fizzy twist.
-
Toppings Galore: Elevate your presentation with sprinkles, whipped cream, or fresh fruit. These toppings add color and texture to each scoop.
Just think of the joy in every vibrant bite—each spoonful becomes a playful experience!
-
Nutty Version: Add crushed peanuts or almond pieces to the mix for a delightful crunch that pairs beautifully with the smooth ice cream.
-
Minty Fresh Twist: Blend in a few drops of mint extract for a refreshing burst that will certainly surprise your taste buds.
A hint of mint could transform this nostalgic dessert into something uniquely refreshing and exciting!
-
Low-Sugar Version: Use a sugar substitute or natural sweetener like honey or maple syrup to satisfy your sweet tooth while keeping it healthier.
-
Spicy Surprise: For the adventurous, add a pinch of cayenne pepper or chili powder to the mixture for a surprising kick against the bubblegum sweetness.
With these variations, your creamy bubblegum ice cream can become a unique indulgence tailored to every occasion!
How to Store and Freeze Creamy Bubblegum Ice Cream
Fridge: Store any leftover ice cream in the fridge for up to 3 days in an airtight container, but for the best quality, it's ideal enjoyed fresh.
Freezer: Keep your homemade creamy bubblegum ice cream in the freezer for up to 2 weeks. Ensure it's tightly sealed in an airtight container to prevent freezer burn.
Reheating: If the ice cream is too hard to scoop, let it sit at room temperature for 5-10 minutes before serving to soften slightly for easier enjoyment.
Expert Tips for Creamy Bubblegum Ice Cream
- Quality Matters: Use high-quality Bazooka bubblegum to ensure optimal flavor and dissolution in the ice cream base.
- Cool Before Churning: Always let the mixture cool completely before pouring it into the ice cream maker to achieve that irresistibly creamy bubblegum ice cream texture.
- Strain Well: Don't rush the straining process; ensuring all gum pieces are removed will create a smooth, luxurious final product.
- Gentle Simmer: Keep the mixture at a gentle simmer while heating; boiling can lead to a grainy texture instead of the creamy consistency you want.
- Let It Rest: For easier scooping, allow the ice cream to sit at room temperature for 5-10 minutes before serving.
Make Ahead Options
Homemade bubblegum ice cream is an ideal treat for meal prep enthusiasts! You can prepare the ice cream base up to 24 hours in advance, ensuring a smooth and sweet experience whenever you need it. Simply follow the initial steps to create your bubblegum mixture and cool it, then refrigerate it in an airtight container. This prevents any potential souring of flavors while keeping it fresh and delicious until you’re ready to churn. When you're set to enjoy your creamy bubblegum ice cream, just pour the cooled mix into your ice cream maker and churn according to the manufacturer’s instructions. You'll have delightful, creamy ice cream waiting for you with minimal effort!
Creamy Bubblegum Ice Cream Recipe FAQs
How do I choose the best bubblegum for this recipe?
Absolutely! For the best results, choose a high-quality Bazooka Bubblegum, as it offers the signature flavor that defines this ice cream. A vibrant pink hue and rich sweetness are key to evoking those nostalgic feelings. If you want a twist, Double Bubble can also work beautifully, but be sure it's a brand that dissolves well in the mixture.
What is the best way to store homemade creamy bubblegum ice cream?
To keep your ice cream at its best, store it in an airtight container in the freezer for up to 2 weeks. Make sure it’s tightly sealed to prevent freezer burn. Remember, for optimal flavor and texture, homemade ice cream is best enjoyed fresh, so try to consume it within the first few days if possible!
Can I freeze my creamy bubblegum ice cream? How?
Certainly! After churning your creamy bubblegum ice cream, transfer it to an airtight container and smooth the top. Freeze it for at least 4 hours to firm up. If you're making it ahead and want to keep it for longer, it will last in the freezer for up to 2 weeks. When ready to serve, let it sit at room temperature for 5-10 minutes to make scooping easier.
What should I do if my ice cream turns out grainy?
The more the merrier! To avoid graininess, it’s important to keep the mixture at a gentle simmer while heating and to strain it properly to remove any undissolved bubblegum. If you've already made the ice cream and it's grainy, try letting it sit at room temperature for a bit before re-churning it lightly. This can help revive some of that creamy texture.
Is this creamy bubblegum ice cream safe for allergies?
Great question! This recipe contains common allergens like dairy. If you have a lactose intolerance or a dairy allergy, I suggest using full-fat coconut milk as a substitute for the whole milk, which is a delicious dairy-free alternative that doesn't compromise on flavor. Always check the ingredients in your bubblegum, as some brands may contain allergens.
Irresistibly Creamy Bubblegum Ice Cream for Sweet Nostalgia
Ingredients
Equipment
Method
- In a small bowl, whisk together cornstarch with a splash of whole milk until smooth and free of lumps. Set it aside.
- In a blender, combine Bazooka bubblegum, remaining whole milk, and heavy cream. Blend on high for 1-2 minutes until smooth.
- Pour the blended bubblegum mixture into a medium saucepan over medium heat. Add sugar and a pinch of salt, stirring gently.
- Slowly pour the cornstarch slurry into the simmering mixture, whisking continuously. Cook for 3-5 minutes until thickened.
- Transfer the saucepan off the heat. Pour into a resealable bag or bowl and submerge in ice water to cool for 15 minutes.
- Strain the mixture through a cheesecloth-lined strainer into a clean bowl to remove any leftover bubblegum pieces.
- Pour the smooth mixture into your ice cream maker and churn according to the manufacturer’s instructions for about 20-25 minutes.
- Transfer your creamy bubblegum ice cream to an airtight container, smooth the top, and freeze for at least 4 hours until firm.


Leave a Reply