
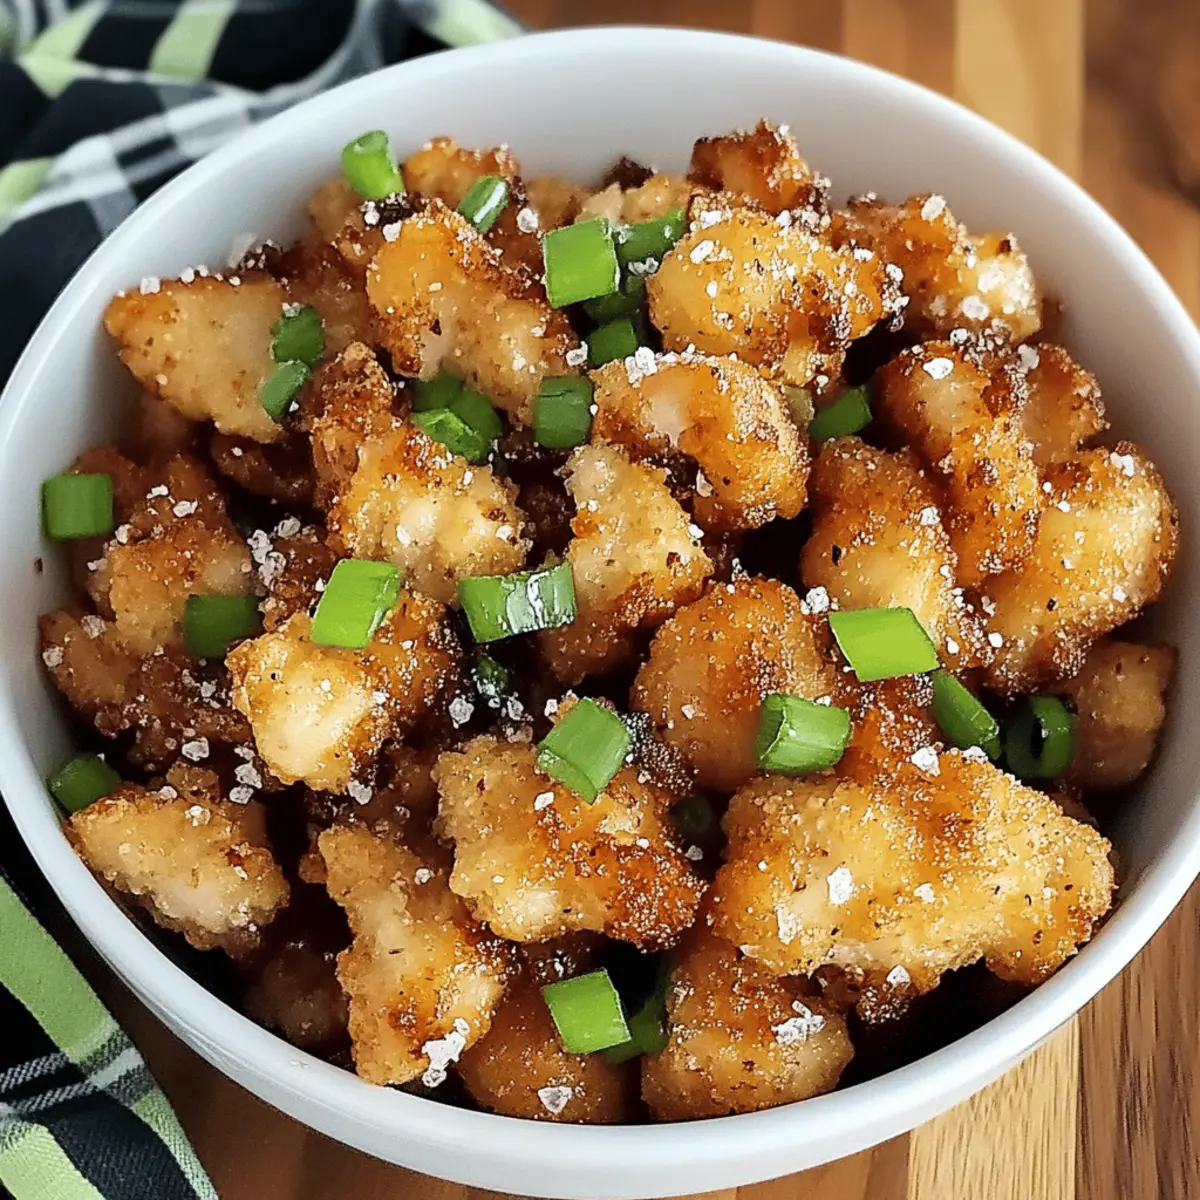
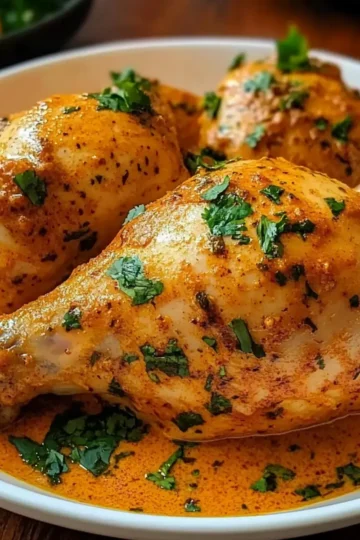
The tantalizing aroma wafted through my kitchen, pulling me back to my favorite Chinese takeout spot. But instead of ordering in, I was about to whip up a batch of Crispy Salt and Pepper Chicken—my healthier, homemade twist on a beloved classic. With mouth-watering crunch and juicy, flavorful chicken, this quick dinner is destined to become your new go-to. What I love most is how effortlessly it transforms an ordinary weeknight into something special, all in under an hour! Plus, it's gluten-free when you opt for tamari, making it a delightful option for everyone at the table. Curious about how to create this satisfying dish that delivers big on flavor with minimal fuss? Let’s dive in!
Why Is This Chicken Recipe a Must-Try?
Irresistible Crunch: Each bite offers a satisfying crispiness that rivals your favorite takeout, making it incredibly addictive.
Quick Preparation: In under an hour, you’ll have a delicious homemade meal ready, perfect for busy weeknights.
Flavor Explosion: The bold combination of garlic, soy sauce, and a hint of sweetness creates a rich and savory taste that will keep everyone coming back for more.
Versatile Serving Options: Pair it with steamed jasmine rice or a vibrant cucumber salad for a well-rounded meal that suits any craving.
Gluten-Free Adaptable: Easily switch to tamari for a gluten-free option, ensuring everyone at the table can enjoy this delightful dish.
For more mouthwatering meals, check out my Hash Brown Quiche for a comforting twist on breakfast!
Crispy Salt and Pepper Chicken Ingredients
For the Chicken
• Chicken Breast – Cut into bite-sized pieces for better flavor absorption.
• Egg – Use one large egg, beaten well, to help the coating adhere.
For the Coating
• Cornstarch – Creates a crispy texture when fried; all-purpose flour works too.
• Salt – Adjust to taste, but opt for low-sodium if preferred.
For the Marinade
• Garlic – Fresh cloves, minced, will add an aromatic kick to your crispy salt and pepper chicken.
• Brown Sugar – A tablespoon balances the savory flavors; feel free to substitute with honey.
• Water – Just use tap water to combine your marinade ingredients.
• Rice Wine – Adds a flavor depth; dry sherry can be a suitable substitute.
• Baking Soda – This tenderizes the chicken; add ½ teaspoon to the marinade.
• Soy Sauce – Introduces umami richness; opt for tamari for a gluten-free option.
For Frying
• Vegetable Oil – Essential for frying; canola or peanut oil adds wonderful flavor.
For Garnish
• Green Onions – Chop 2 tablespoons to add color and freshness to your dish.
With these simple yet flavorful ingredients, you're all set to enjoy a homemade version of Crispy Salt and Pepper Chicken that will have everyone raving!
Step‑by‑Step Instructions for Crispy Salt and Pepper Chicken
Step 1: Marinate Chicken
In a large bowl, combine minced garlic, salt, brown sugar, water, rice wine, baking soda, and soy sauce to create a flavorful marinade. Cut your chicken breast into bite-sized pieces and add them to the marinade, ensuring they are fully coated. Let the chicken marinate for about 30 minutes at room temperature, allowing the ingredients to infuse into the meat.
Step 2: Prepare Egg Wash
While the chicken is marinating, crack one large egg into a bowl and beat it thoroughly until smooth. This egg wash will help the cornstarch adhere to the chicken pieces, creating that crispy coating. Set the egg wash aside, ready to dip the marinated chicken in once it has finished soaking up those delicious flavors.
Step 3: Coat Chicken
Once the marinating time has elapsed, drain the chicken from the marinade. Dip each piece first into the prepared egg wash, allowing any excess to drip off, and then toss them in a bowl filled with cornstarch. Ensure each piece is evenly coated in cornstarch for that perfect crispiness in your Crispy Salt and Pepper Chicken.
Step 4: Heat Oil
In a large wok or deep frying pan, heat about ½ inch of vegetable oil over medium-high heat until it reaches 350°F (175°C). You can test the oil’s readiness by dropping in a small piece of bread—if it sizzles right away, then the oil is hot enough to fry. This frying step is crucial for achieving that golden, crispy texture.
Step 5: Fry Chicken
Carefully add the coated chicken pieces to the hot oil in batches to avoid overcrowding, which will help maintain the oil's temperature. Fry each batch for about 4-5 minutes or until they turn a beautiful golden brown and are crispy on the outside. Use a slotted spoon to remove the fried chicken and place them on paper towels to drain any excess oil.
Step 6: Finish and Serve
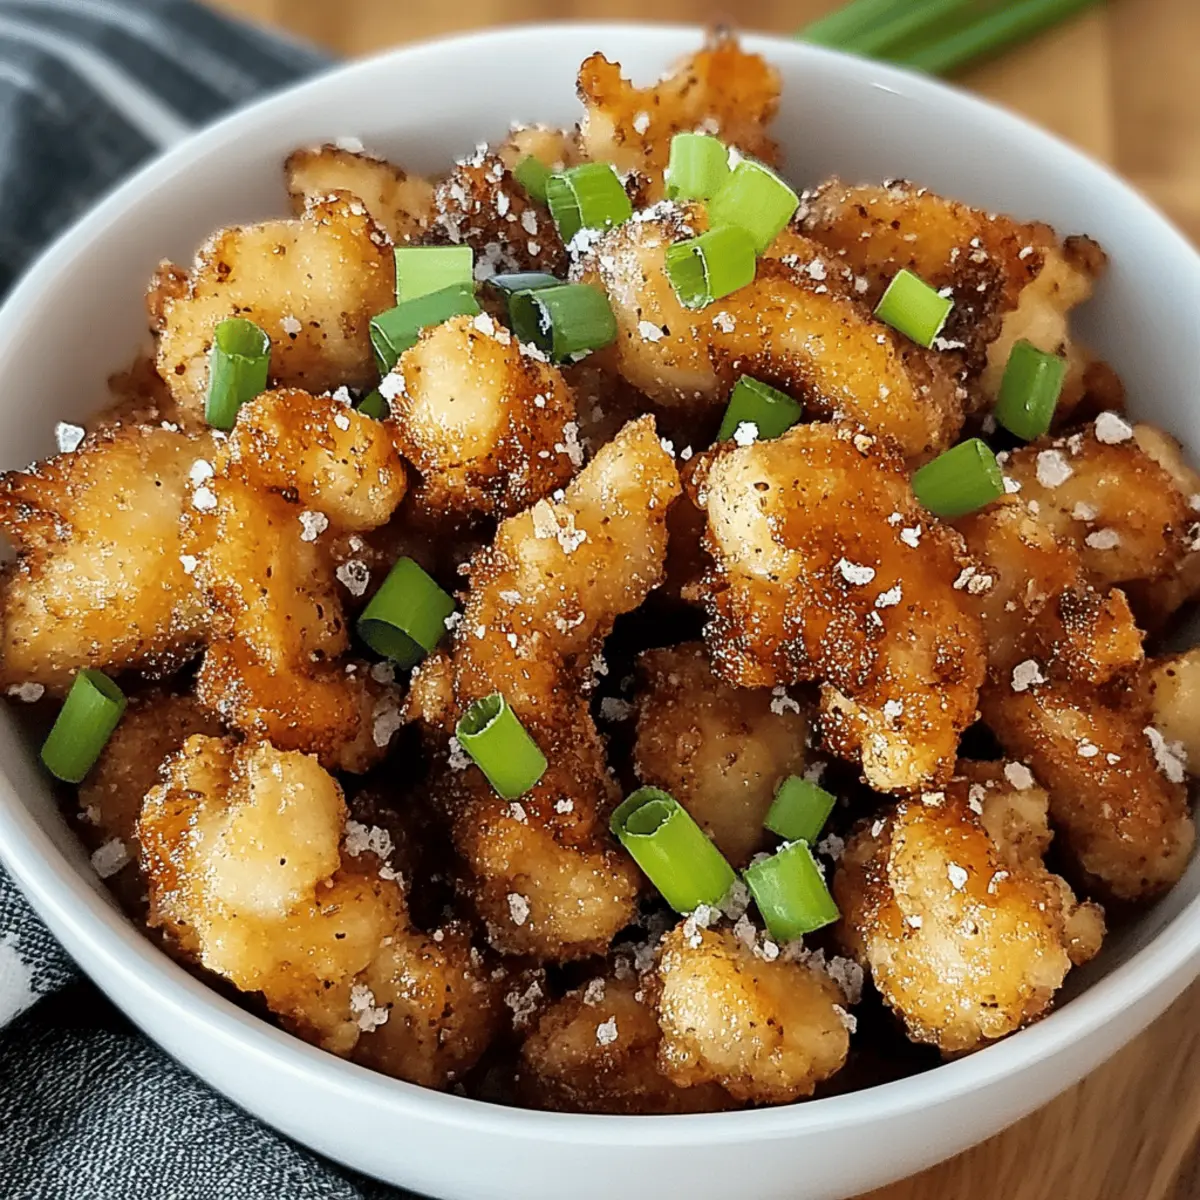
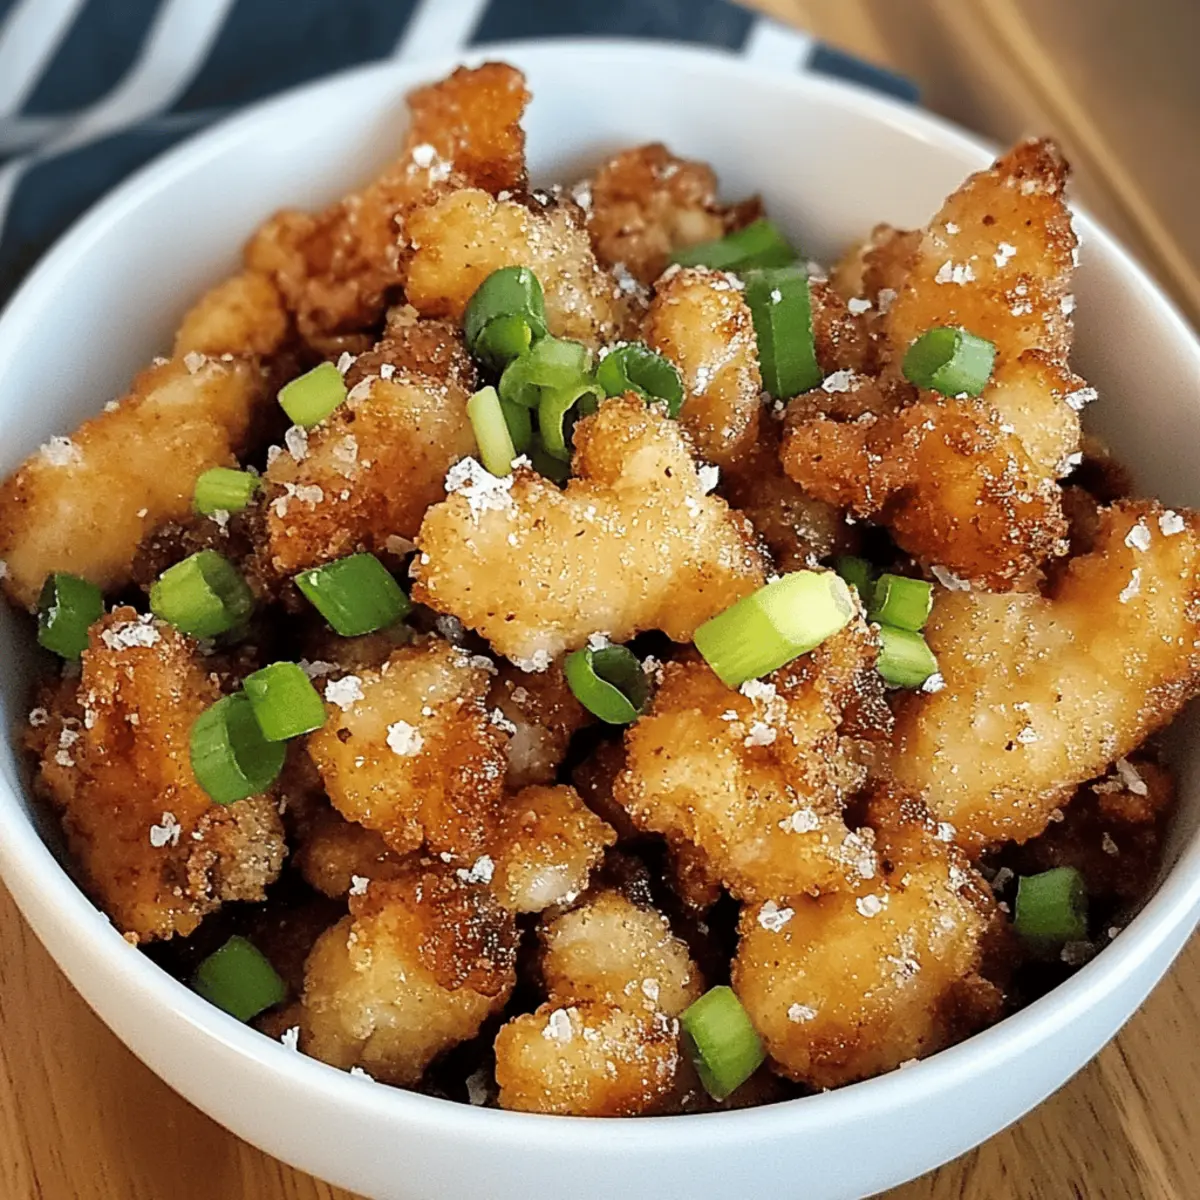
Once all the chicken is fried and drained, return a portion to the wok over low heat. Toss the chicken with additional salt and a generous amount of freshly cracked pepper to enhance the flavors further. Garnish your Crispy Salt and Pepper Chicken with chopped green onions, and serve immediately for a deliciously warm meal that everyone will enjoy.

How to Store and Freeze Crispy Salt and Pepper Chicken
Fridge: Store leftovers in an airtight container for up to 2 days to maintain flavor and freshness.
Freezer: For longer storage, freeze the chicken in a single layer on a baking sheet before transferring to a freezer-safe bag; it lasts up to 3 months.
Reheating: Reheat in an air fryer or skillet over medium heat for optimal crispiness, ensuring it warms through without losing that delicious crunch.
Thawing: When ready to enjoy, thaw in the fridge overnight before reheating for best results.
Make Ahead Options
These Crispy Salt and Pepper Chicken are perfect for busy home cooks looking to save time during the week! You can marinate the chicken chunks in the flavorful marinade up to 24 hours in advance, keeping it covered in the refrigerator to maintain the juiciness and prevent drying out. Additionally, you can coat the marinated chicken with the egg wash and cornstarch, then refrigerate it for up to 3 hours before frying. When you're ready to serve, simply heat your oil and fry the coated chicken pieces until golden brown. This pre-preparation not only saves you time but also ensures that your Crispy Salt and Pepper Chicken remains just as delicious when served fresh!
Crispy Salt and Pepper Chicken Variations
Feel free to get creative with this recipe and tailor it to your taste preferences or dietary needs!
-
Chicken Thighs: Use chicken thighs instead for a juicier and more flavorful bite. The extra fat keeps the meat tender.
-
Honey Sweetener: Swap out brown sugar for honey for a different sweetness profile. It adds a fragrant floral note that pairs beautifully with the savory spices.
-
Sesame Crunch: Add crushed sesame seeds to your cornstarch coating before frying for an extra layer of crunch and nutty flavor that enhances the dish.
-
Spicy Kick: Incorporate red pepper flakes into the marinade for a delightful spicy twist that elevates the dish's complexity and tantalizes the taste buds.
-
Zucchini Noodles: Serve your chicken over sautéed zucchini noodles instead of rice for a healthier, low-carb option. It provides a fresh, vibrant base to balance the richness.
-
Coconut Oil: Fry the chicken in coconut oil for a slightly sweet, tropical flavor that adds a unique touch to your crispy dish.
-
Vegetarian Option: Use firm tofu or tempeh as a protein substitute. Prepare it in the same way as chicken for a delicious meat-free alternative.
-
Garlic Powder Boost: Enhance the flavor further by mixing in garlic powder and onion powder to the cornstarch coating, giving every bite an irresistible kick of garlic flavor.
For a deliciously comforting breakfast, check out my Hash Brown Quiche that your family will love!
Expert Tips for Crispy Salt and Pepper Chicken
-
Oil Temperature: Ensure the oil is at 350°F for the crispiest results; use a small piece of bread to check if it sizzles immediately.
-
Avoid Overcrowding: Fry in small batches to prevent lowering the oil temperature, ensuring each piece gets that perfect crunch.
-
Season Last: Only add salt and pepper after frying to keep the Crispy Salt and Pepper Chicken's coating intact and crunchy.
-
Rest Before Frying: Allow coated chicken pieces to rest for about 10 minutes before frying for a better crust and texture.
-
Use Fresh Garlic: Fresh, minced garlic will heighten flavor; avoid pre-minced varieties that lose potency over time.
What to Serve with Crispy Salt and Pepper Chicken
Transform your Crispy Salt and Pepper Chicken into a complete meal with these delightful pairings that balance flavors and textures.
-
Steamed Jasmine Rice: The fluffy rice soaks up any savory sauce and provides a soft contrast to the crispiness of the chicken.
-
Stir-Fried Vegetables: A colorful medley of stir-fried veggies adds nutrition and a fresh crunch that complements the savory goodness of the chicken.
-
Garlic Noodles: These savory noodles bring a deliciously rich flavor, making them a comforting side that enhances every bite of chicken.
-
Cucumber Salad: This refreshing salad, tossed with a tangy dressing, lightens the meal and offers a crunchy, cooling element that balances the richness.
-
Pineapple Fried Rice: Sweet and savory fried rice with pineapple chunks brings a taste of the tropics, perfectly contrasting with the salty pepper chicken.
-
Chili Garlic Sauce: A side of hot chili garlic sauce provides a spicy kick, enhancing the flavor profile of the dish and adding an extra layer of excitement.
-
Coconut Milk Beverage: Pair your chicken with a refreshing coconut milk drink; its creaminess and subtle sweetness provide a delightful roundness.
-
Mango Sorbet: End your meal on a sweet note with mango sorbet. Its fruity chill is just the thing to cleanse your palate after the savory dinner.
Let these pairings elevate your dining experience and create a well-rounded feast everyone will love!
Crispy Salt and Pepper Chicken Recipe FAQs
What is the best way to select chicken for this recipe?
Absolutely! Choose fresh chicken breast that is firm and has a pinkish color. Avoid any with dark spots or a slimy texture. If you're looking for extra flavor, you might also consider using chicken thighs, which provide a juicier bite.
How should I store leftover Crispy Salt and Pepper Chicken?
I recommend placing leftovers in an airtight container in the fridge, where they will stay fresh for up to 2 days. Make sure to cool the chicken down to room temperature before sealing it up to avoid condensation that can make the breading soggy.
Can I freeze Crispy Salt and Pepper Chicken?
Yes, you can! For freezing, first lay the fried chicken on a baking sheet in a single layer and freeze for about 1 hour until solid. Then, transfer it to a freezer-safe bag and label it with the date. This way, it can last for up to 3 months. When you’re ready to enjoy, thaw it in the fridge overnight, then reheat in the air fryer for best results.
Why is my chicken coating not crispy?
Very common! If the coating isn't crispy, ensure the oil is at the right temperature (350°F) before frying. If the temperature is too low, the chicken will absorb oil and become soggy. Additionally, make sure to avoid overcrowding the pan—fry in batches to maintain that crispy texture.
Is there a gluten-free option for the soy sauce in this recipe?
Yes, indeed! You can easily use tamari as a gluten-free alternative to soy sauce. Make sure to check the label to ensure it meets your dietary needs, and you’re all set to enjoy Crispy Salt and Pepper Chicken without worry!
Can my pets eat this dish?
While it's tempting to share, it's best to avoid giving this crispy chicken to pets. The seasoning and frying oil can be hard on their digestive systems. If you want to treat your furry friends, consider giving them plain, cooked chicken without any seasonings instead.
Crispy Salt and Pepper Chicken: Your New Favorite Cozy Dinner
Ingredients
Equipment
Method
- In a large bowl, combine minced garlic, salt, brown sugar, water, rice wine, baking soda, and soy sauce to create a marinade. Cut chicken breast into bite-sized pieces and add to marinade. Let marinate for 30 minutes.
- While chicken is marinating, beat one large egg in a bowl for the egg wash. Set aside.
- Drain marinated chicken, dip each piece in egg wash, then coat with cornstarch.
- Heat ½ inch of vegetable oil in a wok or deep frying pan to 350°F. Test with a piece of bread.
- Fry coated chicken pieces in batches for 4-5 minutes until golden brown and crispy. Remove with slotted spoon and drain on paper towels.
- Return fried chicken to wok over low heat, add additional salt and cracked pepper to taste. Garnish with green onions and serve immediately.
Leave a Reply