
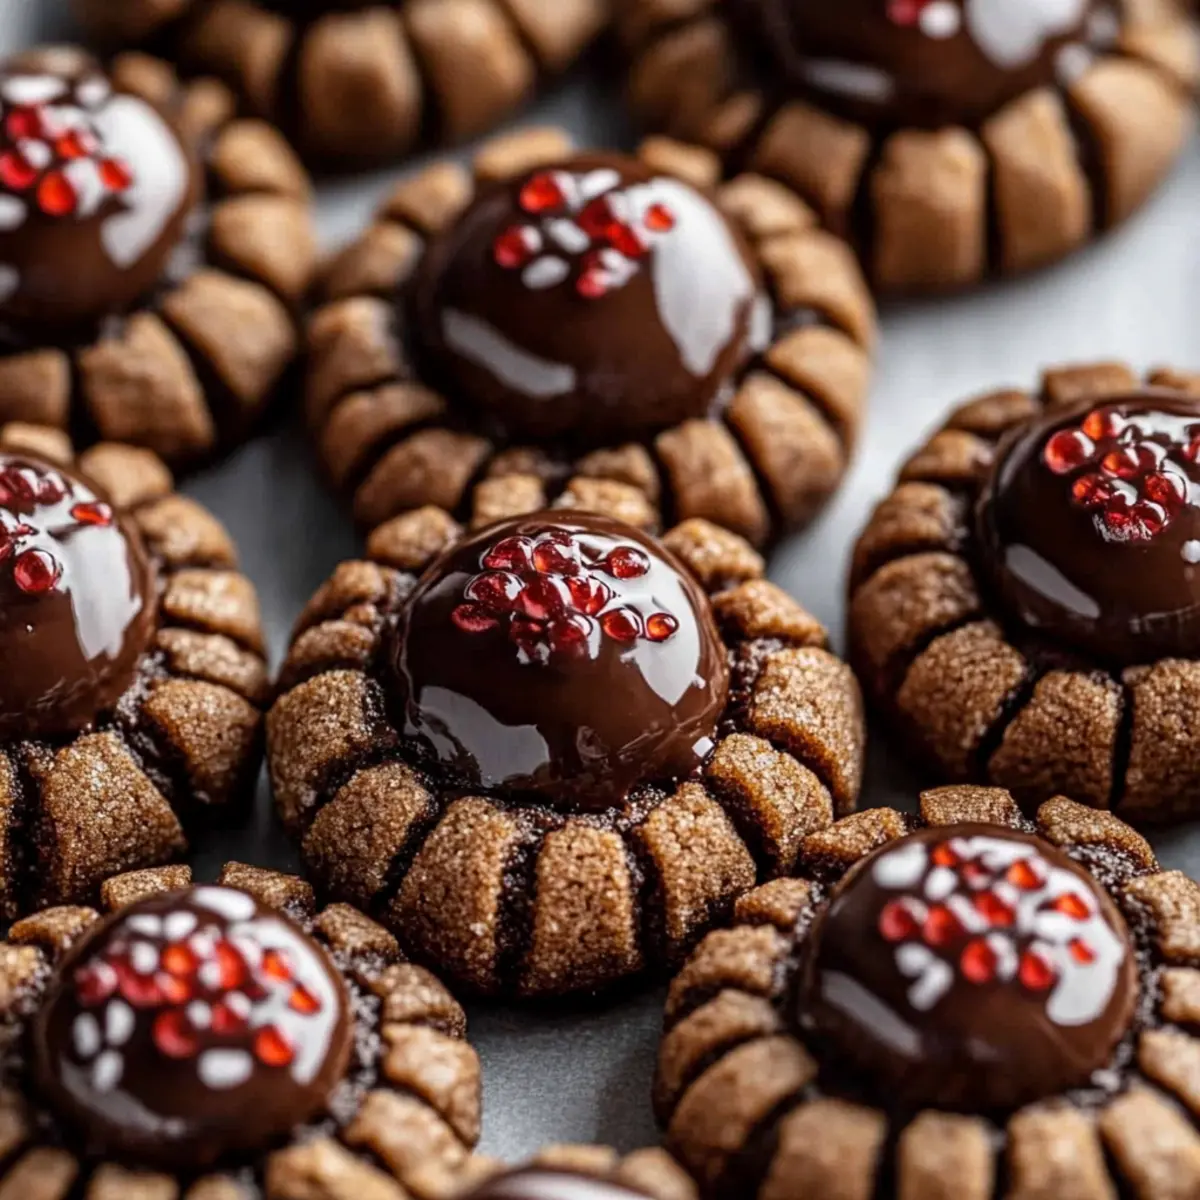
As the holiday season approaches, the delightful scent of baking fills my kitchen, instantly bringing back memories of joyful gatherings and cherished family traditions. This year, I’m thrilled to share my recipe for Chocolate Thumbprint Cookies, a festive treat that’s sure to impress your guests and bring a smile to everyone’s face. These indulgent cookies are not only incredibly easy to make, but they also add a charming twist to your holiday dessert table with their rich chocolate flavor and colorful sprinkles. Perfect for cozy nights spent baking or for sharing during festive get-togethers, these soft and chewy delights are bound to become a seasonal favorite. Ready to learn how to make these scrumptious cookies that promise to fill your home with warmth and joy? Let's dive in!

Why Are These Cookies a Holiday Must?
Irresistible Chocolate Flavor: With a deep, rich cocoa base, these cookies are a chocolate lover's dream.
Quick Prep Time: Ready in under an hour, they fit perfectly into your busy holiday schedule.
Versatile Delight: Feel free to customize with different fillings or toppings—peppermint, fruit preserves, or nuts for a twist!
Family-Friendly Fun: A great way to get kids involved in baking, making memories together is as sweet as these cookies.
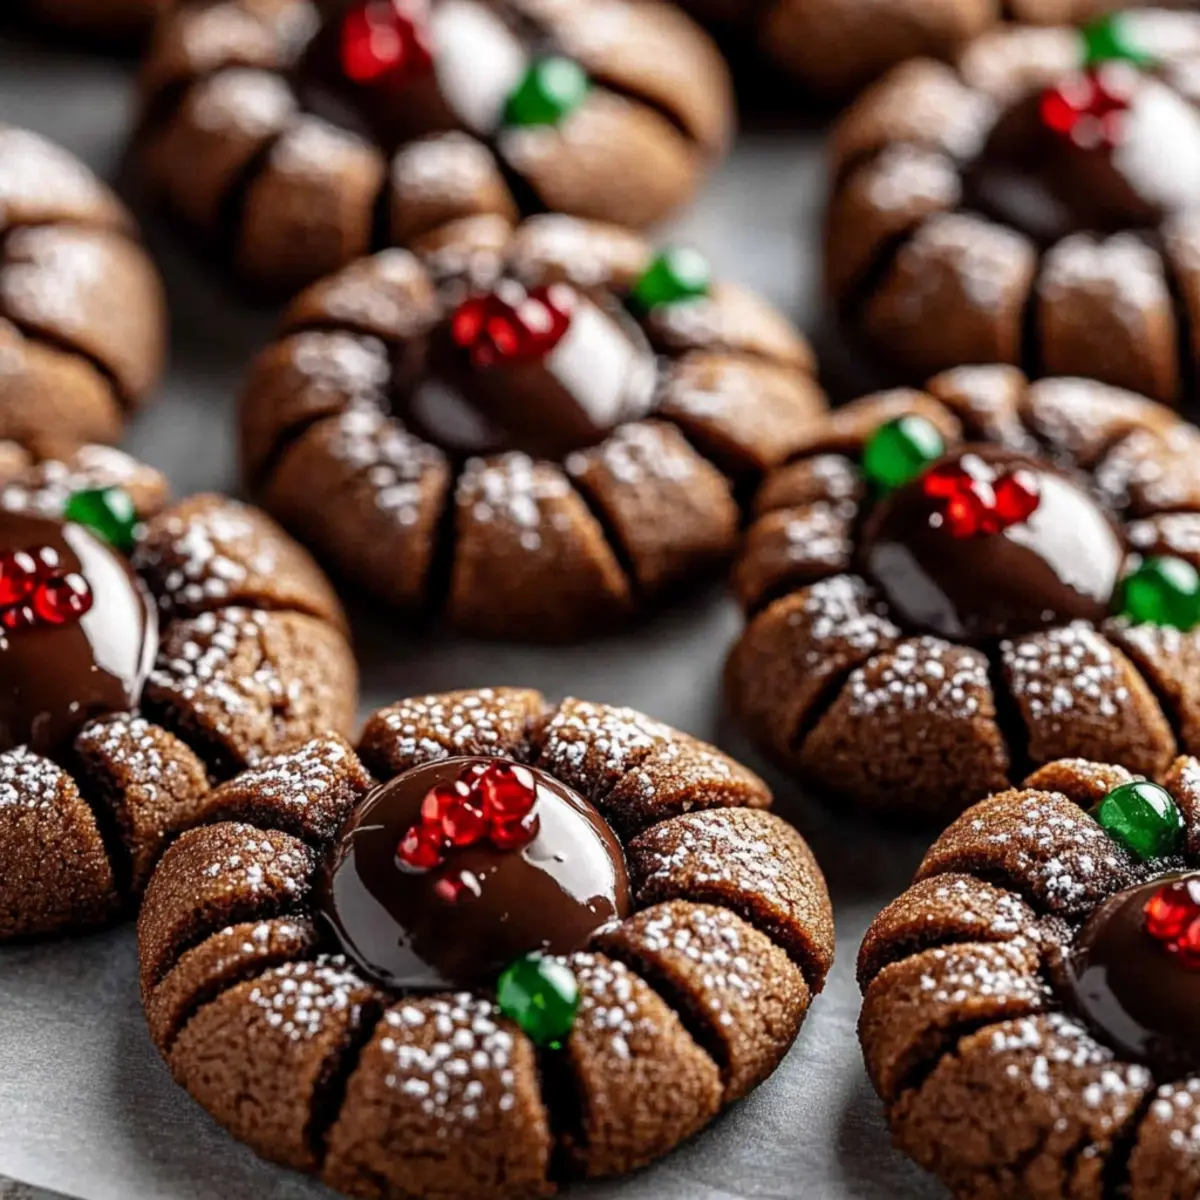
Stunning Presentation: The vibrant holiday sprinkles add a splash of color, making them visually irresistible for festive gatherings.
These Chocolate Thumbprint Cookies are truly a showstopper, perfect for creating a joyful atmosphere during your holiday celebrations!
Chocolate Thumbprint Cookies Ingredients
For the Cookie Dough
• Unsalted Butter – Provides richness and moisture; salted butter can work if you reduce added salt accordingly.
• Granulated Sugar – Adds sweetness and crucial texture; brown sugar can be substituted for a chewier bite.
• Large Egg – Binds the ingredients together and aids in keeping the cookies moist.
• Vanilla Extract – Enhances flavor complexity; almond extract is a great alternative for a different twist.
• All-Purpose Flour – Acts as the structural base that gives the cookies their shape.
• Unsweetened Cocoa Powder – Imparts that essential chocolate flavor; Dutch-processed cocoa lends a smoother richness.
• Salt – Enhances the overall flavors, bringing the cookie to life.
For the Filling
• Semisweet Chocolate Chips – The star of the filling, delivering rich bursts of chocolate; try dark chocolate chips for added decadence.
• Heavy Cream – Creates a smooth and luscious chocolate filling; swap with full-fat coconut milk for a dairy-free option.
For Decoration
• Holiday Sprinkles – Perfect for festive flair; feel free to replace with crushed nuts or coconut flakes for added texture and flavor.
Get ready to bake these delightful Chocolate Thumbprint Cookies that will bring warmth and joy to your holiday season!
Step-by-Step Instructions for Chocolate Thumbprint Cookies
Step 1: Preheat the Oven
Begin by preheating your oven to 350°F (177°C) to ensure it’s hot and ready for baking. While the oven heats, line two baking sheets with parchment paper for easy cookie removal and cleanup. This step sets the groundwork for perfectly baked Chocolate Thumbprint Cookies, ensuring they have the right texture.
Step 2: Cream Butter and Sugar
In a large mixing bowl, add the softened unsalted butter and granulated sugar. Using a hand mixer or stand mixer, beat them together on medium speed until the mixture is light and fluffy, approximately 2-3 minutes. Incorporate the large egg and vanilla extract, mixing until well combined. This fluffy mixture becomes the flavorful base of your cookies.
Step 3: Combine Dry Ingredients
In a separate bowl, whisk together the all-purpose flour, unsweetened cocoa powder, and salt until evenly mixed. Gradually add this dry mix into the butter mixture, stirring gently until just incorporated. Be careful not to overmix; you want a cohesive dough that’s slightly sticky, ready for shaping into those delightful cookies.
Step 4: Shape Cookies
With clean hands, roll the dough into 1-inch balls and place them on the prepared baking sheets, leaving space between each cookie. Using your thumb, gently press down in the center of each ball to create a small indentation—this is where the sweet chocolate filling will go after baking. It should look inviting and ready to hold all that chocolate goodness.
Step 5: Bake
Slide the baking sheets into the preheated oven and bake for about 12 minutes. Keep an eye on them; the cookies should be set but still soft to the touch. Once done, remove the sheets from the oven and allow the cookies to cool for 5 minutes on the sheets. This cooling period lets them firm up slightly before transferring to a wire rack.
Step 6: Prepare Filling
While the cookies cool, take a microwave-safe bowl and combine the semisweet chocolate chips with heavy cream. Microwave in short bursts of 20 seconds, stirring in between until the mixture is smooth and glossy. This rich filling will be the heart of your Chocolate Thumbprint Cookies, adding decadence to each bite.
Step 7: Fill Cookies and Decorate
Once the cookies have cooled completely, use a small spoon or piping bag to fill each indentation with the melted chocolate mixture. Top each filled cookie with colorful holiday sprinkles for a festive touch. This final step elevates your cookies, making them not only delicious but also visually appealing for your holiday gatherings.
How to Store and Freeze Chocolate Thumbprint Cookies
Airtight Container: Store cookies in an airtight container at room temperature for up to 4-5 days to maintain their soft and chewy texture.
Fridge Storage: If you prefer, you can keep them in the fridge for up to a week. Just ensure they are sealed tightly to avoid absorbing any odors.
Freezing: For longer storage, freeze the cookies in a single layer on a baking sheet, then transfer to a freezer bag for up to 3 months. Thaw them at room temperature when ready to enjoy!
Reheating: To refresh, reheat in a microwave for 10-15 seconds. This will bring back some of their original softness, making your Chocolate Thumbprint Cookies delightfully chewy again.
Make Ahead Options
These Chocolate Thumbprint Cookies are perfect for meal prep, allowing you to save precious time during the busy holiday season! You can prepare the cookie dough and refrigerate it for up to 24 hours before baking. Simply roll the dough into balls and store them in an airtight container. This not only keeps your cookie dough fresh but also intensifies the flavors. When you’re ready to bake, preheat your oven and shape the dough as instructed. After baking, fill the cookies with the chocolate ganache and decorate with sprinkles just before serving for the best presentation and taste. With this prep-ahead approach, you’ll have delicious, festive cookies ready with minimal effort on the day of your gathering!
Chocolate Thumbprint Cookies Variations
Feel free to explore these delightful variations that can give your Chocolate Thumbprint Cookies a unique twist and cater to different tastes!
- Dairy-Free: Substitute heavy cream with full-fat coconut milk for a rich, dairy-free filling.
- Nutty Surprise: Add chopped nuts like walnuts or pecans to the dough for an extra crunch and depth of flavor.
- Fruit-Inspired: Swap the chocolate filling with fruit preserves—raspberry or apricot add a lovely fruity contrast to the chocolate.
- Minty Freshness: Use peppermint extract instead of vanilla for a festive, refreshing touch that dances on your palate.
- Spicy Chocolate: Mix in a pinch of cayenne pepper or chili powder for a surprising and delightful heat that pairs beautifully with chocolate.
Experimenting in the kitchen is part of the joy of baking! Don't hesitate to incorporate your favorite variations, and remember, each twist brings a new story to your holiday baking tradition. If you're eager for more ways to enjoy chocolate, check out my post on Irresistible Chocolate Desserts. It's a treasure of sweet inspiration!
Expert Tips for Chocolate Thumbprint Cookies
-
Butter Softness: Ensure your unsalted butter is fully softened before creaming to achieve the right texture. Cold butter can lead to dense cookies.
-
Cool Completely: Let your cookies cool entirely before adding the chocolate filling. This prevents the warm cookies from melting the filling.
-
Watch the Bake Time: Avoid overbaking! The cookies should be just set and soft to the touch for that perfect chewy texture.
-
Quality Ingredients: Invest in high-quality cocoa powder and chocolate chips to enhance the rich chocolate flavor of your Chocolate Thumbprint Cookies.
-
Indention Depth: When creating the thumbprint, make sure it's deep enough to hold the filling but not too deep that it breaks the base of the cookie.
What to Serve with Chocolate Thumbprint Cookies
These delightful treats pair beautifully with comforting accompaniments that will enhance your holiday festivities even further.
-
Glass of Milk: A classic pairing that complements the rich chocolate flavor and adds a refreshing contrast to each bite.
-
Warm Coffee: The bitterness of coffee offsets the sweetness of the cookies, making it a perfect afternoon pick-me-up during holiday baking.
-
Hot Cocoa: For the ultimate chocolate experience, serving these cookies with a cup of velvety hot cocoa creates a cozy winter moment.
-
Vanilla Ice Cream: The creamy texture of vanilla ice cream pairs wonderfully with the chewy cookies, making for an indulgent dessert duet.
-
Fruit Salad: A vibrant fruit salad brings a light and refreshing element to your table, balancing the richness of the cookies with bright flavors.
-
Decadent Cheesecake: Offering creamy cheesecakes topped with chocolate ganache or fruit complements and elevates the overall dessert experience.
-
Mulled Wine: This warm, spiced beverage adds to the festive spirit, enhancing the flavors of chocolate while creating a cozy atmosphere.
-
Nutty Biscotti: A crunchy texture difference makes a delightful contrast, perfect for dipping into a warming drink alongside your cookies.
-
Shortbread Cookies: More buttery and crumbly, shortbreads bring a traditional touch to your holiday spread that pairs perfectly with the thumbprints.

Chocolate Thumbprint Cookies Recipe FAQs
How do I choose the right chocolate for these cookies?
Absolutely! When it comes to selecting chocolate, I recommend using high-quality semisweet chocolate chips for the filling, as they melt beautifully and provide a rich flavor. If you’re feeling adventurous, dark chocolate chips can elevate the taste to a more decadent level. Always check the cocoa content on the packaging; a higher percentage means more intense chocolate flavor!
How should I store leftover cookies?
Very! To keep your Chocolate Thumbprint Cookies fresh, store them in an airtight container at room temperature for up to 4-5 days. If you want them to last longer, place them in the fridge where they can stay fresh for about a week. Just remember to seal them well to prevent any odors from seeping in.
Can I freeze these cookies for later?
Absolutely! Freezing Chocolate Thumbprint Cookies is a great way to save some for future enjoyment. Start by placing the cookies in a single layer on a baking sheet until they're frozen solid. Then transfer them to a zip-lock freezer bag or a sealed container and they’ll stay fresh for up to 3 months. When you're ready, just thaw them at room temperature or pop them in the microwave for a quick refresh!
What should I do if my cookie dough is too sticky?
If you find that your cookie dough is too sticky to handle, be reassured this can happen sometimes. Just sprinkle a little extra flour onto your hands and work surface as you shape the cookies, ensuring they don't stick. Alternatively, chill the dough in the refrigerator for about 30 minutes, which can make it easier to handle and shape into perfect 1-inch balls.
Are these cookies safe for pets or those with allergies?
Great question! Unfortunately, Chocolate Thumbprint Cookies are not suitable for pets, as chocolate is toxic to dogs and other animals. For those with allergies, this recipe contains common allergens such as eggs, dairy, and gluten, so it's always best to check with a medical professional or substitute accordingly. You can try vegan butter, a flaxseed egg, and gluten-free flour if you need to modify the recipe!
Can I change the filling for these cookies?
The more the merrier! Feel free to customize your filling to match your taste! Instead of chocolate, you can use fruit preserves for a fruity thumbprint version. Raspberry or apricot jams make delightful alternatives that pair beautifully with the rich chocolate dough. Just spoon in a bit into the indentation before baking for a sweet surprise!
Decadent Chocolate Thumbprint Cookies to Sweeten Your Holidays
Ingredients
Equipment
Method
- Preheat your oven to 350°F (177°C) and line two baking sheets with parchment paper.
- In a large mixing bowl, cream the unsalted butter and granulated sugar until light and fluffy, then add the egg and vanilla extract and mix well.
- In a separate bowl, whisk together the flour, cocoa powder, and salt. Gradually add to the butter mixture, stirring until just combined.
- Roll the dough into 1-inch balls and place them on the baking sheets. Press a thumbprint in the center of each ball.
- Bake for about 12 minutes. Let them cool on the sheets for 5 minutes before transferring to a wire rack.
- Combine the chocolate chips and heavy cream in a microwave-safe bowl. Microwave until smooth and glossy.
- Fill each cookie indentation with the chocolate mixture and top with holiday sprinkles.


Leave a Reply