
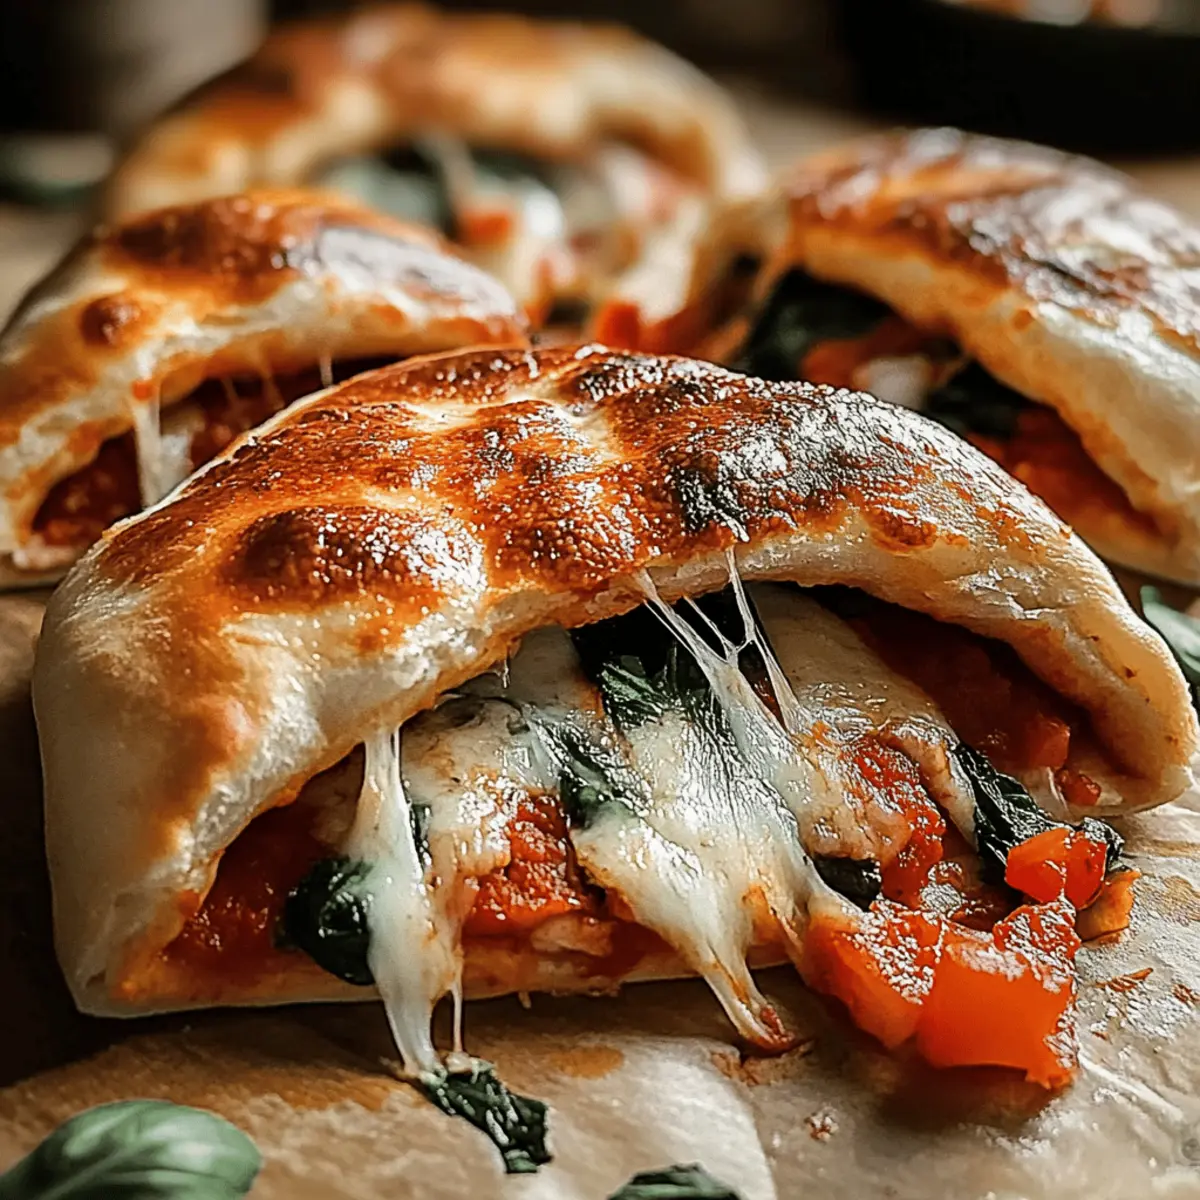
“Have you ever bit into a perfectly baked calzone and felt like you were transported straight to an Italian piazza?” These wood-fired calzones are not only a delightful escape for your taste buds but are also your new go-to comfort food. With their golden, chewy crust, they encase a warm, customizable filling that can be tailored to your family's preferences, from classic cheese to zesty veggie combinations. What’s more, they’re quick and easy to prepare in under 30 minutes, making them perfect for busy weeknights or heartfelt gatherings. Whether you're seeking a healthy upgrade or a fun twist on a beloved recipe, these calzones can do it all. Ready to bring a taste of Italy home? Let’s dive in!

Why Are Wood-Fired Calzones So Special?
Unmatched Flavor: The smoky aroma from the wood fire infuses every bite, creating a taste sensation that you won't find with regular oven-baked calzones.
Quick Preparation: These delightful pockets can be ready in under 30 minutes, making them a perfect option for busy weeknights.
Customizable Goodness: Whether you’re craving traditional cheese, spicy meats, or fresh veggies, you can easily personalize the filling to suit your taste.
Family-Friendly: Kids and adults alike will love these comforting treats, making them a hit for family gatherings or casual dinners. Pair them with a classic Caesar salad for a complete meal experience!
Versatile Options: From gluten-free dough to dairy-free cheese alternatives, you can easily adapt this recipe to accommodate various dietary needs.
Wood-Fired Calzones Ingredients
For the Dough
- Pizza Dough – A store-bought option saves time and provides a reliable base for flavorful calzones.
For the Filling
- Ricotta Cheese – Provides a creamy texture; swap for cottage cheese for a lighter feel.
- Shredded Mozzarella – Melts beautifully for that gooey goodness; try provolone for a deeper flavor.
- Grated Parmesan – Adds savory depth to your filling; use other cheeses if Parmesan isn’t on hand.
- Italian Seasoning – Infuses your calzones with classic Italian flavors; fresh herbs like basil or oregano can elevate the taste.
- Optional Fillings – Customize with favorites like pepperoni, sautéed mushrooms, or spinach for added variety.
For Assembly
- Olive Oil – Brush on for a crispy finish; melted butter can also work wonders.
- Marinara or Pizza Sauce – Serve on the side for dipping; whether homemade or store-bought, it’s a must!
- Garlic – Adds a punch of aromatic flavor; feel free to omit for a milder taste.
Bring the taste of Italy straight to your dinner table with these delectable wood-fired calzones and enjoy their endless possibilities!
Step‑by‑Step Instructions for Wood-Fired Calzones
Step 1: Preheat the Oven
Begin by preheating your wood-fired oven to a sizzling 500–550°F (260–290°C). This high temperature is key to achieving that deliciously crispy crust characteristic of wood-fired calzones. As the oven warms up, it’ll fill your kitchen with an enticing aroma, building anticipation for the tasty meal ahead.
Step 2: Roll the Dough
On a floured surface, gently roll your pizza dough into circles approximately 8–9 inches in diameter. Aim for a thickness that is neither too thin nor too thick, allowing for a chewy inside and a perfectly crisp exterior. As you roll, keep the surfaces lightly floured to prevent sticking, ensuring an easy transfer to the next step.
Step 3: Prepare the Filling
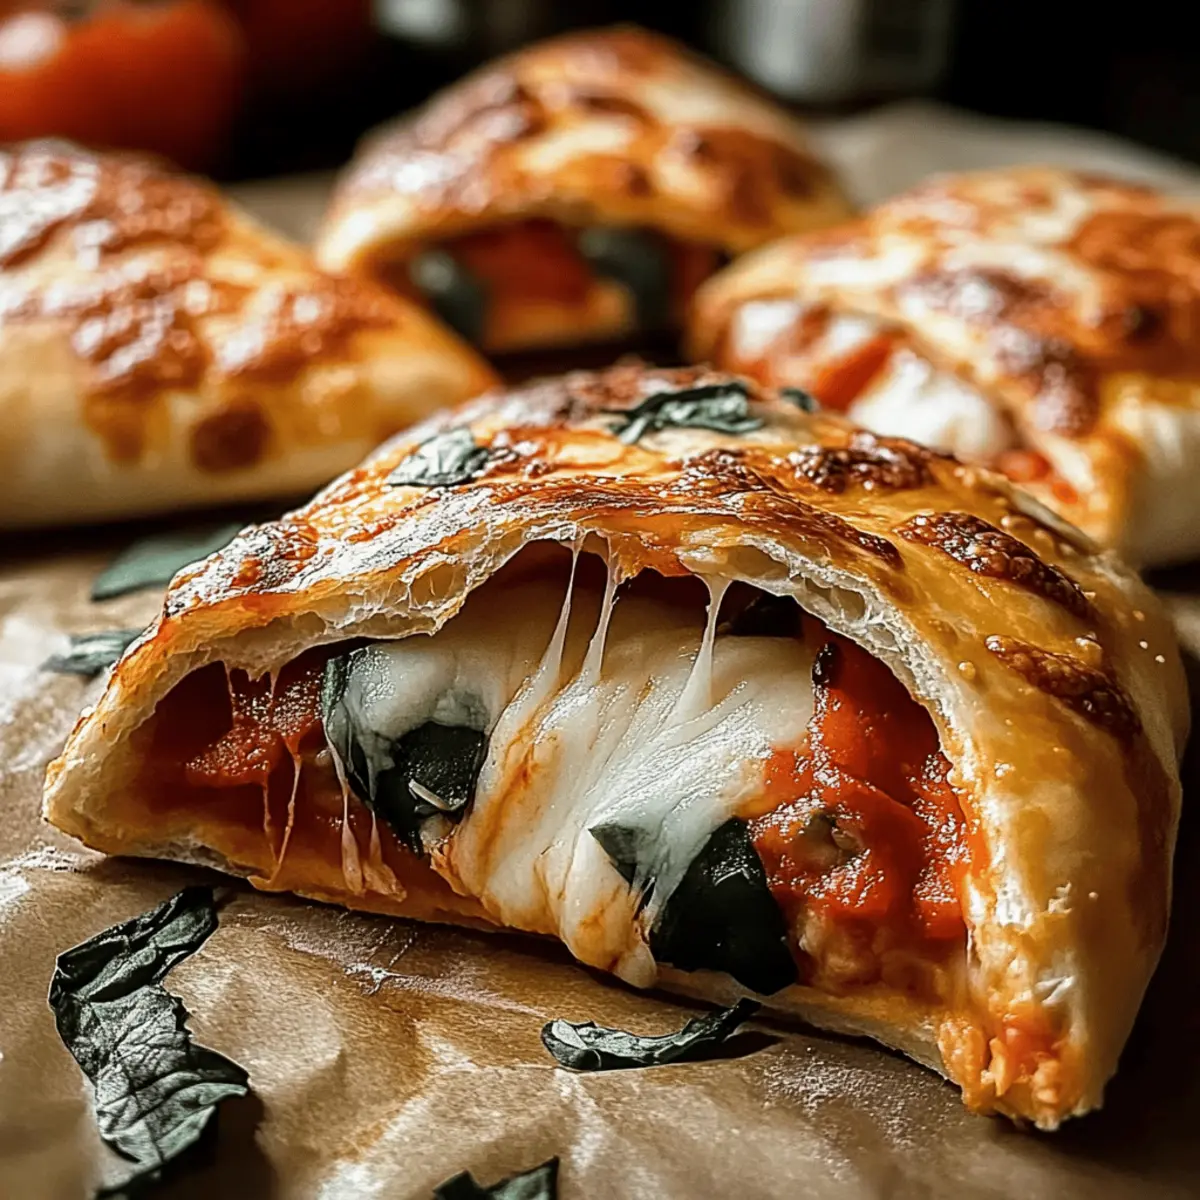
In a mixing bowl, combine ricotta, shredded mozzarella, grated Parmesan, minced garlic, and Italian seasoning. Stir until well blended, creating a creamy filling bursting with flavor. This delightful mixture will create a gooey center, bringing your wood-fired calzones to life. Set the filling aside as you get ready to assemble.
Step 4: Assemble the Calzones
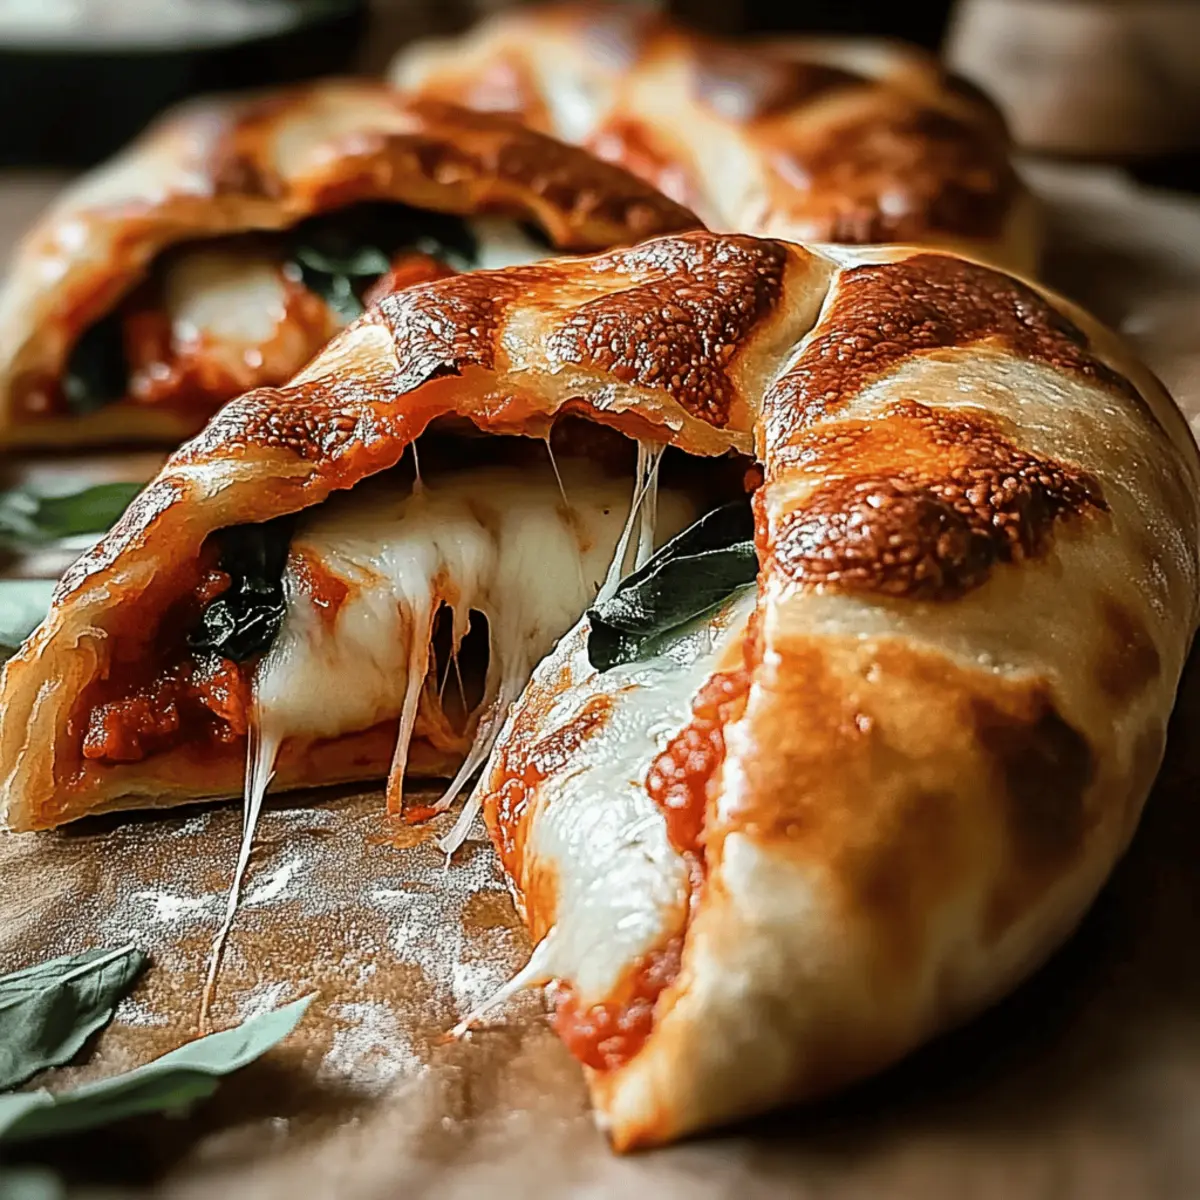
Spread a layer of marinara sauce over one half of each dough circle, leaving a small border for sealing. Next, spoon an ample amount of the cheesy filling onto the sauce. This combination of flavors will create a harmonious balance that elevates your wood-fired calzones, making them irresistible.
Step 5: Seal the Calzones
Carefully fold the dough over the filling to create a semi-circle. Use your fingers to crimp the edges tightly, ensuring that they are well sealed. This step is crucial to prevent any delicious fillings from leaking out during baking, delivering a mess-free experience when you bite into your calzone.
Step 6: Bake the Calzones
Gently place the assembled calzones on a floured pizza peel to prepare for the oven. Slide them into the wood-fired oven and bake for 6–8 minutes, rotating halfway through. Keep an eye on them as they cook; you’re looking for a golden-brown crust that signals they are perfectly baked and ready to serve.
Step 7: Finish and Serve
Once the calzones are golden and aromatic, carefully remove them from the oven. Brush the tops with a bit of olive oil for an appealing sheen and extra flavor. Allow them to cool slightly before serving, pairing with a side of marinara sauce for dipping, and enjoy these delicious wood-fired calzones straight from your kitchen!
Make Ahead Options
These wood-fired calzones are a fantastic choice for meal prep, making your busy weeknights a breeze! You can prepare the filling (ricotta, mozzarella, Parmesan, and Italian seasoning) and refrigerate it for up to 3 days. Additionally, you can roll the dough circles in advance and keep them covered in the refrigerator for up to 24 hours. To maintain freshness, wrap the dough tightly in plastic wrap to prevent it from drying out. When you’re ready to enjoy, simply assemble the calzones, brush with olive oil, and bake them directly from the fridge. Just like that, you’ll have hot, cheesy wood-fired calzones ready to serve with minimal effort!
Storage Tips for Wood-Fired Calzones
-
Room Temperature: Store leftover calzones in an airtight container for up to 2 days at room temperature. Consume them as a tasty snack or quick meal.
-
Fridge: Keep calzones in the refrigerator for up to 3 days. Reheat them in an oven at 350°F (175°C) for about 10 minutes for optimal warmth and crispiness.
-
Freezer: Wrap unbaked calzones tightly in plastic wrap and freeze for up to 3 months. Bake directly from frozen at 475°F (245°C) for approximately 10–12 minutes, ensuring a fresh taste.
-
Reheating: For best results, reheat calzones in a conventional oven rather than a microwave to preserve the crispy texture of the crust. Enjoy your delicious wood-fired calzones at any time!
Expert Tips for Wood-Fired Calzones
-
Perfect Temperature: Ensure your wood-fired oven is preheated to the right temperature. This creates that signature crispy crust you love in wood-fired calzones.
-
Floured Surfaces: Use plenty of flour on your rolling surface to prevent sticking. This ensures easy handling and a flawless transfer to the oven.
-
Don’t Overfill: Avoid overstuffing your calzones. Too much filling can lead to leaks during baking, ruining that perfect shape and crust!
-
Tight Seals: Crimp the edges securely to keep your fillings inside. A well-sealed calzone prevents the delicious insides from escaping during cooking.
-
Watch the Clock: Keep an eye on baking times as wood-fired ovens can cook faster than conventional ones. Aim for a golden-brown finish without burning.
Wood-Fired Calzones Variations
Customize your wood-fired calzones to delight everyone’s taste buds and make each meal an adventure!
- Dairy-Free: Swap out traditional cheeses for your favorite vegan alternatives to create a deliciously creamy filling without dairy.
- Gluten-Free: Use gluten-free pizza dough to ensure everyone at the table can join in on the fun, making these calzones accessible for those with sensitivities.
- Spicy Kick: Add diced jalapeños or banana peppers to the filling for a delightful burst of heat that will awaken your taste buds. A little spice makes everything nice!
- Herb Garden: Replace Italian seasoning with freshly chopped herbs like thyme or rosemary to enhance the flavor; it brings a vibrant twist to your calzone experience.
- Sweet Version: For a fun dessert twist, fill with Nutella and strawberries, then bake for a sweet surprise that will delight your family after dinner.
- Meat Lover’s Delight: Amp up the protein by adding cooked sausage or pepperoni to satisfy those hearty appetites. The savory flavors create a filling experience!
- Vegetable Medley: Mix in sautéed bell peppers, onions, and spinach to get your daily veggies while keeping it hearty and flavorful. It’s a feast for both the eyes and the palate!
- Cheesy Trio: Combine ricotta, mozzarella, and fontina for a luxurious and gooey filling; the mix of flavors will take your calzones to the next level of deliciousness.
Feel free to experiment with these variations and make them your own! For ideas on how to serve these calzones, consider pairing them with a classic Caesar salad or perhaps a side of roasted potatoes for a complete meal. Happy cooking!
What to Serve with Wood-Fired Calzones
Elevate your dining experience with delicious sides that complement the warm flavors of your wood-fired calzones.
-
Garlic Breadsticks: Perfectly crispy and soft, these sticks add a delightful crunch and aromatic flavor that enhances each bite.
-
Classic Caesar Salad: Crisp romaine and creamy dressing bring a refreshing contrast, making each forkful of calzone even more enjoyable.
-
Roasted Vegetables: A medley of colorful, caramelized veggies complements the richness of the calzones, adding depth and nutrition to your meal.
-
Zesty Coleslaw: The bright flavors of this creamy slaw provide a nice balance to the savory calzones, adding a crunchy texture that everyone loves.
-
Italian Tomato Salad: Fresh tomatoes, basil, and a drizzle of balsamic vinegar offer a light and tangy side that brightens up the meal.
-
Tiramisu: Cap off your cozy dinner with this classic Italian dessert, where the layers of coffee-soaked goodness create a sweet, sumptuous finish.
-
Sparkling Water: A bubbly drink enhances the dining experience with its refreshing effervescence, balancing the hearty flavors of the calzones beautifully.
These pairings promise a satisfying meal that speaks to comfort and delight, creating cherished moments around the dining table.
Wood-Fired Calzones Recipe FAQs
What kind of pizza dough should I use?
Absolutely! You can use store-bought pizza dough for convenience; it saves time and still provides a delicious base. If you prefer, homemade dough can be fun and rewarding, allowing you to customize your flavor with herbs or spices. Just ensure it's well-kneaded for that perfect chew!
How do I store leftover calzones?
I recommend storing leftover calzones in an airtight container. At room temperature, they can last for up to 2 days, but for longer freshness, pop them in the fridge where they will keep for up to 3 days. When you're ready to enjoy them again, reheat in a 350°F (175°C) oven for about 10 minutes to restore that lovely crispiness!
Can I freeze unbaked calzones?
Yes! Freezing unbaked calzones is a brilliant option for future meals. Wrap each calzone tightly in plastic wrap or aluminum foil, then place them in a freezer-safe bag. They will stay fresh for up to 3 months. When you’re ready to bake, simply cook them directly from frozen at 475°F (245°C) for about 10–12 minutes.
What if my calzones are leaking during baking?
Oh no! If your calzones do leak, it could be due to overfilling or not sealing the edges tightly enough. To avoid this, make sure to leave a small border free of filling when assembling, and crimp the edges firmly. If leaks do occur, don’t worry—they’ll still taste great. Just consider using a baking tray to catch any drips!
Are these calzones suitable for dietary restrictions?
Very much so! You can easily adapt these wood-fired calzones for dietary needs. For a dairy-free option, substitute the cheeses with vegan alternatives, and for gluten-free requirements, opt for a gluten-free pizza dough. Don't hesitate to get creative with fillings to ensure everyone can enjoy this delicious comfort food.
Irresistible Wood-Fired Calzones for Cozy Family Nights
Ingredients
Equipment
Method
- Preheat your wood-fired oven to a sizzling 500–550°F (260–290°C).
- On a floured surface, roll your pizza dough into circles approximately 8–9 inches in diameter.
- In a mixing bowl, combine ricotta, shredded mozzarella, grated Parmesan, minced garlic, and Italian seasoning. Stir until well blended.
- Spread a layer of marinara sauce over one half of each dough circle. Spoon the cheesy filling onto the sauce.
- Fold the dough over the filling to create a semi-circle, crimping the edges tightly to seal.
- Place the assembled calzones on a floured pizza peel and bake for 6–8 minutes, rotating halfway through.
- Remove from the oven when golden and brush the tops with olive oil before serving.


Leave a Reply