
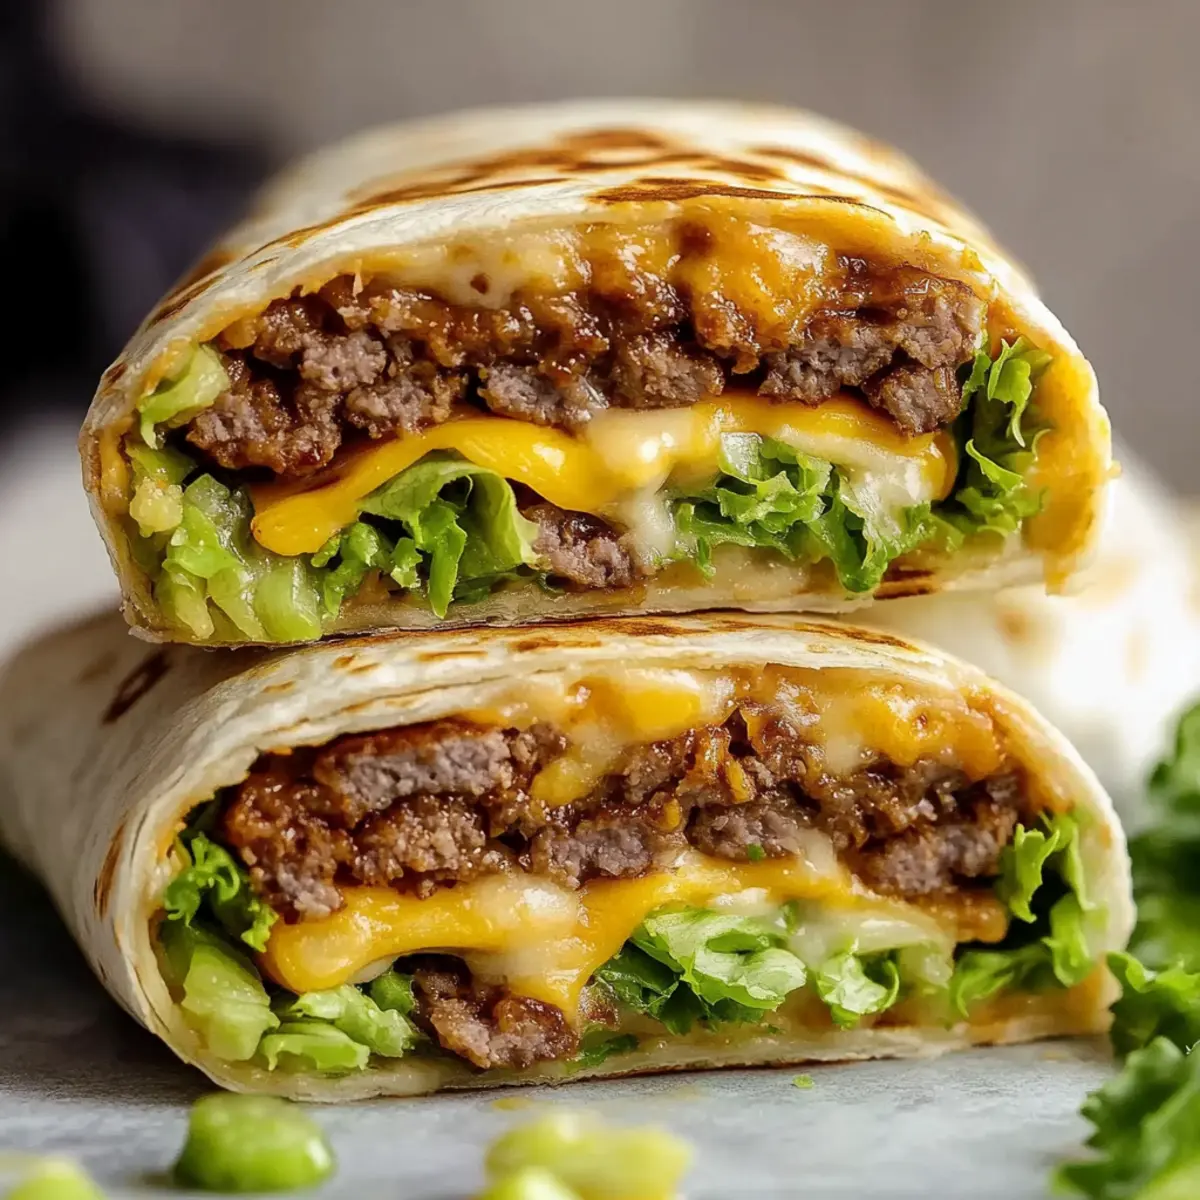
As I took a bite of my latest creation, a wave of nostalgia washed over me—the unmistakable taste of a classic cheeseburger wrapped in a cozy tortilla. These Quick and Easy Cheeseburger Wraps effortlessly blend juicy beef, melty cheese, and your favorite toppings into a convenient meal that whisks you away from fast food fatigue. Whether you're whipping them up for a busy weeknight dinner or a casual family gathering, these wraps are not just a treat for the taste buds; they’re also a breeze to prepare and clean up after. With endless options for customization—like spicy jalapeños or bacon goodness—you can cater to everyone’s cravings. Ready to dive into the delicious world of Cheeseburger Wraps? Let’s get cooking!
Why Are Cheeseburger Wraps So Loved?
Convenience: These wraps are quick to make, perfect for busy weeknights or last-minute meals. Flavor Combo: Enjoy the rich combination of seasoned beef, melted cheese, and zesty toppings that satisfy every crave. Customizable: With options like Bacon Cheeseburger and Vegetarian Wraps, everyone at the table can enjoy their favorite twist. Low-Carb Friendly: Swap traditional tortillas for low-carb varieties, making this recipe an easy fit into various diets. Family-Friendly: Kids and adults alike adore these delicious wraps, making dinner prep a breeze. Dive into the fun of cooking with these Cheeseburger Wraps for a delightful twist on a classic meal!
Cheeseburger Wraps Ingredients
• Ready to make your wraps?
For the Filling
- Ground Beef – Provides the main protein and flavor; substitute with lean beef or plant-based meat for a lighter option.
- Onion – Adds sweetness and depth; finely chop for better incorporation into the filling.
- Garlic Powder – Enhances the savory flavor; you can use fresh garlic if you prefer.
- Cheddar Cheese – Offers a classic cheeseburger taste; other varieties like American or Colby Jack melt beautifully too.
For the Wraps
- Tortilla Wraps – The delicious outer layer; large flour tortillas are ideal, but low-carb tortillas make for healthy choices.
- Pickles – Provides crunch and tang; chop finely to ensure even distribution throughout the wrap.
For the Condiments
- Ketchup & Mustard – Essential for mimicking that classic cheeseburger experience; adjust to your taste preferences.
- Salt & Black Pepper – For seasoning the beef; always taste before assembling for the best flavor.
For Toasting
- Butter or Oil – Used for toasting the wraps until golden; oil is a great lighter alternative.
Enjoy whipping up these delightful Cheeseburger Wraps that bring joy to family dinners!
Step‑by‑Step Instructions for Cheeseburger Wraps
Step 1: Cook the Beef
Begin by heating a skillet over medium heat. Add the ground beef and finely chopped onion, stirring occasionally. Cook until the beef is browned and the onion has softened, about 6–8 minutes. Look for a uniform brown color in the meat and translucent onions, ensuring everything is cooked through.
Step 2: Add Seasoning
Once the beef is cooked, stir in the garlic powder, salt, and black pepper. Cook for an additional 30 seconds on the same heat to allow the spices to bloom and release their aromatic flavors. This step enhances the cheeseburger wraps’ overall taste, making the filling even more savory.
Step 3: Drain Grease
If you prefer less greasy wraps, carefully drain any excess fat from the skillet. This ensures you have a lighter filling that won’t soak through the tortillas. Allow the meat mixture to sit for a moment while you prepare to add the cheese for that cheesy goodness.
Step 4: Melt Cheese
Reduce the heat to low, then sprinkle the cheddar cheese over the beef mixture. Stir gently until the cheese is melted and fully combined with the meat, creating a rich, gooey filling. This should take about 2–3 minutes, resulting in a deliciously cheesy mixture that encapsulates the essence of cheeseburger wraps.
Step 5: Mix in Toppings
Incorporate chopped pickles, ketchup, and mustard into the melted cheese and beef mixture. Stir until everything is well-distributed, ensuring that you get that classic cheeseburger flavor in each bite. Taste and adjust the seasoning if necessary before proceeding to assemble the wraps.
Step 6: Assemble Wraps
Lay your tortilla wraps flat on a clean surface. Spoon the cheeseburger filling into the center of each tortilla, making sure not to overfill. Fold the sides inward and roll the wrap tightly from the bottom to enclose the filling. This secures the delicious flavors of your cheeseburger wraps in every bite.
Step 7: Toast Wraps
In the same skillet, heat a little butter or oil over medium-high heat. Place the wraps seam-side down and toast for 2–3 minutes on each side, until golden and crispy. Keep an eye on them to prevent burning; you're aiming for a delightful, crunchy texture that perfectly complements the warm filling.
Step 8: Serve
Once toasted, remove the wraps from the skillet and let them cool slightly. Slice them in half for easy handling or serve them whole for a heartier portion. Enjoy your warm and irresistible cheeseburger wraps while they’re fresh, savoring the comforting flavors that take you back to your favorite burger joint.
Expert Tips for Cheeseburger Wraps
-
Perfectly Browned Beef: Ensure the ground beef is evenly browned by breaking it into small pieces as it cooks; this avoids any raw spots in your wraps.
-
Cheese Melting Magic: Use shredded cheese for quicker melting; it incorporates better with the beef and creates a creamy filling in your cheeseburger wraps.
-
Avoid Soggy Wraps: Don’t overfill your tortillas to prevent sogginess; aim for about ⅓ cup of filling per wrap for optimal taste and texture.
-
Crispy Finish: For an even crispier texture, toast the wraps seam-side down first, which helps seal them while giving a beautiful golden crust.
-
Meal Prep Made Easy: Prepare the filling ahead of time; store it in an airtight container and assemble your wraps fresh when ready to eat.
-
Flavor Tweaks: Experiment with different condiments; switching up ketchup and mustard for BBQ sauce or spicy mayo can transform your cheeseburger wraps into a new delight!
What to Serve with Cheeseburger Wraps
Complete your meal experience with these delicious pairings that enhance the flavors of your Cheeseburger Wraps and delight every palate.
-
Crispy French Fries: The classic combo of fries with your wraps provides a satisfying crunch that complements the soft, cheesy interior.
-
Fresh Garden Salad: A refreshing mix of greens adds a lightness to the meal, balancing the heartiness of the wraps with vibrant flavors and textures.
-
Creamy Coleslaw: The cool, tangy slaw contrasts beautifully with the warm, savory wraps, creating a delightful blend of flavors in your mouth.
-
Grilled Corn on the Cob: Sweet, charred corn brings a pop of color and a sweet crunch that perfectly complements the richness of the cheeseburger flavors.
-
Spicy Pickles: For those who love a kick, spicy pickles are an excellent accompaniment; they heighten the flavors of the wraps and add an extra layer of zest.
-
Baked Potato Wedges: These crispy wedges are hearty and pair wonderfully with a dollop of sour cream or a sprinkle of cheese for extra indulgence.
-
Root Beer Float: Satisfy your sweet tooth with this nostalgic drink. The creamy vanilla ice cream and fizzy root beer create a refreshing contrast to the savory wraps.
-
Chocolate Chip Cookies: End your meal on a sweet note with warm cookies that bring back fond memories, making them an unforgettable way to conclude your dinner.
Opt for a combination or mix and match these sides to create a memorable and satisfying meal around your Cheeseburger Wraps!
Cheeseburger Wraps Variations & Substitutions
Feel free to get creative with these wraps and let your culinary imagination soar!
- Bacon Cheeseburger: Add crispy bacon to the beef mixture for a smoky, savory twist. Each bite will be a flavor explosion!
- Spicy Cheeseburger: Incorporate diced jalapeños or a splash of hot sauce for a kick. If you're feeling adventurous, try adding some spicy cheese for extra heat!
- Mushroom Swiss: Swap cheddar for Swiss cheese and fold in sautéed mushrooms. The earthy flavor of mushrooms paired with creamy Swiss brings a gourmet touch to your wraps.
- BBQ Cheeseburger: Substitute ketchup with your favorite BBQ sauce for a sweet and tangy flavor. This variation pairs beautifully with a coleslaw side salad for a well-rounded meal.
- Cheesy Double Wrap: Double up the beef and cheese for a heartier meal. Go ahead; you deserve the indulgence, and it’s perfect for a satisfying dinner!
- Vegetarian Delight: Use plant-based ground meat and vegan cheese for a lighter, meat-free option. Trust me, even the meat lovers at the table will enjoy every bite!
- Low-Carb Wrap: Replace traditional tortillas with low-carb options. Not only does it fit seamlessly into various diets, but it also keeps the wraps deliciously satisfying.
- Extra Crunch: Add crushed tortilla chips or crispy fried onions to the filling for a delightful crunch. It’s a simple twist that elevates your wraps to a new level of texture!
Feel free to explore and mix these variations with the classic cheeseburger flavor—your family will thank you for the delightful surprises!
Storage Tips for Cheeseburger Wraps
- Room Temperature: Allow cooked cheeseburger wraps to cool completely before storing. They can stay at room temperature for up to 2 hours—perfect for a quick snack!
- Fridge: Store any leftover wraps in an airtight container in the fridge for up to 3 days. Just reheat in a skillet or microwave for a quick meal.
- Freezer: For longer storage, wrap individual cheeseburger wraps in foil or plastic wrap, then place them in a freezer-safe bag. They can be frozen for up to 2 months.
- Reheating: Thaw frozen wraps overnight in the fridge before reheating. Warm them in a skillet over medium heat for 5-7 minutes, flipping until heated through and crispy!
Make Ahead Options
These Cheeseburger Wraps are ideal for meal prep, saving you valuable time during hectic weeknights! You can prepare the filling (ground beef, cheese, and seasonings) up to 3 days ahead, storing it in an airtight container in the refrigerator. To maintain quality, make sure to let the mixture cool completely before refrigerating. Just before serving, simply reheat the filling in a skillet on medium heat until warmed through, assemble your wraps with fresh tortillas, and toast as directed. This way, you’ll enjoy delicious, satisfying Cheeseburger Wraps that taste just as good as if they were freshly made!
Cheeseburger Wraps Recipe FAQs
What is the best type of ground beef to use for cheeseburger wraps?
Absolutely! For the best flavor, I recommend using ground beef with a fat content of around 80/20. This ensures a juicy filling. If you're looking for a healthier option, lean ground beef or even plant-based ground meat works wonderfully too!
How should I store leftover cheeseburger wraps?
Leftover wraps should be placed in an airtight container and stored in the refrigerator for up to 3 days. To keep them crispier, I often wrap them individually in foil, making them easy to reheat for quick meals.
Can I freeze cheeseburger wraps?
Yes! To freeze, first allow the wraps to cool completely. Then, wrap each one in foil and place them in a freezer-safe bag. They can be stored in the freezer for up to 2 months. When you're ready to enjoy, simply thaw overnight in the fridge and reheat in a skillet for about 5-7 minutes.
What can I do if my cheeseburger wraps turn out soggy?
Very! If your wraps turn out soggy, it’s likely due to overfilling or using too much liquid condiments. To avoid this, use about ⅓ cup of filling per wrap and ensure the filling is not too wet. If they do get soggy, toasting them in a skillet again for a few minutes can help crisp them back up.
Are cheeseburger wraps suitable for kids with allergies?
Definitely! You can make these wraps allergy-friendly by selecting appropriate substitutes. For instance, use gluten-free tortillas for those with gluten allergies, and check the cheese and condiments for dairy or soy. Always read labels carefully, and feel free to customize the fillings to suit individual dietary needs.
Can I use a different type of cheese in my cheeseburger wraps?
The more the merrier! While cheddar cheese is classic, you can certainly experiment with other types like American, pepper jack, or mozzarella, depending on your flavor preferences. Each cheese will add a different character to your wraps, so feel free to get creative!
Irresistibly Juicy Cheeseburger Wraps for a Tasty Twist
Ingredients
Equipment
Method
- Heat a skillet over medium heat. Add the ground beef and finely chopped onion. Cook until browned and onion is softened, about 6–8 minutes.
- Stir in the garlic powder, salt, and black pepper. Cook for an additional 30 seconds.
- Drain any excess fat from the skillet for a lighter filling.
- Reduce heat to low and sprinkle cheddar cheese over the mixture. Stir until melted and fully combined, about 2–3 minutes.
- Incorporate chopped pickles, ketchup, and mustard into the mixture. Stir until well-distributed.
- Lay tortilla wraps flat. Spoon cheeseburger filling into the center, fold sides inward, and roll tightly.
- Heat butter or oil in the skillet over medium-high heat. Toast wraps seam-side down for 2–3 minutes on each side until golden.
- Remove wraps from the skillet and let cool slightly before slicing in half or serving whole.

Leave a Reply