
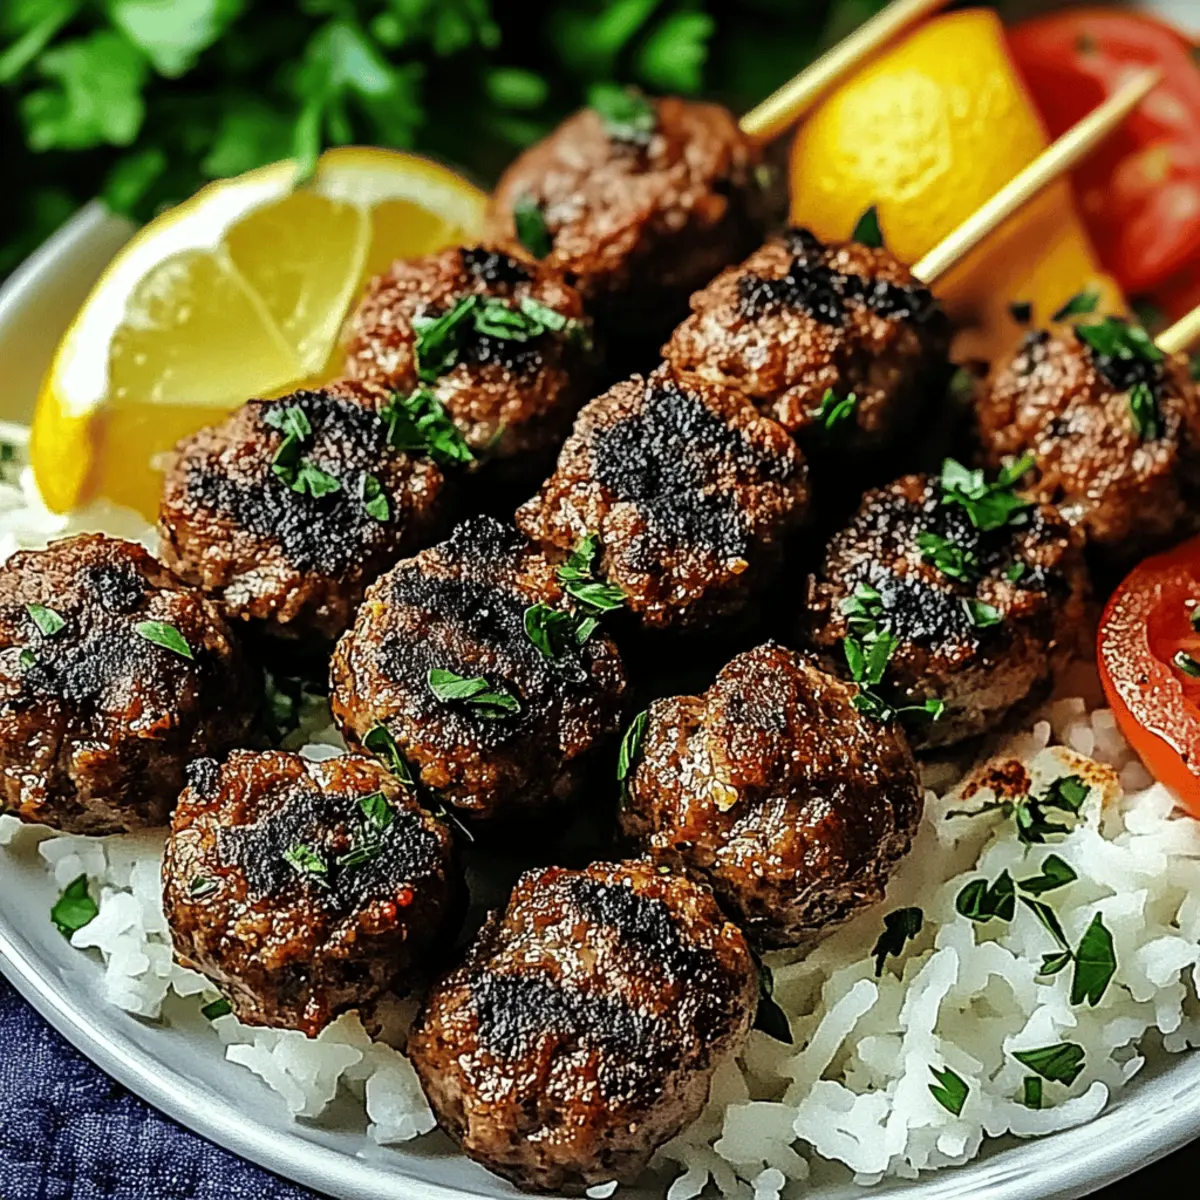
As I was wandering through the bustling markets of Cairo, the mouthwatering aroma of sizzling meat skewers wafted through the air, instantly captivating my senses. That unforgettable moment inspired me to recreate this experience at home with my own version of Egyptian Kofta Kebab. This quick and customizable recipe captures the essence of Mediterranean flavors, making it perfect for any gathering or weeknight dinner. With options for gluten-free diets and various cooking methods—whether you choose to grill, bake, or pan-fry—these juicy kebabs promise to impress even the pickiest eaters. Intrigued by how versatile they can be? Let’s dive into the delicious world of kofta kebabs together!

Why Love Egyptian Kofta Kebab?
Versatility: This recipe is customizable to fit any palate or dietary preference, whether you're opting for lamb, beef, or even a vegan version with chickpeas.
Quick Prep: In just a few simple steps, you can whip up a delicious meal perfect for weeknights or impressing guests at gatherings.
Flavor Explosion: The combination of fresh herbs and aromatic spices creates a taste sensation that transports you to the Mediterranean with every bite.
Effortless Cooking: Choose from grilling, baking, or pan-frying, making it a breeze to fit your schedule or kitchen setup.
Crowd-Pleaser: With its juicy, savory profile, these kebabs are sure to win over picky eaters and food lovers alike. If you're looking for a memorable dish, don't miss out on this easy to make recipe!
Egyptian Kofta Kebab Ingredients
Here’s everything you need to create delicious Egyptian Kofta Kebab at home!
For the Kofta
- Ground Beef or Lamb – Choose meat with about 20% fat for juicy, tender kebabs.
- Onion – Grate and drain to avoid excess moisture that can lead to a mushy texture.
- Fresh Parsley – Adds brightness; consider swapping for mint for a refreshing twist.
- Fresh Cilantro – Optional for added herbaceous flavor; omit if you're not a fan.
- Garlic – Adjust according to your preference for aromatic richness.
- Green Chilies – Include for a spicy kick; modify the quantity based on your heat level.
- Ground Cumin – Essential for that warm, earthy flavor that defines Mediterranean cuisine.
- Ground Coriander – Adds a subtle sweetness; don’t skip this for a balanced flavor.
- Allspice – A pinch elevates the kebab's complexity; it’s worth it!
- Cinnamon – Just a hint rounds out the spices beautifully.
- Sweet Paprika – Provides a mild sweetness and vibrant color.
- Black Pepper – Freshly ground gives a nice bite; adjust to taste.
- Salt – Essential for enhancing all the flavors in the kebab.
- Breadcrumbs – Optional binder to help hold the shape of your kebabs.
- Egg – Optional; binds the mixture and improves texture for a cohesive kebab.
For the Tahini Sauce
- Tahini Paste – A creamy base full of flavor; it’s a must for that Middle Eastern touch.
- Lemon Juice – Brightens the sauce; use fresh lemons for the best flavor.
- Water – Adjust to reach your desired sauce consistency.
This ingredient list sets you on a path to an authentic and flavorful experience with your Egyptian Kofta Kebab! Enjoy blending the flavors and experimenting to make it your own.
Step‑by‑Step Instructions for Egyptian Kofta Kebab
Step 1: Prep Onion
Start by grating a medium onion and place it in a clean kitchen towel or cheesecloth to squeeze out excess liquid. This ensures your Egyptian Kofta Kebab stays firm and doesn’t turn mushy during cooking. Once drained, set the onion aside, ready to incorporate into your flavorful mixture.
Step 2: Combine Ingredients
In a large mixing bowl, combine the drained onion with the ground beef or lamb, fresh parsley, cilantro, garlic, and all the spices: cumin, coriander, allspice, cinnamon, sweet paprika, black pepper, and salt. Mix thoroughly using your hands or a spatula until all flavors are evenly distributed, allowing the aromatic spices to entwine with the meat.
Step 3: Mix Thoroughly
Using your hands, knead the mixture for about 5–7 minutes until it becomes sticky and cohesive. This step is crucial for the texture of your Egyptian Kofta Kebab, as it helps bind the ingredients together, creating a juicy and flavorful kebab. Enjoy the fragrant aroma as the spices meld with the meat during this process.
Step 4: Add Binders
If you choose to use breadcrumbs and/or an egg, now is the time to mix them into the meat mixture. These optional ingredients serve as binders, enhancing the texture and ensuring the kebabs hold their shape while cooking. Mix well until everything is fully combined into a homogeneous mixture.
Step 5: Rest Mixture
Cover the bowl with plastic wrap and place it in the refrigerator for at least 30 minutes. This resting period allows the flavors of your Egyptian Kofta Kebab to meld beautifully, making each bite even more delicious. While you wait, you can prepare your skewers and any side dishes you plan to serve.
Step 6: Soak Skewers
If you're using wooden skewers for grilling, soak them in water for 30 minutes. This step is essential to prevent burning on the grill, ensuring your kofta kebabs stay intact during cooking. As the skewers soak, gather your equipment and get ready for the next step.
Step 7: Shape Kofta
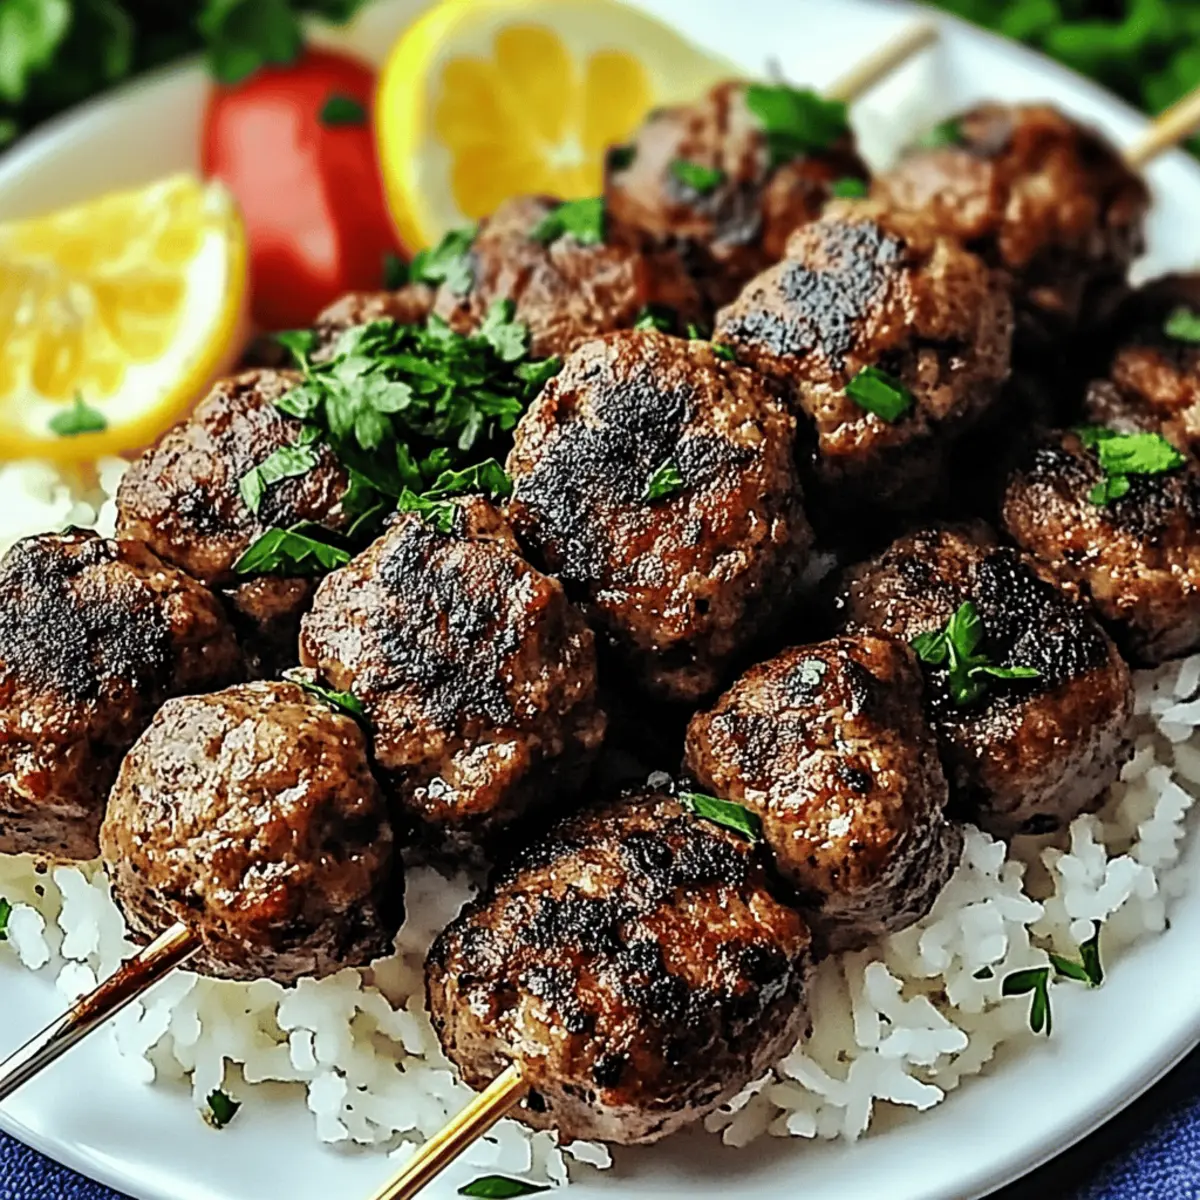
Once the mixture has rested, remove it from the refrigerator. Take a handful of the beef or lamb mixture and mold it onto the soaked skewers into elongated shapes about 4–5 inches long. Aim for cohesive shapes that won't fall apart on the grill; this is a critical step for achieving the perfect Egyptian Kofta Kebab.
Step 8: Smooth Surface
With wet hands, gently smooth the surface of the kebabs for an even cooking experience and a delightful appearance. This step helps the kebabs not only look stunning but also ensures they grill properly, resulting in a beautifully charred exterior with a tender interior.
Step 9: Grill Kofta
Preheat your grill to medium-high heat, ideally around 375°F (190°C). Once hot, place your skewered kofta kebabs on the grill and cook for approximately 8–10 minutes. Turn them frequently to achieve an even char and ensure they are cooked through, with a nice golden exterior.
Step 10: Rest Kebabs
Once grilled to perfection, remove the kofta kebabs from the grill and let them rest for about 5 minutes. This resting period is essential for the juices to redistribute, ensuring that each bite of your Egyptian Kofta Kebab is juicy and full of flavor.
Step 11: Prepare Tahini Sauce
While the kebabs rest, whisk together tahini paste, fresh lemon juice, and water in a small bowl until you reach your desired sauce consistency. Adjust the thickness by adding more water if necessary. This creamy sauce complements your Egyptian Kofta Kebab beautifully, adding a lovely nutty flavor to the dish.
Step 12: Warm Bread
In a skillet or on the grill, lightly heat your pita or flatbreads for about 1-2 minutes until warm and pliable. This step enhances the overall experience and provides a perfect vessel for your succulent kofta, adding an inviting aroma to your meal.
Step 13: Assemble Kebab
To assemble, place the grilled kofta kebabs on the warm pita or flatbreads. Top with fresh vegetables of your choice and drizzle generously with your tahini sauce for a burst of flavor. The colors and textures come together beautifully for a delightful presentation.
Step 14: Serve
Serve your delicious Egyptian Kofta Kebab alongside lemon wedges to brighten the flavors. This dish is perfect for sharing and enjoying with loved ones, allowing everyone to delight in the rich, culinary experience of Mediterranean-inspired cooking.

Expert Tips for Egyptian Kofta Kebab
-
Fresh Ingredients: Always opt for the freshest meat, herbs, and spices to elevate the flavor of your Egyptian Kofta Kebab. Quality ingredients make a world of difference.
-
Drain the Onion: Make sure to squeeze out excess moisture from the grated onion thoroughly. This prevents a watery kofta mixture, helping the kebabs maintain their shape and texture.
-
Rest for Flavor: Allow the meat mixture to rest in the refrigerator for at least 30 minutes. This waiting period is crucial for the spices to meld and enhances the overall flavor.
-
Soak Wooden Skewers: Don’t forget to soak wooden skewers for 30 minutes before grilling. This step is essential to prevent burning and ensures your kofta stays perfectly intact.
-
Use a Meat Thermometer: To guarantee food safety, check that your Egyptian Kofta Kebab reaches an internal temperature of at least 160°F (71°C) before serving.
What to Serve with Delicious Egyptian Kofta Kebab
Dive into a satisfying meal that’s bursting with flavors and textures to elevate your dining experience!
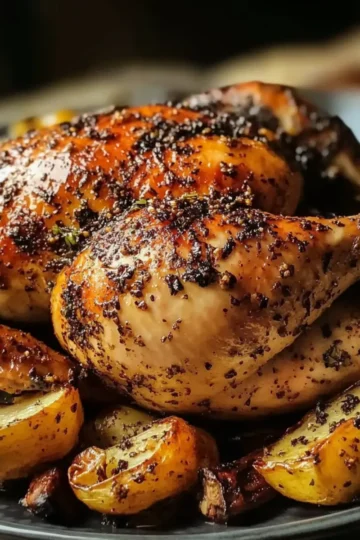
- Crispy Roasted Potatoes: The golden, crispy texture offers a delightful contrast to the juicy kebabs, making every bite memorable.
- Fresh Tabbouleh Salad: Bright herbs and crunchy veggies create a refreshing balance that complements the rich flavors of the kofta.
- Creamy Hummus Dip: This classic Mediterranean spread adds warmth and creaminess, perfect for slathering on your warm pita.
- Sliced Pickles: Adding tangy pickles enhances the overall flavor profile of the meal, cutting through the richness of the kebabs beautifully.
- Warm Pita Bread: Soft and fluffy, pita serves as a perfect base for your kofta, soaking up the delicious tahini sauce.
- Tangy Yogurt Sauce: A cooling yogurt sauce mixed with lemon and garlic provides a refreshing contrast to the spicy kebab.
- Mint Tea: Enjoy a mug of sweet mint tea as a light, refreshing drink that enhances the Mediterranean experience.
- Baklava for Dessert: This sweet, flaky pastry with honey and nuts rounds out the meal perfectly, adding a touch of decadence.
Make Ahead Options
If you're a busy home cook eager to enjoy delicious Egyptian Kofta Kebab without the last-minute rush, you're in luck! You can prepare the kofta mixture and shape it onto skewers up to 24 hours in advance. Simply make the meat mixture, mold it onto your skewers, and cover with plastic wrap in the refrigerator to preserve freshness. For optimal quality, ensure to store the skewers in an airtight container, preventing any drying out or flavor loss. When you're ready to enjoy your meal, just grill the skewers as directed for about 8–10 minutes. This prep-ahead strategy will make your weeknight dinners a breeze, providing you with a homemade feast in no time!
Egyptian Kofta Kebab Variations
Feel free to unleash your creativity in the kitchen! With these ideas, you can elevate your Egyptian Kofta Kebab experience.
-
Turkey Swap: Replace ground beef or lamb with turkey for a lighter, leaner version that's still packed with flavor.
-
Herb Twist: Use fresh mint or dill instead of parsley for a refreshing herbal twist in your kofta.
-
Spice It Up: Incorporate ground sumac or smoked paprika for a smoky depth and a touch of tanginess that enhances the flavor.
-
Vegan Version: Create a vegan kofta using mashed chickpeas or lentils with spices; it’s a fantastic plant-based alternative!
-
Cheesy Goodness: Add crumbled feta cheese to the meat mixture for an extra layer of creaminess and a delightful tang.
-
Flavor Burst: Mix in some finely chopped dried apricots or raisins for a hint of sweetness that delights the palate.
-
Heat Level: Adjust the spice by increasing the quantity of green chilies or adding a dash of cayenne pepper for those who love extra heat.
-
Texture Variation: Experiment by adding finely chopped vegetables like bell peppers or zucchini to the meat mixture, enhancing both texture and flavor.
These variations not only personalize your dish but can also impress your family and guests. Have fun exploring the different tastes and combinations—and don’t forget to serve alongside a refreshing tabbouleh salad or creamy hummus for the ultimate Mediterranean experience!
Storage Tips for Egyptian Kofta Kebab
- Room Temperature: It’s best to consume freshly cooked Egyptian Kofta Kebab within 2 hours to ensure quality and safety. If left out longer, discard any leftovers.
- Fridge: Store leftover kebabs in an airtight container and refrigerate for up to 3 days. Reheat in the oven at 350°F (175°C) for 10-15 minutes until warmed through.
- Freezer: To preserve freshness, shape the kofta on skewers, wrap them tightly in plastic wrap, and freeze for up to 3 months. Thaw overnight in the fridge before grilling.
- Reheating: For best results, reheat on a grill or in an oven rather than a microwave to maintain the juicy texture of the Egyptian Kofta Kebab.
Egyptian Kofta Kebab Recipe FAQs
How do I choose the right meat for Egyptian Kofta Kebab?
Absolutely! For the best results, opt for ground beef or lamb with about 20% fat content. This fat level helps keep your kofta moist and flavorful during cooking. If you want a leaner option, ground turkey can work well too, although it may result in a slightly drier texture.
What are the best storage methods for leftover kebabs?
Very good question! Store leftover Egyptian Kofta Kebab in an airtight container in the refrigerator for up to 3 days. Make sure they're cooled down before sealing to maintain freshness. If you plan on keeping them longer, you can freeze them for up to 3 months. Just wrap them tightly in plastic wrap and place them in a freezer bag.
Can I freeze the kofta mixture before cooking?
Yes, you can! To freeze the kofta mixture, shape it onto skewers, wrap each skewer tightly with plastic wrap, and then place them in a freezer-safe bag. This method allows easy access to your kebabs for future meals. They can be frozen for up to 3 months. When you're ready to cook, simply thaw them overnight in the refrigerator before grilling.
What should I do if my kebabs fall apart on the grill?
If your Egyptian Kofta Kebab seems to be falling apart, it might be due to not using enough binders or insufficient chilling time. Ensure that you have incorporated breadcrumbs and/or an egg to help the mixture hold together. Additionally, make sure you refrigerate the mixture for at least 30 minutes before shaping the kebabs—this helps them firm up. If they still fall apart, consider using a meat thermometer to check doneness early and reduce cooking time.
Are there any dietary considerations for making Egyptian Kofta Kebab?
Definitely! If you're preparing the dish for someone with dietary restrictions, you can make it gluten-free by omitting breadcrumbs or using gluten-free alternatives. Also, for those who prefer a vegetarian or vegan option, try using a base of chickpeas or lentils. Just ensure they're mashed well and mixed with spices and herbs to replicate the texture and flavor of traditional kofta.
How can I make my kofta kebabs more flavorful?
To enhance the flavor of your Egyptian Kofta Kebab, consider adding extra spices like ground sumac or smoked paprika, which offer a unique twist to the traditional recipe. You can also experiment with different herbs—replace parsley with fresh mint or dill for an interesting flavor profile. Marinating the mixture longer than 30 minutes is also an effective way to intensify the flavors.
Juicy Egyptian Kofta Kebab: Easy to Make and Customize
Ingredients
Equipment
Method
- Start by grating a medium onion and place it in a clean kitchen towel or cheesecloth to squeeze out excess liquid.
- In a large mixing bowl, combine the drained onion with the ground beef or lamb, fresh parsley, cilantro, garlic, and all the spices.
- Using your hands, knead the mixture for about 5–7 minutes until it becomes sticky and cohesive.
- If using breadcrumbs and/or an egg, mix them into the meat mixture now.
- Cover the bowl with plastic wrap and refrigerate for at least 30 minutes.
- If using wooden skewers, soak them in water for 30 minutes.
- Remove the mixture from the refrigerator and shape it onto the soaked skewers into elongated shapes.
- With wet hands, gently smooth the surface of the kebabs.
- Preheat grill to medium-high heat and cook kebabs for approximately 8–10 minutes, turning frequently.
- Remove the kebabs from the grill and let them rest for about 5 minutes.
- While the kebabs rest, whisk together tahini paste, lemon juice, and water until desired consistency is reached.
- Lightly heat pita or flatbreads in a skillet or on the grill for about 1-2 minutes.
- Assemble by placing kebabs on warm bread, topping with fresh vegetables and tahini sauce.
- Serve with lemon wedges to brighten the flavors.
Leave a Reply