
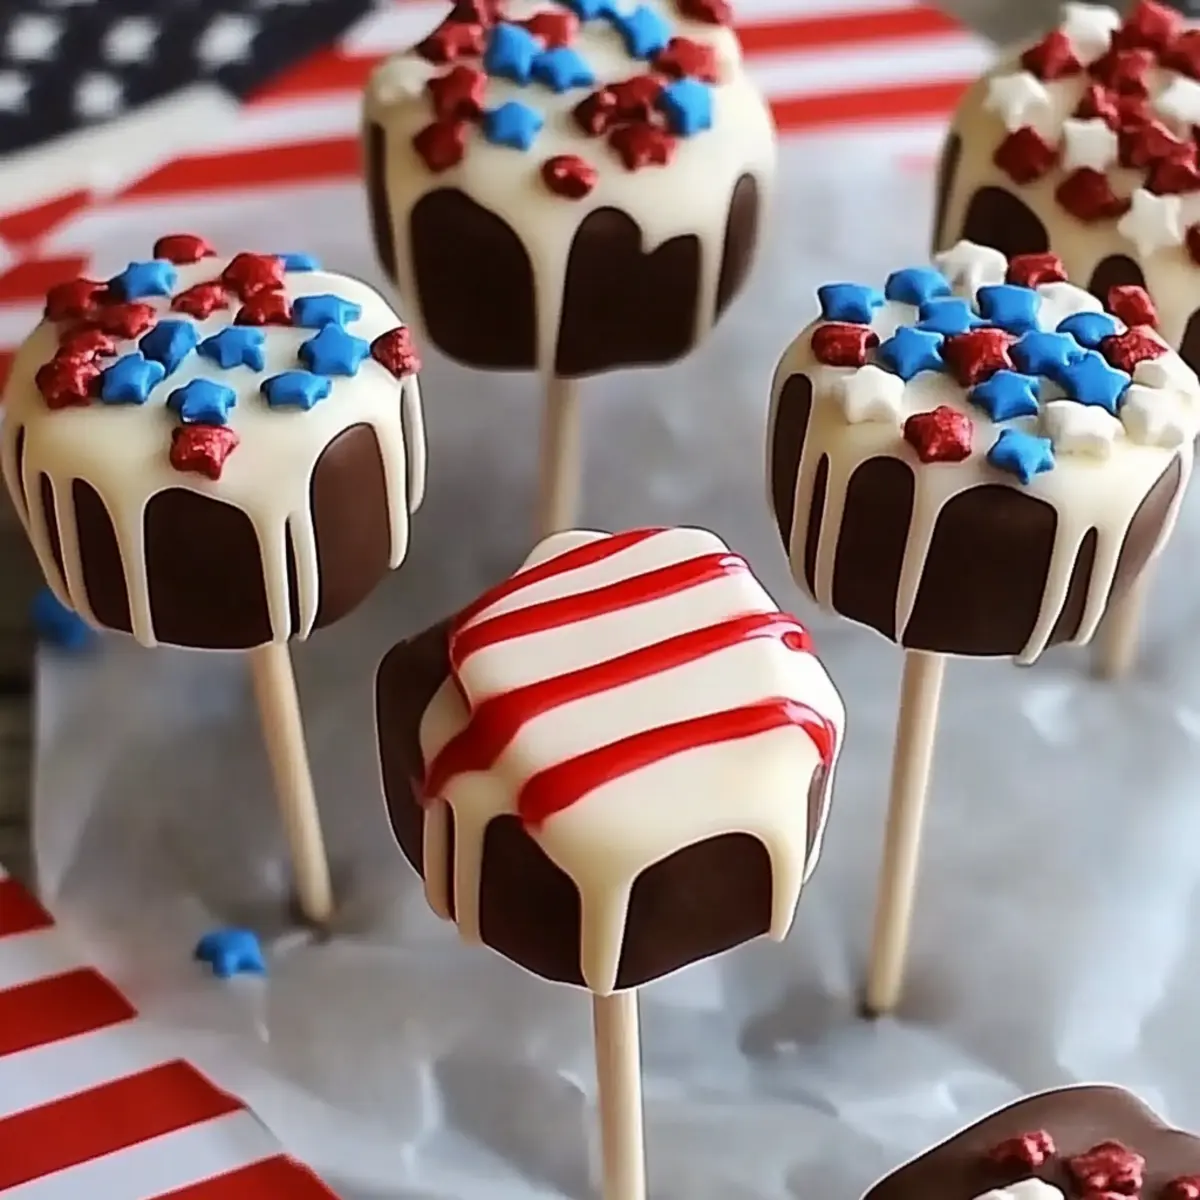
The sizzling summer sun casts its cheerful glow, a perfect backdrop for festive gatherings filled with laughter and great food. This season, I can’t resist whipping up a batch of Patriotic Cheesecake Pops that are not only visually stunning but also incredibly easy to make. These no-bake dessert bites combine creamy cheesecake goodness with a delightful crunch, making them the ultimate treat for any celebration, especially those honoring our nation. They're a surefire crowd-pleaser, and the best part? You can prepare them ahead of time, leaving you free to enjoy your event without the kitchen chaos. Ready to elevate your summer soirées with these frozen delights? Let’s dive into the recipe!
Why Are These Pops a Must-Try?
Festive vibes make every occasion brighter! These Patriotic Cheesecake Pops are the perfect dessert to impress your guests. No Bake convenience means less time in the kitchen and more time celebrating. Rich, Creamy Filling contrasts deliciously with a crunchy chocolate layer, offering a delightful surprise in every bite. Endless Variations allow you to customize flavors and colors for any celebration, from holidays to birthdays. Make-Ahead flexibility is a game-changer—you can whip up these treats in advance and store them easily for effortless entertaining! Enjoy your gatherings stress-free and deliciously!
Patriotic Cheesecake Pops Ingredients
• Get ready to create deliciousness!
For the Filling
- Cream Cheese – Provides a creamy base for the cheesecake filling; use full-fat for richer flavor.
- Powdered Sugar – Adds sweetness and smooth texture; granulated sugar can be used but may affect smoothness.
- Vanilla Extract – Infuses the filling with a warm, aromatic flavor; opt for pure vanilla for best results.
- Sour Cream – Contributes to creaminess and tanginess; Greek yogurt can be substituted for a lighter option.
For the Crust
- Graham Cracker Crumbs – Forms the crunchy base for the pops; substitute with crushed cookies or gluten-free crumbs for variation.
- Unsalted Butter – Binds the graham cracker mixture and adds richness; melted coconut oil can be used as a dairy-free alternative.
For the Coating
- White Chocolate Chips – Coating that adds sweetness and a smooth finish; dark or milk chocolate can be used for a flavor twist.
- Coconut Oil – Helps achieve a smooth melting consistency for the chocolate; optional, but recommended for a glossy finish.
For the Decoration
- Red and Blue Sprinkles – Decorative element that enhances the festive presentation; feel free to adjust colors for different occasions.
- Popsicle Sticks – Used for easy handling of the cheesecake pops.
Step‑by‑Step Instructions for Patriotic Cheesecake Pops
Step 1: Prepare Cheesecake Filling
In a large mixing bowl, combine 8 ounces of softened cream cheese, 1 cup of powdered sugar, 1 teaspoon of vanilla extract, and ½ cup of sour cream. Blend with a hand mixer on medium speed for about 2-3 minutes until the mixture is completely smooth and creamy. Ensuring there are no lumps in the filling is crucial for your Patriotic Cheesecake Pops' delightful texture.
Step 2: Make Crust Mixture
In a separate bowl, mix 1 cup of graham cracker crumbs with 4 tablespoons of melted unsalted butter. Stir thoroughly until the crumbs are well-coated and the mixture resembles wet sand. This crumb mixture will serve as the base that adds a crunchy texture to your cheesecake pops, enhancing their overall appeal.
Step 3: Shape Pops
Using a cookie scoop or your hands, take about 1 tablespoon of the cheesecake filling and roll it into a ball about 1 inch in diameter. Place each ball on a parchment-lined baking sheet, making sure they are spaced apart to prevent sticking. Repeat until all the cheesecake mixture is shaped into balls. This step is crucial for forming the iconic Patriotic Cheesecake Pops.
Step 4: Insert Sticks
Carefully insert a popsicle stick into the center of each cheesecake ball, pushing it halfway through to secure it. Once all the sticks are inserted, transfer the baking sheet to the freezer. Freeze the pops for at least 2 hours, or until firm. This step allows the pops to hold their shape while being dipped in chocolate later.
Step 5: Melt Chocolate
In a microwave-safe bowl, combine 1 cup of white chocolate chips with 1 tablespoon of coconut oil. Microwave the mixture in 30-second intervals, stirring after each, until it’s fully melted and smooth—typically about 1-2 minutes in total. The addition of coconut oil will help achieve a silky, glossy finish for your Patriotic Cheesecake Pops.
Step 6: Coat Pops
Remove the cheesecake pops from the freezer and dip each one into the melted chocolate, allowing any excess chocolate to drip back into the bowl. Be sure to coat evenly for a beautiful finish. Immediately sprinkle red and blue sprinkles on top for a festive touch, making your pops perfect for any celebration!
Step 7: Set Pops
Return the coated cheesecake pops to the parchment-lined baking sheet and place them back in the freezer for an additional 30 minutes to ensure the chocolate coating firms up completely. This final freeze is important for achieving the ultimate bite-sized treat with a satisfying crunch!
Step 8: Serve
Once the chocolate is set, remove your Patriotic Cheesecake Pops from the freezer and serve them chilled. These delightful pops are perfect for picnics, potlucks, or festive gatherings, ready to impress your guests with their vibrant colors and sweet flavors.

Expert Tips for Patriotic Cheesecake Pops
-
Soften Cream Cheese: Ensure your cream cheese is at room temperature for easy mixing; cold cream cheese can lead to lumps in the filling.
-
Melt Chocolate Carefully: Heat the chocolate in short intervals to prevent burning; stir well to achieve a smooth consistency for coating your Patriotic Cheesecake Pops.
-
Adjust Coconut Oil: Adding a little more coconut oil to the chocolate can create a thinner coating, making dipping easier and achieving a perfect finish.
-
Monitor Freezing Time: Make sure to freeze the pops long enough for them to firm up; insufficient freezing can cause them to lose shape during chocolate coating.
-
Creative Sprinkles: Don’t hesitate to customize your sprinkles! Feel free to swap colors according to the theme of the occasion, making them versatile for any celebration.
How to Store and Freeze Patriotic Cheesecake Pops
Fridge: Store any leftover cheesecake pops in an airtight container in the refrigerator for up to 3 days. Keep them chilled to maintain their creamy texture.
Freezer: For longer storage, wrap each pop individually in plastic wrap and place them in a freezer-safe container. They can be frozen for up to 2 months without losing flavor or texture.
Thawing: When ready to enjoy, transfer the cheesecake pops from the freezer to the fridge and allow them to thaw for about 30 minutes before serving.
Reheating: These pops are enjoyed cold; no reheating is necessary. Simply take them out of the fridge or freezer and serve!
Make Ahead Options
These Patriotic Cheesecake Pops are a fantastic choice for meal prep enthusiasts! You can prepare the cheesecake balls and store them in an airtight container in the freezer for up to 3 days. Simply freeze them after shaping, and when you're ready to serve, all you need to do is dip the frozen pops into the melted chocolate and sprinkle with festive decorations. To maintain their creamy texture, ensure they are tightly wrapped or stored properly to prevent freezer burn. This way, you'll have these delicious treats ready for any celebration without the last-minute rush! Enjoy the freedom of having your Patriotic Cheesecake Pops prepped ahead of time!
What to Serve with Patriotic Cheesecake Pops
Nothing elevates a festive gathering like delightful accompaniments that enhance your dessert experience!
-
Fresh Berries: A mix of strawberries, blueberries, and raspberries adds vibrant colors while providing a tart contrast to the sweet pops. Their juiciness refreshes the palate, perfectly balancing the creaminess of the cheesecake.
-
Whipped Cream: Light and fluffy, a dollop of freshly whipped cream enhances the indulgence of the cheesecake pops while inviting a comforting, nostalgic feel to each bite. Serve it alongside for an additional layer of sweetness.
-
Grilled Peaches: Warm, caramelized peaches offer a smoky, tender complement that pairs beautifully with the cold pops. The combination of temperatures and textures creates a delightful contrast that's sure to impress.
-
Ice Cream: A scoop of vanilla or a berry-flavored ice cream provides a creamy, cold pairing that enhances the celebration’s festive spirit. Each bite offers an explosion of flavor and creamy goodness that guests will adore.
-
Lemonade or Iced Tea: Refreshing beverages like homemade lemonade or chilled iced tea offer a zesty counterpoint to the sweet treats, enhancing the whole summer vibe and keeping guests refreshed.
-
Chocolate Dipped Pretzels: For an added crunch and salty contrast, serve chocolate-dipped pretzels. Their savory-sweet nature complements the cheesecake pops, adding variety to your dessert table.
-
Fruit Platter: An artfully arranged platter of seasonal fruits—think melons, pineapple, and kiwi—adds freshness and visual appeal while allowing guests to nibble and mix flavors as they enjoy the pops.
-
Sparkling Wine: For an adult twist, serve elegant sparkling wine. The effervescence elevates the dessert experience, making your gathering feel even more special. Pop, fizz, and celebrate!
Patriotic Cheesecake Pops Variations
Feel free to unleash your creativity and tailor these delightful treats to your taste buds!
-
Chocolate Lovers: Swap half of the white chocolate for dark chocolate to create a rich, bittersweet treat.
-
Nutty Twist: Stir in crushed nuts, like pecans or almonds, into the graham cracker mixture for an added crunch and flavor.
-
Fruit-Infused: Mix in pureed strawberries or blueberries into the cheesecake filling for a burst of fruity flavor!
-
Dairy-Free: Use vegan cream cheese and a dairy-free chocolate for a completely plant-based version that still tastes delicious.
-
Flavorful Extracts: Experiment with different extracts like almond or peppermint to add a surprising twist to the traditional flavor.
-
Zesty Addition: Add a teaspoon of lemon zest to the cheesecake filling for a refreshing citrus kick that balances the sweetness.
-
Spicy Heat: For a subtle kick, add a pinch of cayenne pepper to the chocolate coating—it's a daring move that many will love.
-
Decorative Options: Switch up the sprinkles with edible glitter or themed decorations to match the occasion, from birthdays to holiday celebrations!
These variations will not only tantalize your taste buds but also turn these Patriotic Cheesecake Pops into an even more exciting treat for any gathering. Don't hesitate to try out your own ideas or mix in your family's favorite flavors!

Patriotic Cheesecake Pops Recipe FAQs
How do I choose the right cream cheese for the cheesecake pops?
Absolutely! For the best flavor and texture, always use full-fat cream cheese. It provides that rich, creamy base we love in cheesecakes. If you're looking for a lighter option, you can opt for low-fat cream cheese, but keep in mind it may change the consistency slightly.
What’s the best way to store leftover cheesecake pops?
To keep them fresh, store any leftover cheesecake pops in an airtight container in the refrigerator for up to 3 days. If you're not planning to eat them within that time, they can also be frozen for up to 2 months. Just wrap each pop in plastic wrap and place them in a freezer-safe container. They’ll taste just as delightful when you’re ready to enjoy them!
Can I freeze these cheesecake pops? If so, how?
Yes, you can! To freeze Patriotic Cheesecake Pops, wrap each pop individually in plastic wrap after they have set. Place them in a freezer-safe container or bag. They can be stored in the freezer for up to 3 months. When you want to enjoy them, simply transfer the pops to the fridge for about 30 minutes to thaw before serving.
What should I do if my chocolate coating isn’t smooth?
If your chocolate coating doesn’t turn out smooth, don’t worry! You can add a teaspoon or two of coconut oil to your melted chocolate. This helps it achieve a smoother consistency. Also, be sure to melt the chocolate in short 30-second intervals, stirring well between heats to prevent it from burning.
Can my pets eat these cheesecake pops?
No, it’s important to keep these cheesecake pops away from pets. Ingredients like chocolate and sugar can be harmful to them, so enjoy these treats solely for yourself and your family! Always check the ingredients before sharing any food with your furry friends.
How do I ensure my pops don’t fall off the sticks after freezing?
To ensure the pops stay on the sticks, make sure to freeze them for at least 2 hours after inserting the sticks. Additionally, ensure the cheesecakes are well-frozen before dipping them in the chocolate coating. This extra time will help them hold their shape during the chocolate-dipping process!

Indulgent Patriotic Cheesecake Pops That Steal the Show
Ingredients
Equipment
Method
- In a large mixing bowl, combine 8 ounces of softened cream cheese, 1 cup of powdered sugar, 1 teaspoon of vanilla extract, and ½ cup of sour cream. Blend with a hand mixer on medium speed for about 2-3 minutes until smooth.
- In a separate bowl, mix 1 cup of graham cracker crumbs with 4 tablespoons of melted unsalted butter until the mixture resembles wet sand.
- Using a cookie scoop, take about 1 tablespoon of the cheesecake filling and roll it into a ball. Place on a parchment-lined baking sheet.
- Insert a popsicle stick into the center of each cheesecake ball. Transfer the baking sheet to the freezer and freeze for at least 2 hours.
- In a microwave-safe bowl, combine 1 cup of white chocolate chips and 1 tablespoon of coconut oil. Microwave in 30-second intervals until melted and smooth.
- Dip each cheesecake pop into the melted chocolate, allowing excess to drip back and immediately sprinkle with red and blue sprinkles.
- Return the coated cheesecake pops to the parchment-lined baking sheet and place back in the freezer for an additional 30 minutes.
- Once set, remove from the freezer and serve chilled.


Leave a Reply