
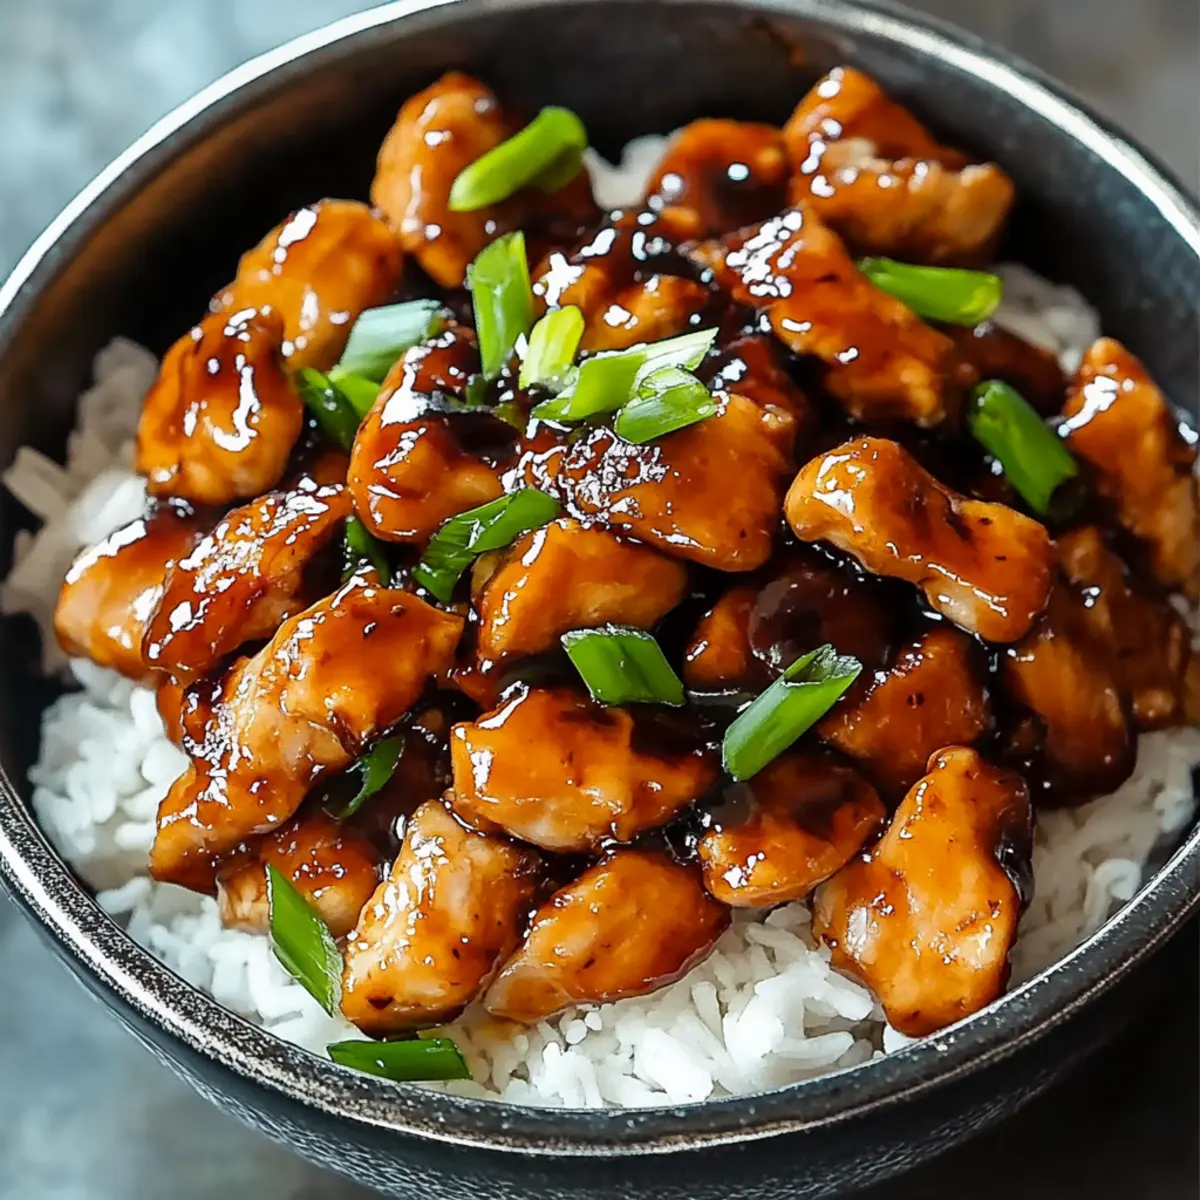
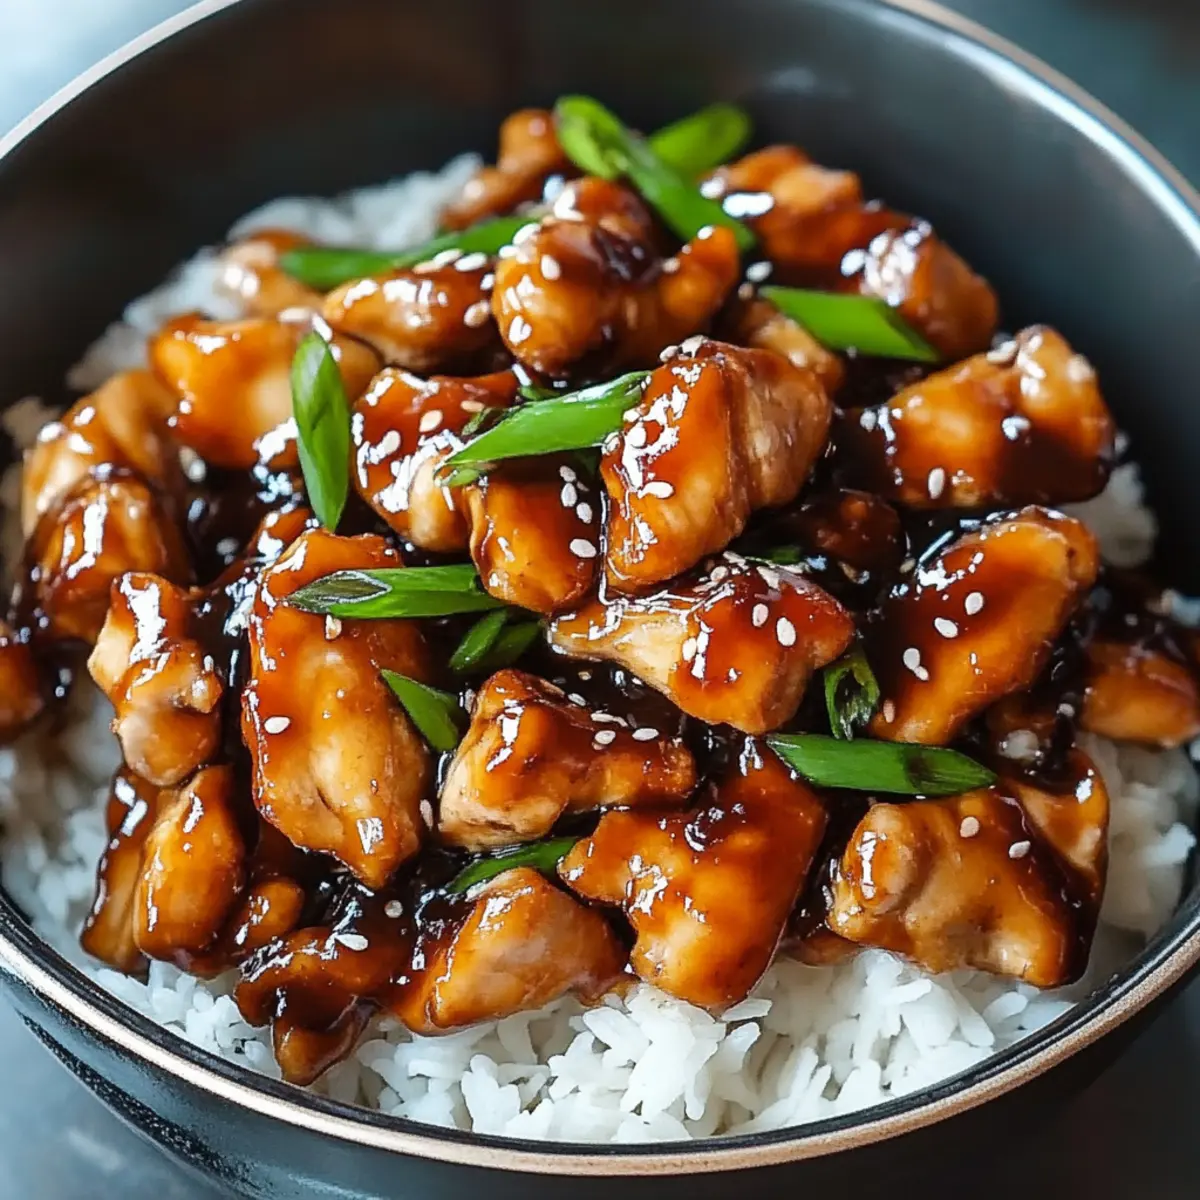
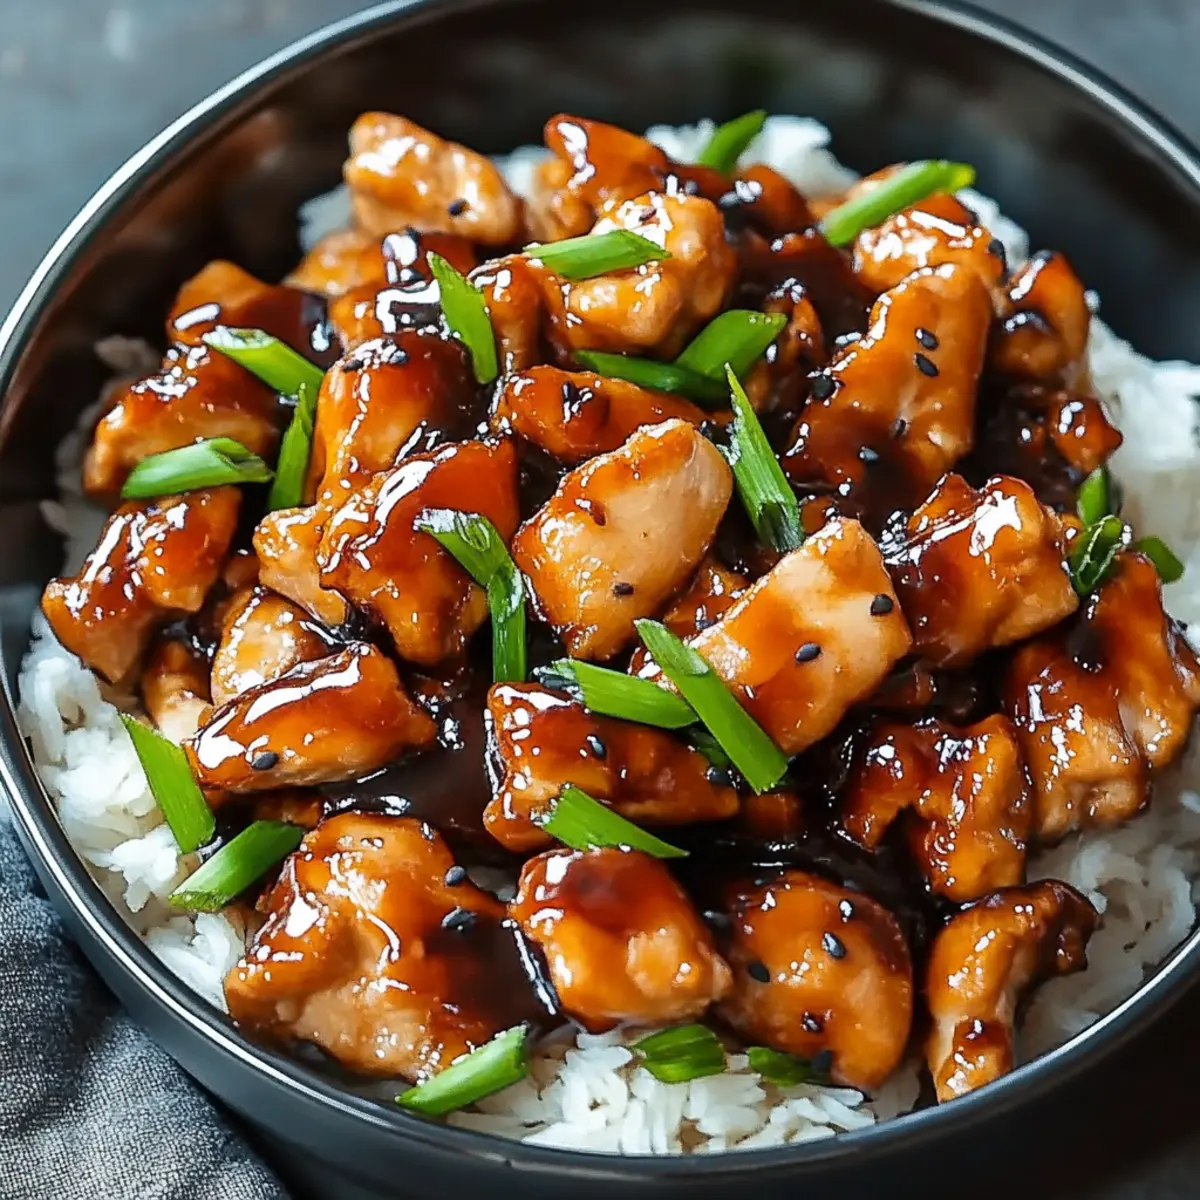
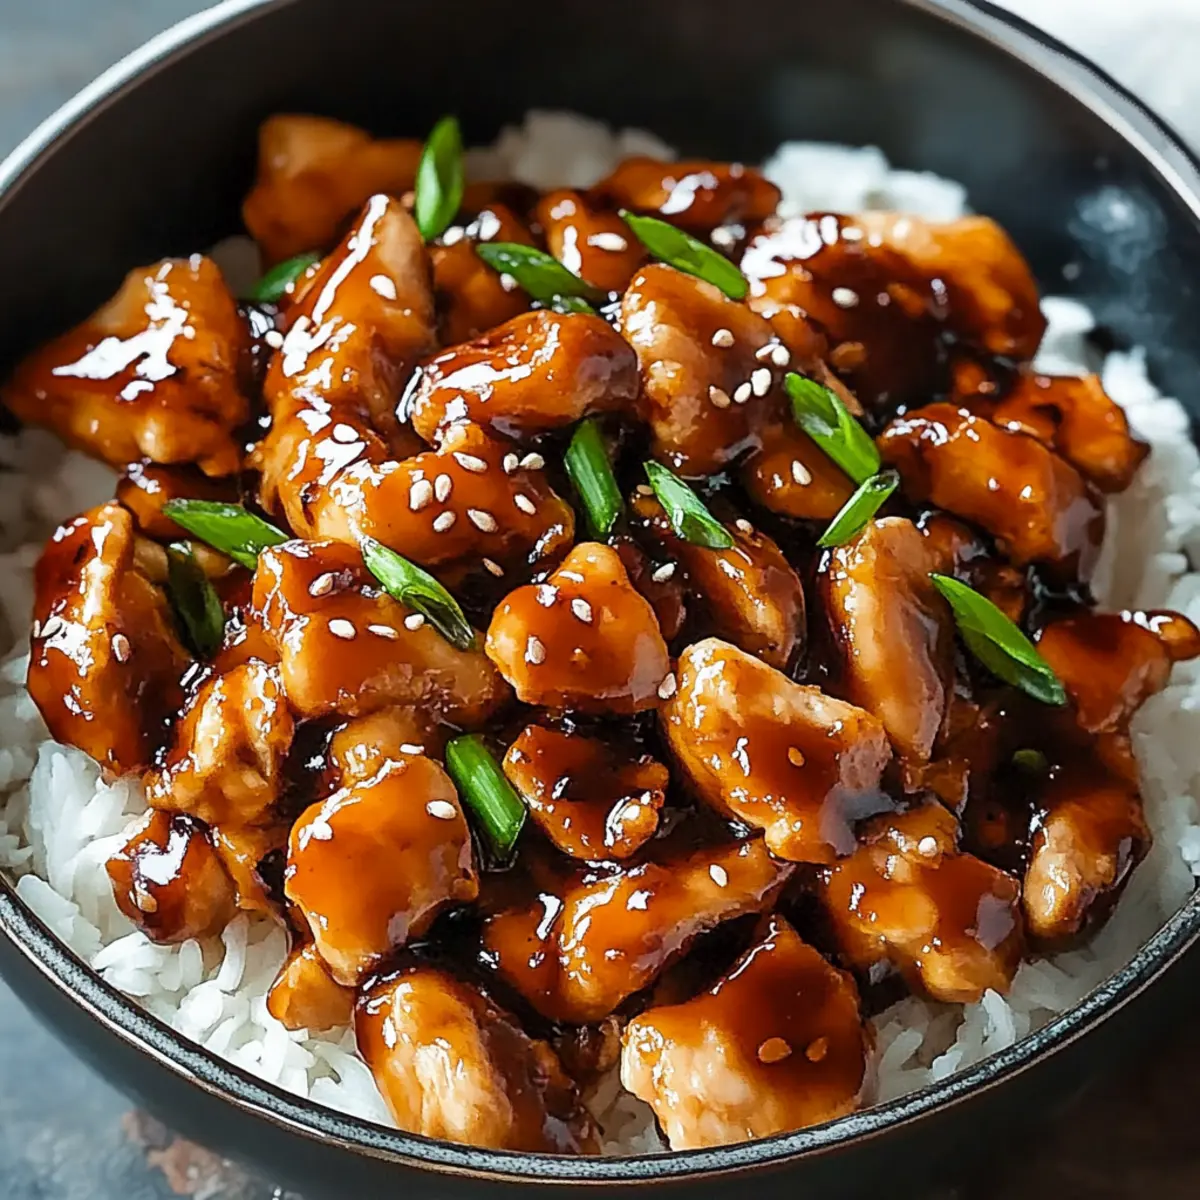
The kitchen murmured with excitement as I gazed at the clock—20 minutes until dinnertime! With only a mere handful of ingredients, I whipped up a comforting batch of Mongolian Chicken that turned out to be a stellar balance of quick and delicious. This recipe is not only a lifesaver for busy weeknights but a customizable gem that pleases both kids and adults alike. Crispy on the outside, tender and juicy inside, it’s a flavorful escape that transports takeout to homemade bliss. Plus, you can easily make it gluten-free or amp up the heat with some chili flakes, so there’s something for everyone at the table! Ready to bring the taste of takeout home? Let’s get cooking!
Why is Mongolian Chicken a Must-Try?
Speedy Preparation: This dish comes together in just 20 minutes, making it perfect for those hectic weeknights.
Crispy Goodness: The corn starch coating creates an irresistible crunch that rivals any takeout option you’ve had.
Customizable Flavors: Whether you prefer it spicy or vegetarian, the recipe easily adapts to your taste buds!
Family-Friendly Delight: Kids and adults alike will love its sweet and savory combination—a guaranteed hit at the dinner table.
Healthy Homemade Alternative: Skip the delivery and embrace a guilt-free option that doesn’t skimp on flavor. Check out variations like our Spicy Mongolian Chicken for a little kick!
Dive into this delectable dish, and you’ll see exactly why it has captured so many hearts (and stomachs!).
Mongolian Chicken Ingredients
-
For the Chicken
• Boneless chicken thighs (or breasts) – They provide juicy flavor and tender texture; thighs are ideal for moisture.
• Corn starch – Essential for that crispy coating; swap with arrowroot starch for a gluten-free option.
• Salt and pepper – Simple seasonings that enhance overall flavor; adjust quantities based on taste preferences. -
For Cooking
• Vegetable oil – Necessary for frying; canola or peanut oil are great for a higher smoke point.
• Fresh ginger – It adds warmth and depth; ground ginger can be used if fresh is unavailable.
• Garlic – A must for flavor; fresh is preferred to achieve the best taste.
• Green onion – Provides crunchy texture and freshness; use both white and green parts for maximum flavor. -
For the Sauce
• Dark brown sugar – Uniquely contributes sweetness; coconut sugar makes a lower glycemic substitute.
• Low sodium soy sauce – The backbone of the sauce, offering umami flavor; choose gluten-free soy sauce as needed.
• Toasted sesame oil – Adds a rich, nutty aroma; if unavailable, use more vegetable oil as a substitute.
• Water – Used to create a corn starch slurry for thickening the sauce.
Each of these Mongolian Chicken ingredients plays a vital role in building the delicious, comforting flavors that make this dish a cherished family favorite!
Step‑by‑Step Instructions for Mongolian Chicken
Step 1: Prepare the Corn Starch Slurry
In a small bowl, combine 2 teaspoons of corn starch with ⅓ cup of water, stirring until smooth. Set this mixture aside; it will help thicken the savory sauce later. Make sure there are no lumps in the slurry, as this will create a beautifully glossy finish to your Mongolian Chicken.
Step 2: Coat the Chicken
Cut your boneless chicken thighs or breasts into thin strips and place them in a zip-lock bag. Add ¼ cup of corn starch, salt, and pepper to the bag, then seal and shake until the chicken is evenly coated. This coating is key for achieving that irresistible crispiness when fried, so take a moment to ensure every piece is well covered.
Step 3: Heat the Oil
In a wok or large skillet, heat approximately ½ inch of vegetable oil over medium heat. To test if the oil is ready, drop in a small piece of coated chicken; it should sizzle immediately upon contact. Once the oil is hot enough, you’re ready to fry the chicken, creating that delicious crunch you crave in Mongolian Chicken.
Step 4: Fry the Chicken
Carefully add the chicken strips to the hot oil in batches, making sure not to overcrowd the pan. Fry each batch for about 2–3 minutes on each side, or until golden brown and fully cooked through. Once done, use a slotted spoon to transfer the chicken to a paper towel-lined plate to drain excess oil and keep them crispy.
Step 5: Sauté Aromatics
In the same skillet, remove excess oil, leaving just enough to sauté the aromatics. Over medium heat, add the minced ginger, garlic, and half of the chopped green onions. Sauté for about 1-2 minutes until fragrant and the onions are slightly soft; this step builds a flavor foundation for your Mongolian Chicken.
Step 6: Create the Sauce
Stir in 1 tablespoon of toasted sesame oil, ¼ cup of low-sodium soy sauce, and 2 tablespoons of dark brown sugar into the sautéed aromatics. Mix well, allowing the ingredients to meld together for about 1-2 minutes. The sauce should start to bubble slightly as you combine these rich flavors that define Mongolian Chicken.
Step 7: Thicken the Sauce
Now, add the corn starch slurry from earlier to the pan while stirring continuously. Cook for an additional 30 seconds, or until the sauce thickens and coats the back of a spoon. You’re looking for a glossy consistency that will cling beautifully to your crispy chicken.
Step 8: Combine Chicken and Sauce
Finally, return the fried chicken to the pan and toss it gently to coat the pieces in the flavorful sauce. Add the remaining green onions, mixing for an extra pop of color and freshness. Ensure all the chicken is evenly coated, amplifying the deliciousness of your Mongolian Chicken.
Step 9: Serve Up and Enjoy
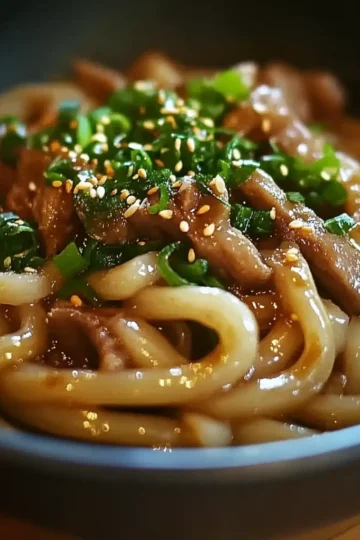
Immediately serve your Mongolian Chicken over a bed of steamed rice or toss it with cooked noodles. The contrast of textures and flavors will shine through. Consider garnishing with additional green onions for an extra touch, making this dish a comforting homemade favorite that family and friends will love!
Expert Tips for Mongolian Chicken
-
Batch Frying: Keep it crispy: Fry chicken in small batches to ensure even cooking and maintain that delightful crunch we adore in Mongolian Chicken.
-
Spicy Kick: Add heat: For those who love a bit of spice, stir in red chili flakes or sriracha to your sauce for an extra burst of flavor.
-
Reheating Right: Preserve texture: When reheating leftovers, use a skillet instead of a microwave to keep the chicken crispy and flavorful.
-
Gluten-Free Option: Easy swaps: Make this recipe gluten-free by using tamari or coconut aminos instead of regular soy sauce in your Mongolian Chicken.
-
Veggie Boost: Add nutrients: Toss in peppers or broccoli when sautéing aromatics for a nutritious twist that the whole family can enjoy.
What to Serve with 20-Minute Mongolian Chicken
Prepare to elevate your homemade Mongolian Chicken into a complete culinary experience that delights every sense!
-
Steamed Jasmine Rice: The fragrant, fluffy rice serves as the perfect base, soaking up the sweet and savory sauce from the chicken for the ultimate comfort food pairing.
-
Stir-Fried Vegetables: A medley of bright bell peppers, snap peas, and carrots not only adds color but also introduces fresh textures that balance the dish's richness beautifully. Toss them in the pan for a quick, crisp side!
-
Crispy Wontons: These crunchy, golden bites provide a delightful contrast to the juicy chicken, making them an irresistible starter or side. A sweet chili dip pairs perfectly for extra excitement!
-
Asian Cucumber Salad: Lightly pickled cucumbers tossed with sesame oil and rice vinegar offer a refreshing crunch that cuts through the savory flavors of the Mongolian Chicken. It’s a bright way to add zest to your meal!
-
Garlic Noodles: Buttery noodles with a hint of garlic create a luscious side linking wonderfully with the bold flavors of the chicken. Just mix them with some sesame oil and green onions for added zest.
-
Chardonnay or Riesling: These white wines complement the vivid flavors and enhance the dining experience. A chilled glass brings out the sweetness of the chicken beautifully.
Let your 20-Minute Mongolian Chicken take center stage, surrounded by these delightful companions for a meal that's sure to impress!
Make Ahead Options
These 20-Minute Mongolian Chicken are perfect for busy home cooks looking to save time during hectic weeknights! You can prepare the chicken, coating it in corn starch, and place it in an airtight container up to 24 hours in advance. Additionally, the corn starch slurry can be mixed and refrigerated for easy access. When you’re ready to serve, simply fry the chicken as directed and create your sauce with the prepped slurry. To maintain quality, store leftovers in an airtight container in the fridge for up to 3 days; reheating in a skillet keeps the chicken crispy and delicious. Enjoy the convenience of homemade yumminess without the rush!
Mongolian Chicken Variations & Substitutions
Customize this dish to satisfy your cravings and dietary needs by trying these delicious twists!
-
Spicy Mongolian Chicken: Incorporate chili flakes or a dash of sriracha into the sauce for a fiery kick that elevates your taste experience.
-
Vegetarian Version: Swap out chicken for tofu or tempeh, using the same frying method for a delightful plant-based option that’s equally satisfying.
-
Add Vegetables: Toss in vibrant bell peppers, crisp broccoli, or snap peas during the sauté stage for added nutrition and a rainbow of colors on your plate.
-
Low-Sugar Option: Reduce the dark brown sugar or substitute it with a sugar alternative, making this dish a healthier choice without sacrificing flavor.
-
Serve Over Noodles: Instead of rice, try mixing it with cooked rice noodles for a delightful take on a noodle bowl that ties everything together beautifully.
-
Fruity Twist: Add chunks of pineapple or a splash of orange juice to the sauce for a surprisingly sweet and tangy flavor that complements the savory notes perfectly.
For more variety, consider this delightful Vegetarian Mongolian Chicken if you want to explore a new way to enjoy this classic dish!
Storage Tips for Mongolian Chicken
-
Fridge: Store leftovers in an airtight container for up to 3 days, keeping your delicious Mongolian Chicken fresh and ready for enjoyment.
-
Reheating: When reheating, use a skillet over medium heat to preserve that delightful crispy texture. Add a splash of water if needed to loosen the sauce.
-
Freezer: Avoid freezing cooked Mongolian Chicken, as thawing may result in a soggy texture that loses its original charm.
-
Airtight Sealing: If you must store it longer, take care to seal tightly to prevent moisture from compromising the dish's quality.
20-Minute Mongolian Chicken Recipe FAQs
How do I choose the right chicken for Mongolian Chicken?
Absolutely! I recommend using boneless chicken thighs for a juicier bite, or breasts for a leaner alternative. Regardless of your choice, make sure they are fresh, without any dark spots or unpleasant odors, ensuring the best flavor for your dish.
What’s the best way to store leftover Mongolian Chicken?
Keep your leftovers in an airtight container in the refrigerator for up to 3 days. If you're reheating, a skillet works best to regain that crispy texture. Just add a splash of water to loosen the sauce if it thickens too much while heating.
Can I freeze Mongolian Chicken?
I recommend avoiding freezing this dish. Once thawed, the crumbly coating can become soggy and lose that perfect crispiness. If you must freeze it, store in a tightly sealed container for up to 3 months, but expect a difference in texture when reheating.
What if I don't have some of the ingredients?
Very much! If you can’t find fresh ginger, ground ginger is a fine substitute, just use about ¼ teaspoon for each tablespoon of fresh. Also, if you want to keep it gluten-free, opt for tamari or coconut aminos instead of soy sauce. Be creative—this recipe easily adapts to what you have!
Can pets eat Mongolian Chicken?
Not at all! While chicken itself is safe for pets, the spices and sauces (especially soy sauce and garlic) can be harmful to them. It’s best to stick to plain, cooked chicken without any seasoning if you want to share a bite with your furry friends.
How do I ensure my Mongolian Chicken stays crispy after cooking?
To maintain that delightful crunch, always fry the chicken in small batches. This ensures each piece is evenly cooked and has room to crisp up. After frying, place them on a paper towel-lined plate to drain excess oil and preserve crispiness. Enjoy that crunchiness you crave!
Quick & Juicy Mongolian Chicken: A Takeout Game Changer
Ingredients
Equipment
Method
- In a small bowl, combine 2 teaspoons of corn starch with ⅓ cup of water, stirring until smooth. Set aside.
- Cut chicken into thin strips, place in a zip-lock bag with ¼ cup corn starch, salt, and pepper. Shake until coated.
- Heat ½ inch of vegetable oil in a wok or skillet over medium heat until hot.
- Fry chicken strips in batches for 2-3 minutes on each side, until golden brown.
- Remove excess oil from the skillet, add ginger, garlic, and half of green onions. Sauté until fragrant.
- Stir in sesame oil, soy sauce, and brown sugar. Mix well and allow to bubble slightly.
- Add corn starch slurry while stirring continuously and cook for 30 seconds until thickened.
- Return fried chicken to the pan and toss with sauce and remaining green onions.
- Serve over steamed rice or noodles and garnish with additional green onions if desired.
Leave a Reply