
As I watched my friend’s eyes widen in delight, I knew I had struck gold with my latest creation: the Red Velvet Oreo Cheesecake. This indulgent dessert is not just a feast for the eyes, with its vibrant red layers contrasting beautifully with creamy white cheesecake, but it also tickles the taste buds, thanks to its perfect balance of rich cream cheese and sweet red velvet. One of the best perks? It’s surprisingly simple to whip up, making it an impressive showstopper for gatherings or sweet moments at home. Plus, this treat is make-ahead friendly, so you can enjoy stress-free hosting while leaving your guests in awe. Ready to dive into a slice of sugary heaven? Let’s get baking!

Why is this dessert a must-try?
Indulgent Delight: Each bite of this Red Velvet Oreo Cheesecake is a blissful experience, seamlessly combining the flavors of rich cream cheese and sweet, velvety cake.
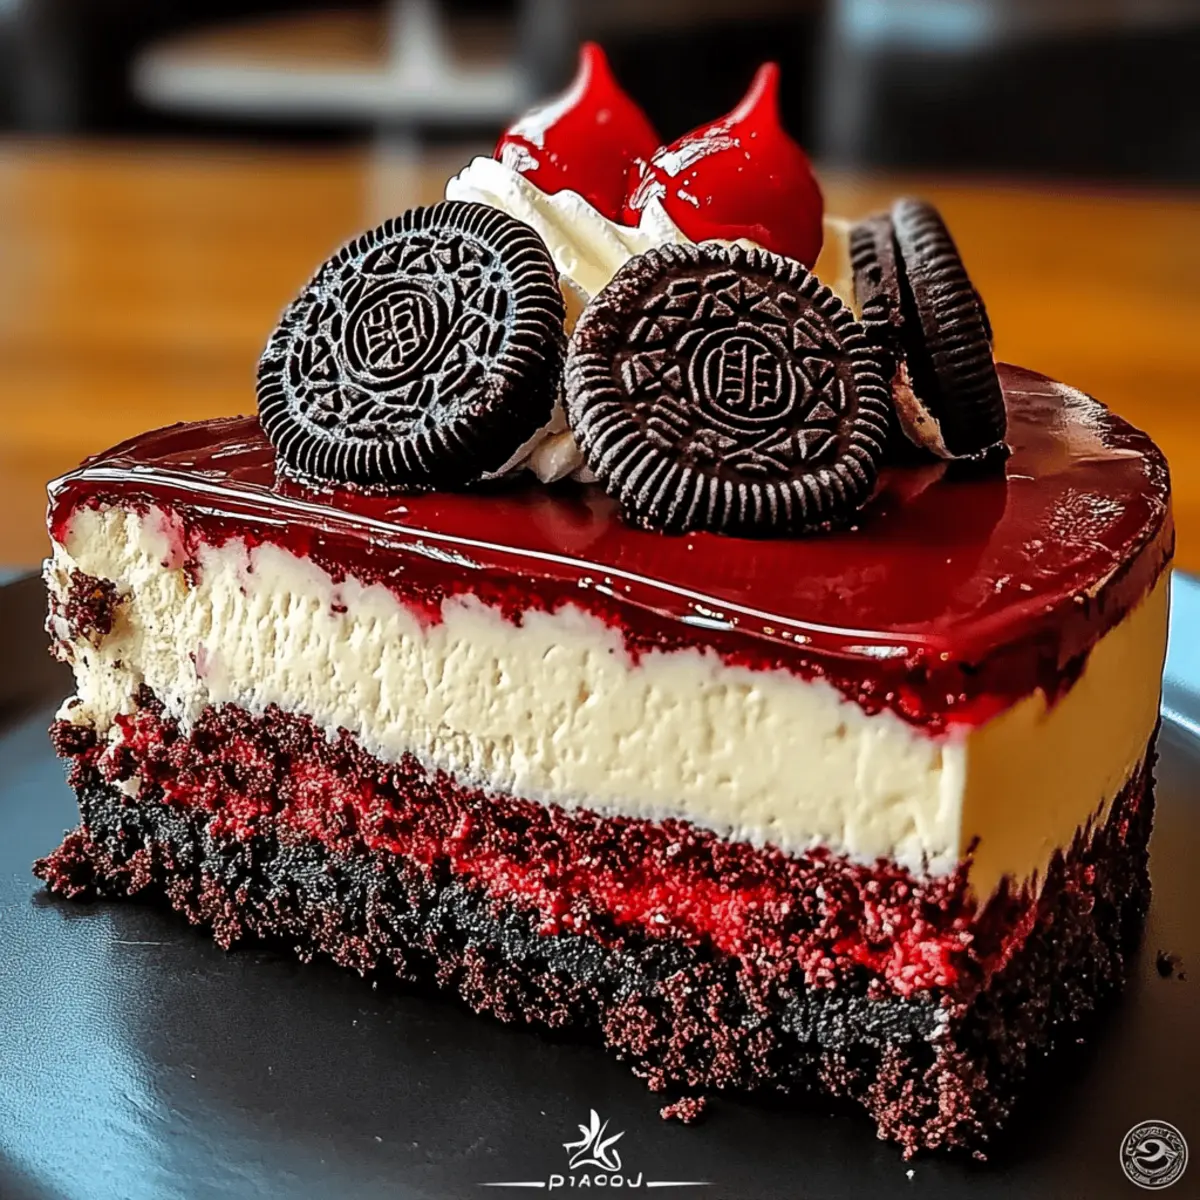
Visually Stunning: With its striking red and white layers, this cheesecake will captivate your guests, making it the highlight of any gathering.
Easy to Make: You don't need to be a baking pro! The straightforward steps make this the perfect recipe for home bakers of all levels.
Make-Ahead Magic: Prepare in advance and free yourself for fun with family and friends—it's a true stress-reliever!
Versatile Serving Options: Pair it with fresh berries or a scoop of ice cream for a delightful twist. Consider serving it alongside a warm cup of coffee for the perfect balance. Enjoy your moment of decadence!
Red Velvet Oreo Cheesecake Ingredients
For the Crust
- Oreo Cookies – The crunchy, chocolatey base gives the cheesecake a delightful texture. Substitute with Double Stuff Oreos for added creaminess or use chocolate graham crackers for a unique flavor.
- Unsalted Butter – Adds richness to the crust; make sure it’s melted for easy mixing with cookie crumbs.
For the Cheesecake Layers
- Cream Cheese – Essential for a creamy and rich texture; full-fat cream cheese is recommended for the best results.
- Granulated Sugar – This sweetens the cheesecake; adjust to suit your personal taste.
- Large Eggs – Provides structure and binds the ingredients together; use room temperature eggs for a smoother batter.
- Red Velvet Cake Mix – The flavorful star of the red velvet layer; alternatively, consider a homemade red velvet batter for a personal touch.
- Vanilla Extract – Enhances the overall flavor profile; fresh or vanilla bean paste adds an extra depth of taste.
For the Ganache Topping
- Heavy Cream – Used to create a luscious ganache; opt for coconut cream for a dairy-free version.
- Dark Chocolate – Forms the base of the ganache topping; using milk chocolate will yield a sweeter flavor profile.
With these ingredients, you’re all set to create a jaw-dropping Red Velvet Oreo Cheesecake that will leave everyone wanting more!
Step‑by‑Step Instructions for Indulgent Red Velvet Oreo Cheesecake
Step 1: Preheat and Prepare the Pan
Begin by preheating your oven to 350°F (175°C). While it’s warming up, take a 9-inch springform pan and prepare the crust. In a mixing bowl, combine crushed Oreo cookies with melted unsalted butter until well blended. Press this mixture firmly into the bottom of the springform pan to create a sturdy base for your Red Velvet Oreo Cheesecake.
Step 2: Make the Red Velvet Layer
In a large mixing bowl, beat together the cream cheese and granulated sugar until smooth and creamy, about 2-3 minutes. Add in the large eggs, red velvet cake mix, and vanilla extract, mixing until fully combined and free of lumps. The mixture should be rich and velvety, showcasing that signature red hue, perfect for your indulgent dessert.
Step 3: Prepare the Vanilla Cheesecake Layer
In a separate bowl, beat another block of cream cheese with sugar and vanilla extract until it reaches a creamy consistency. This will be the vanilla layer that pairs beautifully with the rich red velvet. Make sure the cream cheese is softened to room temperature to avoid lumps, ensuring a silky texture that complements the vibrant red layer.
Step 4: Layer the Cheesecakes
Pour the red velvet cheesecake mixture over the prepared Oreo crust, spreading it evenly with a spatula. Next, dollop the vanilla cheesecake mixture on top and gently swirl with a knife to create a marbled effect, keeping the layers distinct but beautifully blended. This step adds visual appeal to your Red Velvet Oreo Cheesecake.
Step 5: Bake the Cheesecake
Carefully place the springform pan into the preheated oven and bake for 45-50 minutes. Keep an eye on the cheesecake; it should be set around the edges while the center remains slightly jiggly. This slight jiggle ensures a creamy texture once cooled.
Step 6: Cool in the Oven
Once the baking time is complete, turn off the oven but leave the cheesecake inside for 1 hour. This gentle cooling method prevents cracks from forming and helps the cheesecake maintain a velvety texture. After the hour is up, allow it to cool further to room temperature before moving it to the refrigerator.
Step 7: Chill for Optimal Texture
Transfer the cooled cheesecake to the fridge and let it chill for at least 6 hours, or overnight if possible. This step is crucial; it enhances the flavors and allows the cheesecake to set fully, resulting in a richer, more indulgent Red Velvet Oreo Cheesecake.
Step 8: Prepare the Ganache
To make the ganache, heat the heavy cream in a saucepan until it reaches a gentle simmer. Pour the hot cream over chopped dark chocolate and stir until smooth and glossy. Allow the ganache to slightly cool before drizzling it over the chilled cheesecake for a decadent finish that pulls together all the flavors beautifully.
Step 9: Decorate and Serve
To elevate your stunning dessert, decorate with whipped cream or crushed Oreo crumbs on the top. Slice and serve each piece with a flourish, perhaps with a side of fresh berries or a scoop of vanilla ice cream. Your Indulgent Red Velvet Oreo Cheesecake is now ready to dazzle your guests!

Expert Tips for Red Velvet Oreo Cheesecake
Room Temperature Ingredients: Ensure all ingredients, especially the cream cheese and eggs, are at room temperature for a smooth batter and creamy texture.
Avoid Oven Cracks: Resist the urge to open the oven while baking. This helps maintain a stable temperature, preventing unsightly cracks in your cheesecake.
Gentle Cooling: Allow the cheesecake to cool in the oven after baking for an hour. This gradual cooling helps preserve a velvety texture and reduces the risk of cracks.
Chill for Flavor: For the best flavor, chill your Red Velvet Oreo Cheesecake overnight. It sets beautifully and enhances the richness of each layer.
Variations and Substitutions: Feel free to experiment with different Oreo flavors or add citrus zest for a refreshing kick, making this indulgent dessert uniquely yours!
Don’t Rush the Ganache: Let your ganache cool slightly before pouring it over the cheesecake to achieve a perfect pour and shine.
Red Velvet Oreo Cheesecake Variations
Embrace your creativity in the kitchen and discover delightful twists on this luscious dessert!
- Dairy-Free: Substitute cream cheese with a dairy-free alternative like cashew cream or vegan cream cheese for a plant-based version without losing creaminess.
- Flavorful Zest: Add a teaspoon of orange or lemon zest to the red velvet layer for a refreshing citrus kick that brightens each bite.
- Crunchy Toppings: Sprinkle crushed pistachios or walnuts on top of the ganache for an added crunch that contrasts beautifully with the smooth cheesecake.
- Chocolate Lovers' Delight: Incorporate mini chocolate chips into the cheesecake layers for an extra chocolatey surprise in every slice—pure bliss!
- Coffee Infusion: Mix in a tablespoon of instant coffee granules to the cream cheese filling for a coffee-flavored twist that pairs wonderfully with the chocolate.
- Caramel Swirl: Drizzle caramel sauce between the layers before baking for a touch of sweetness that will tantalize your taste buds.
- Spicy Surprise: Add a pinch of cayenne pepper or cinnamon to the red velvet cake mix for a subtle heat that elevates the flavor profile.
- Layered Delight: Consider making a two-layer cheesecake by preparing separate distinct red velvet and vanilla layers, stacking them for a dramatic presentation.
There you have it! With these variations, you can truly make this Red Velvet Oreo Cheesecake your own. Enjoy every delicious moment!
What to Serve With Red Velvet Oreo Cheesecake
Indulging in this decadent cheesecake opens the door to a world of delicious pairings that elevate your dessert experience.
- Vanilla Ice Cream: A scoop of creamy vanilla ice cream provides a cool contrast to the rich flavors of the cheesecake, enhancing every bite.
- Fresh Berries: Juicy strawberries, raspberries, or blueberries add a refreshing burst of fruitiness that cuts through the sweetness.
- Raspberry Sauce: Drizzling a tangy raspberry sauce adds a vibrant pop of color and a delightful tartness, balancing the rich sweetness of the cheesecake.
- Coffee: A warm cup of coffee complements the dessert perfectly, offering an aromatic pairing that offsets the sweetness with a bold kick.
- Chocolate Mint Cookies: Serve these alongside for a delicious crunch that echoes the cheesecake’s Oreo crust, while adding a delightful minty freshness.
- Crushed Oreos: Sprinkle some crushed Oreos on top for an extra touch of texture and fun; it’s a playful nod to the cheesecake’s base.
- Whipped Cream: A dollop of freshly whipped cream adds lightness, enhancing the cheesecake's richness while making it irresistibly photogenic.
- Chocolate Ganache Tart: For the chocolate lovers, serve a slice of ganache tart on the side for an extra dose of chocolate indulgence.
How to Store and Freeze Red Velvet Oreo Cheesecake
Fridge: Store your Red Velvet Oreo Cheesecake in an airtight container for up to 5 days. This will keep it fresh and prevent it from absorbing any unwanted odors from the refrigerator.
Freezer: You can freeze the cheesecake for up to 3 months. Make sure it's wrapped tightly in plastic wrap and aluminum foil to avoid freezer burn.
Thawing: To enjoy your frozen cheesecake, thaw it in the fridge overnight. This gentle thawing helps maintain its lovely texture.
Serving After Storage: Allow the cheesecake to come to room temperature before serving, or you can enjoy it chilled straight from the fridge for a delightful treat!
Make Ahead Options
These Indulgent Red Velvet Oreo Cheesecakes are perfect for meal prep enthusiasts! You can prepare the crust and both cheesecake layers up to 24 hours in advance, allowing you to refrigerate them separately so they stay fresh and delicious. Make sure to cover the pan tightly with plastic wrap to maintain moisture and prevent any odors from affecting the flavors. When ready to serve, simply assemble by layering the chilled red velvet and vanilla cheesecake mixtures before baking. After baking, let the cheesecake cool, then chill for at least 6 hours or overnight for the best texture. With this make-ahead approach, you’ll impress your guests with minimal last-minute effort!

Red Velvet Oreo Cheesecake Recipe FAQs
What should I look for when selecting ingredients for my Red Velvet Oreo Cheesecake?
Absolutely! The freshness of your ingredients is key. For the cream cheese, ensure it’s full-fat and at room temperature to avoid a gritty texture. When choosing Oreo cookies, look for ones without dark spots or signs of age. Fresh eggs are also critical; they should be clean and uncracked, ideally at room temperature for the smoothest batter!
How should I store my leftover Red Velvet Oreo Cheesecake?
Very good question! Store your cheesecake in an airtight container in the refrigerator for up to 5 days. It's best to cover it well to prevent it from absorbing any odors from other foods. A clean plastic wrap works great if you don't have a suitable container. Enjoy it cold straight from the fridge or at room temperature!
Can I freeze the Red Velvet Oreo Cheesecake?
Definitely! You can freeze your cheesecake for up to 3 months. To freeze, make sure it’s completely cooled and then wrap it tightly in plastic wrap followed by aluminum foil to prevent freezer burn. When you’re ready to enjoy, simply thaw it in the refrigerator overnight for the best results.
What should I do if my cheesecake cracks while baking?
No worries! Cracking can happen, especially when the temperature fluctuates. To prevent this, avoid opening the oven door while baking and ensure that your cheesecake cools gently inside the oven. If it does crack, you can cover the imperfection with ganache or whipped cream to disguise it beautifully!
Are there any dietary considerations for my guests?
Of course! If any guests have dietary restrictions, you can easily modify the Red Velvet Oreo Cheesecake to be dairy-free. Substitute cream cheese and heavy cream with dairy-free alternatives, such as coconut cream and dairy-free cream cheese. Always double-check with your guests for allergies, particularly concerning the ingredients in Oreos.
How long in advance can I prepare my Red Velvet Oreo Cheesecake?
You can make this cheesecake up to 24 hours ahead of time, which is a real time-saver. Prepare the crust and layers, then refrigerate until you’re ready to bake. Or bake it the day before your event and chill overnight for optimal flavor and texture—the more the merrier when it comes to planning!
Indulgent Red Velvet Oreo Cheesecake to Impress Everyone
Ingredients
Equipment
Method
- Preheat your oven to 350°F (175°C). Prepare the crust by combining crushed Oreo cookies with melted unsalted butter until well blended. Press this mixture into the bottom of a 9-inch springform pan.
- In a mixing bowl, beat together cream cheese and granulated sugar until smooth and creamy. Add eggs, red velvet cake mix, and vanilla extract, mixing until fully combined.
- In a separate bowl, beat another block of cream cheese with sugar and vanilla extract until creamy. This will be the vanilla layer.
- Pour the red velvet cheesecake mixture over the prepared Oreo crust, then dollop the vanilla cheesecake mixture on top and gently swirl to create a marbled effect.
- Bake in the preheated oven for 45-50 minutes until set around the edges but slightly jiggly in the center.
- Turn off the oven, leaving the cheesecake inside for 1 hour to cool gently.
- Transfer the cheesecake to the fridge and let it chill for at least 6 hours or overnight for optimal texture.
- For the ganache, heat heavy cream in a saucepan until simmering, then pour over chopped dark chocolate and stir until smooth.
- Allow the ganache to cool slightly before drizzling it over the chilled cheesecake. Decorate with whipped cream or crushed Oreo crumbs before serving.


Leave a Reply