
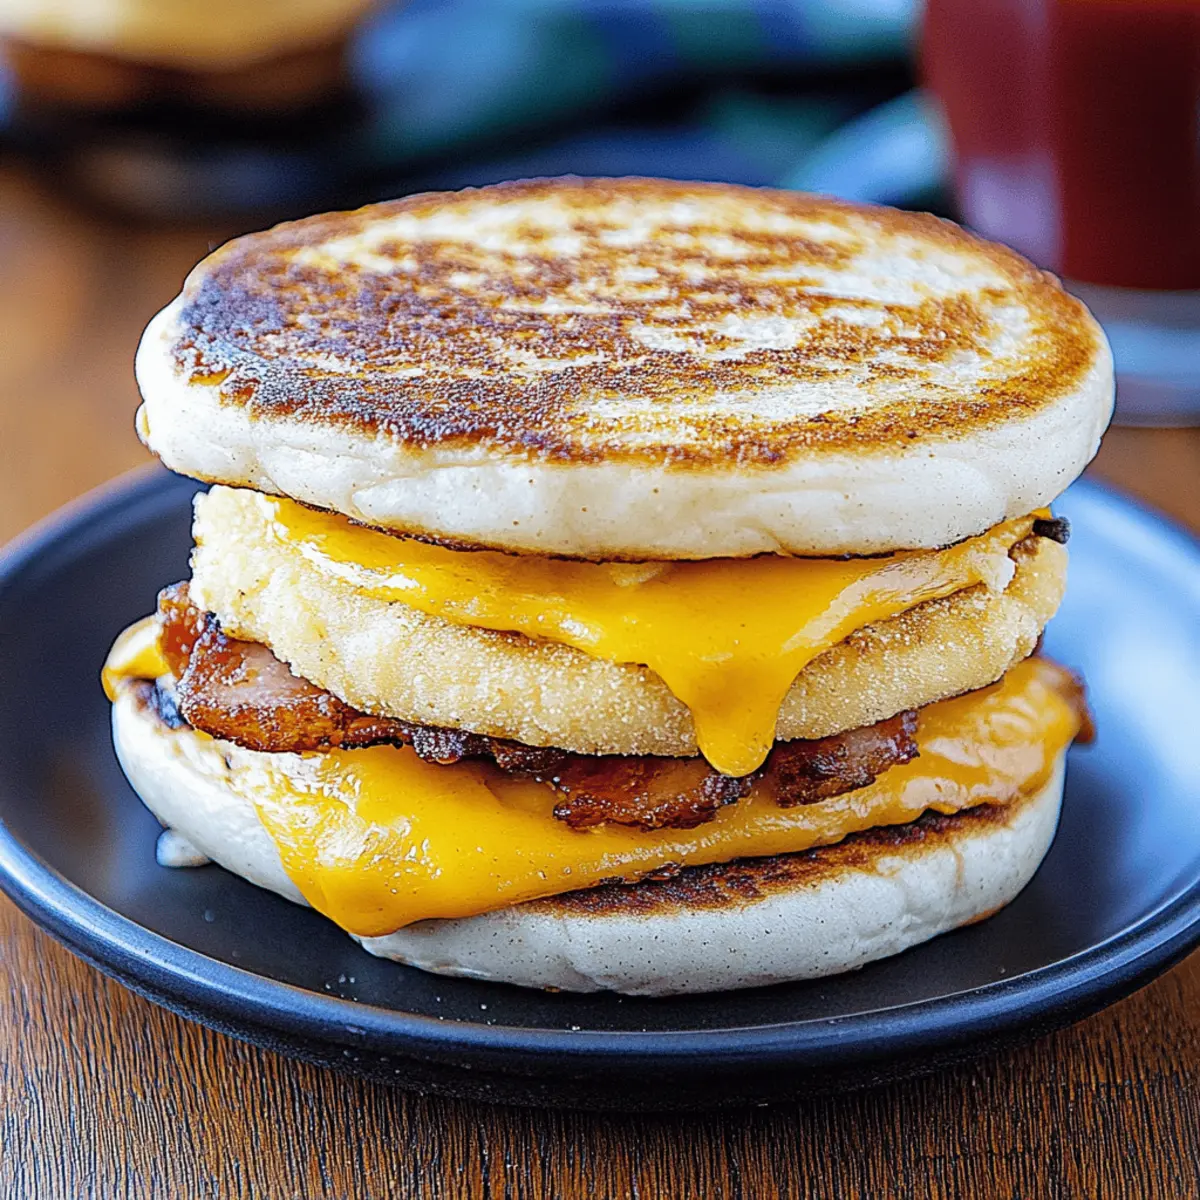
As I stood in my kitchen that crisp morning, the sizzle of crispy bacon melded with the rich aroma of baking eggs, instantly reminding me of cozy diner breakfasts. If you’re craving a quick and satisfying meal that respects both taste and dietary needs, look no further than these Gluten Free Breakfast Sandwiches. Seamlessly blending fluffy baked eggs, savory bacon, and gooey cheddar cheese, all tucked into soft homemade English muffins, this recipe not only caters to gluten-sensitive diets but also ensures that everyone at your table leaves satisfied. With just 30 minutes of prep, these customizable sandwiches become the perfect canvas for creativity—whether you prefer classic flavors or a fresh twist. So, are you ready to elevate your breakfast game and delight in a homemade treat?
Why Choose Gluten Free Breakfast Sandwiches?
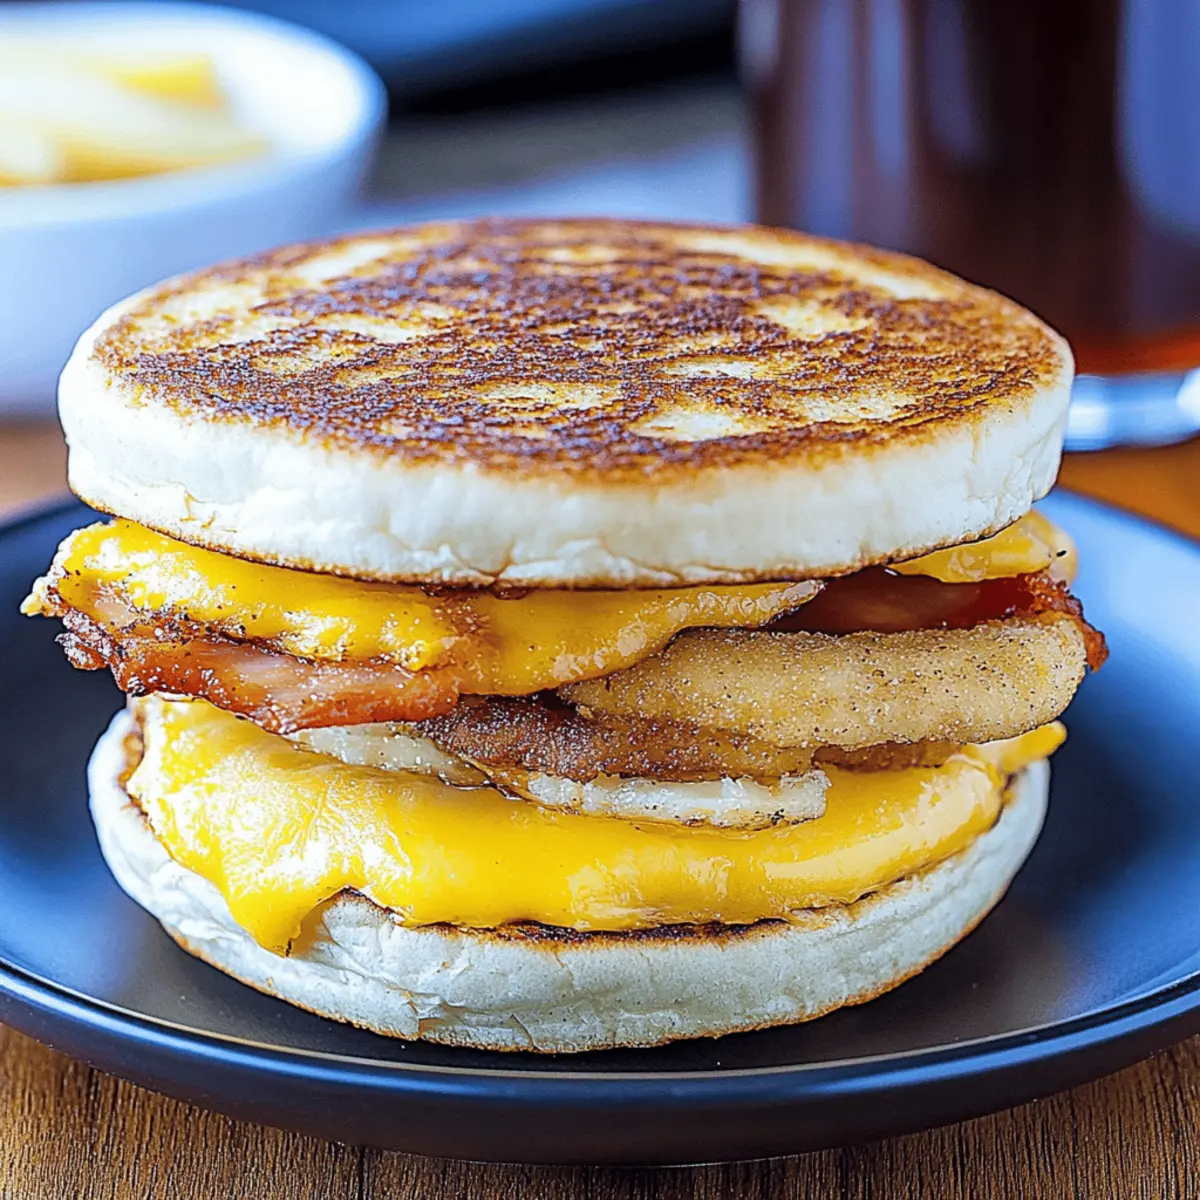
Delicious, Savory Breakfast: Every bite is bursting with rich flavors from the crispy bacon, fluffy eggs, and melty cheddar cheese, making these sandwiches an instant favorite.
Quick Preparation: In just 30 minutes, you can whip up a breakfast that not only caters to gluten sensitivities but also satisfies hungry appetites.
Customizable Options: Whether you prefer turkey bacon or want to add fresh veggies like spinach, this recipe is versatile enough to match your tastes.
Family-Friendly Delight: These sandwiches appeal to all ages, ensuring a joyful start for every member of the family. Pair them with a fresh fruit salad for a complete meal!
Make-Ahead Convenience: You can prepare these sandwiches in advance and store them easily, making breakfast hassle-free on busy mornings.
Gluten Free Breakfast Sandwich Ingredients
• Ready to create delicious Gluten Free Breakfast Sandwiches? Here’s what you’ll need:
For the Sandwiches
- Nonstick Cooking Spray – Prevents sticking during baking; try a plant-based spray for a healthier alternative.
- Eggs (4 large) – Provide protein and structure; substitute with an egg alternative for a vegan option.
- Salt and Pepper – Essential to enhance flavor; adjust to taste preferences.
- Gluten-Free English Muffins (4 pieces) – The perfect base for your sandwich; ensure they're fresh to avoid sogginess.
- Bacon or Ham (8 slices) – Adds savory flavor; swap for turkey bacon for a lighter option.
- Cheddar Cheese (4 slices) – Melts beautifully for creaminess; use dairy-free cheese for lactose-free sandwiches.
Optional Add-Ins
- Fresh Vegetables – Spinach or avocado can add nutrition and flavor; feel free to experiment!
- Alternative Cheeses – Swiss or pepper jack can change the flavor profile to suit your taste buds.
Whip up your sandwiches, and enjoy a hearty gluten-free breakfast that the entire family will adore!
Step‑by‑Step Instructions for Gluten Free Breakfast Sandwiches
Step 1: Preheat Your Oven
Start by preheating your oven to 350°F (175°C). While it warms up, grab a muffin pan and lightly spray it with nonstick cooking spray, ensuring each well is coated to prevent the eggs from sticking. This preparation sets the stage for perfectly baked fluffy eggs as part of your delightful Gluten Free Breakfast Sandwiches.
Step 2: Bake the Eggs
Crack one large egg into each muffin well, taking care not to break the yolks. Season them with a pinch of salt and pepper for added flavor. Place the muffin pan in the preheated oven and bake for 14-18 minutes, or until the egg whites are set and the yolks achieve your desired consistency. Keep an eye on them to avoid overcooking for your perfect breakfast sandwich.
Step 3: Prepare the English Muffins
While the eggs bake, slice the gluten-free English muffins in half. Arrange them cut-side up on a baking sheet and pop them under the broiler for 2-3 minutes. This quick broil will create a crisp, golden top that adds texture to your Gluten Free Breakfast Sandwiches, making each bite more enjoyable.
Step 4: Assemble the Sandwiches
Once the eggs are done baking, carefully remove them from the muffin pan. On each muffin bottom, place a baked egg, followed by a slice of crispy bacon or ham. For that cheesy goodness, add a slice of cheddar cheese on top, allowing its melty richness to elevate your breakfast experience.
Step 5: Final Melt Under the Broiler
To finish off your Gluten Free Breakfast Sandwiches, return the assembled sandwiches to the broiler for about 1 minute. Watch closely as the cheese melts and bubbles, turning slightly golden. The sizzling sound and enticing aroma will entice everyone, making it hard to wait for the first bite!
Step 6: Serve Warm
Carefully remove the sandwiches from the oven and cap them with the muffin tops. Serve them warm, inviting your family to enjoy this homemade breakfast treat. With their hearty flavors and delightful textures, these sandwiches are sure to become a breakfast favorite in no time.

Storage Tips for Gluten Free Breakfast Sandwiches
Fridge: Store leftover sandwiches in an airtight container for up to 3 days to maintain freshness and flavor.
Freezer: Assemble sandwiches and wrap tightly in foil or plastic wrap; freeze for up to 3 months for a quick breakfast option.
Reheating: When ready to enjoy, reheat in the oven at 350°F (175°C) for about 15 minutes, ensuring they are warmed through and the cheese is melty.
Enjoy Freshness: For the best quality, consume sandwiches soon after preparation, but the storage methods keep your Gluten Free Breakfast Sandwiches delicious even later!
What to Serve with Gluten Free Breakfast Sandwiches
Enhance your breakfast experience with complementary sides and beverages that bring out the flavors of your gluten-free sandwiches.
-
Crispy Hash Browns: These golden-brown potatoes add a satisfying crunch and pair perfectly with the soft sandwiches for a hearty breakfast. Their savory flavor evokes nostalgia, making every bite feel like a cozy diner morning.
-
Fresh Fruit Salad: Bright, juicy fruits can cut through the richness of the sandwiches, providing a refreshing contrast. Think of sweet strawberries, tart blueberries, and zesty oranges to elevate your meal.
-
Greens Salad: A light side salad with mixed greens, tomatoes, and cucumbers offers a fresh, crisp element to your breakfast. Toss in a simple vinaigrette for added acidity and balance.
-
Herbed Yogurt Dip: Serve a creamy yogurt dip infused with fresh herbs as a tangy complement. This adds a delightful creaminess that pairs beautifully with the savory notes of the sandwiches.
-
Hot Coffee or Tea: A warm beverage will enhance the flavors of your meal, whether it’s a rich cup of coffee or a soothing herbal tea. These drinks provide comforting warmth to kickstart your morning.
-
Smoothies: Blend up your favorite fruits and veggies for a nutrient-rich drink that’s both filling and refreshing. A berry banana smoothie harmonizes with the flavors of your sandwiches while packing a nutritious punch.
-
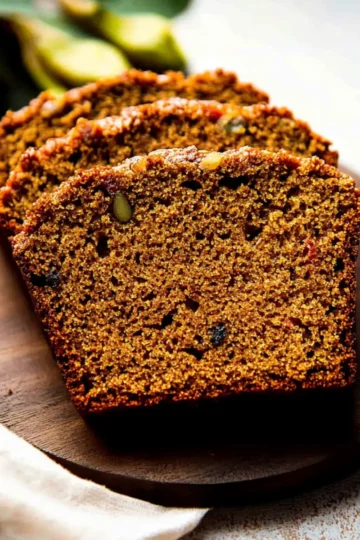
Muffin Bites: Small bites of gluten-free muffins make for a sweet addition. Check out cranberries or banana muffins, adding a delightful touch of sweetness to your breakfast spread.
Explore these pairings to create a wholesome, satisfying breakfast that’ll have everyone asking for seconds!
Gluten Free Breakfast Sandwiches Variations
Feel free to get creative with these delicious options to make the recipe uniquely yours!
-
Dairy-Free: Use cashew or almond cheese instead of cheddar to keep it creamy without dairy.
-
Veggie-Packed: Add fresh spinach, sliced tomatoes, or sautéed mushrooms to increase nutrition and flavor. These vibrant additions will make your sandwich irresistible!
-
Spicy Twist: Mix in a slice of jalapeño cheese or add hot sauce to kick up the heat. A little spice can transform your breakfast routine into a fiery delight.
-
Sausage Switch: Swap the bacon for sausage patties for a heartier option that pairs beautifully with the fluffy eggs. The savory flavors blend perfectly for a comforting bite.
-
Herbed Perfection: Add fresh herbs like chives or parsley to the eggs before baking for a fragrant, fresh taste that elevates every bite. A little greenery goes a long way in flavoring!
-
Alternative Breads: Try using gluten-free bagels or biscuits instead of English muffins for a delightful change in texture. Each option offers a new twist to your classic breakfast choice.
-
Nutty Crunch: Sprinkle some crushed nuts or seeds on top of the cheese before broiling for an added crunch and nutty flavor. A delightful surprise that adds pleasing texture!
-
Sweet Layer: For a sweeter version, slather a thin layer of jam or avocado spread on the muffin before adding eggs. It’s a fun twist that makes breakfast feel like a treat!
Expert Tips for Gluten Free Breakfast Sandwiches
- Egg Cooking Tip: Adjust baking time based on your yolk preference; for runny yolks, aim for 14-16 minutes to ensure perfect texture.
- Avoid Sogginess: Use fresh gluten-free English muffins to prevent sogginess; toasted muffins create a delightful crunch in your Gluten Free Breakfast Sandwiches.
- Broiling Alert: Keep a close eye on the muffins while broiling; remove them promptly to avoid burning and ensure a perfect melt on the cheese.
- Creative Add-Ins: Don’t hesitate to experiment with alternative ingredients; adding fresh spinach or substituting different cheeses can elevate flavors.
- Make-Ahead Magic: Prepare extra sandwiches and wrap them tightly for storage; they can be refrigerated for up to 3 days or frozen for a quick breakfast later.
Make Ahead Options
These Gluten Free Breakfast Sandwiches are a dream for busy mornings! You can prepare the baked eggs and store them in the refrigerator for up to 3 days. Simply crack the eggs into the muffin wells, bake them, and once cooled, place them in an airtight container. Additionally, you can slice the English muffins and cook the bacon or ham ahead, refrigerating these components separately to maintain freshness. When you're ready to serve, just assemble the sandwiches by broiling the muffins and toppings for about 1 minute until the cheese is melted and bubbly; this way, you’ll enjoy warm, delicious results with minimal effort!

Gluten Free Breakfast Sandwiches Recipe FAQs
What kind of eggs should I use for the sandwiches?
You can use large eggs for a hearty and protein-rich breakfast sandwich. If you're looking for a vegan option, consider using a vegan egg substitute, which is often made from ingredients like chickpea flour or tofu. I recommend experimenting with different alternatives to find one that suits your taste!
How can I ensure my eggs don’t stick to the muffin pan?
Absolutely! To prevent sticking, it’s crucial to use a nonstick cooking spray generously on each muffin compartment. You may also consider using silicone muffin cups as they naturally prevent sticking, making it easier to pop out the baked eggs without any hassle!
What are the best storage methods for leftovers?
Leftover Gluten Free Breakfast Sandwiches can be stored in an airtight container in the fridge for up to 3 days. Make sure they're fully cool before sealing to retain freshness. For longer storage, you can freeze the assembled sandwiches wrapped tightly in foil or plastic wrap, allowing for up to 3 months of delicious breakfasts at your fingertips.
How should I reheat frozen breakfast sandwiches?
To reheat frozen sandwiches, first, preheat your oven to 350°F (175°C). Remove the sandwich from its wrapping and place it on a baking sheet. Cover it loosely with foil to prevent it from drying out and bake for about 15 minutes, or until heated through and the cheese is melty. This method helps retain the delightful textures!
Can I substitute the bacon for a healthier option?
Very! You can definitely swap bacon for turkey bacon or even a plant-based bacon alternative to cut down on fat and calories. Feel free to explore alternatives like sausage patties or grilled vegetables for added flavor and nutrition. These small changes keep your meal wholesome while still being incredibly satisfying.
Is there a way to make this recipe lactose-free?
Yes! You can easily cater to lactose intolerance by replacing the regular cheddar cheese with a dairy-free cheese made from nuts or soy. There are plenty of options available in the market now that melt beautifully and provide great flavor, ensuring your Gluten Free Breakfast Sandwiches are both delicious and suitable for your dietary needs.
Deliciously Easy Gluten Free Breakfast Sandwiches for All
Ingredients
Equipment
Method
- Preheat your oven to 350°F (175°C) and lightly spray a muffin pan with nonstick cooking spray.
- Crack one egg into each muffin well and season with salt and pepper. Bake for 14-18 minutes until set.
- Slice the gluten-free English muffins in half and broil cut-side up for 2-3 minutes until crisp and golden.
- On each muffin bottom, place a baked egg, followed by bacon or ham, and then a slice of cheddar cheese.
- Return the assembled sandwiches to the broiler for about 1 minute to melt the cheese.
- Remove from the oven, cap with muffin tops, and serve warm.


Leave a Reply