
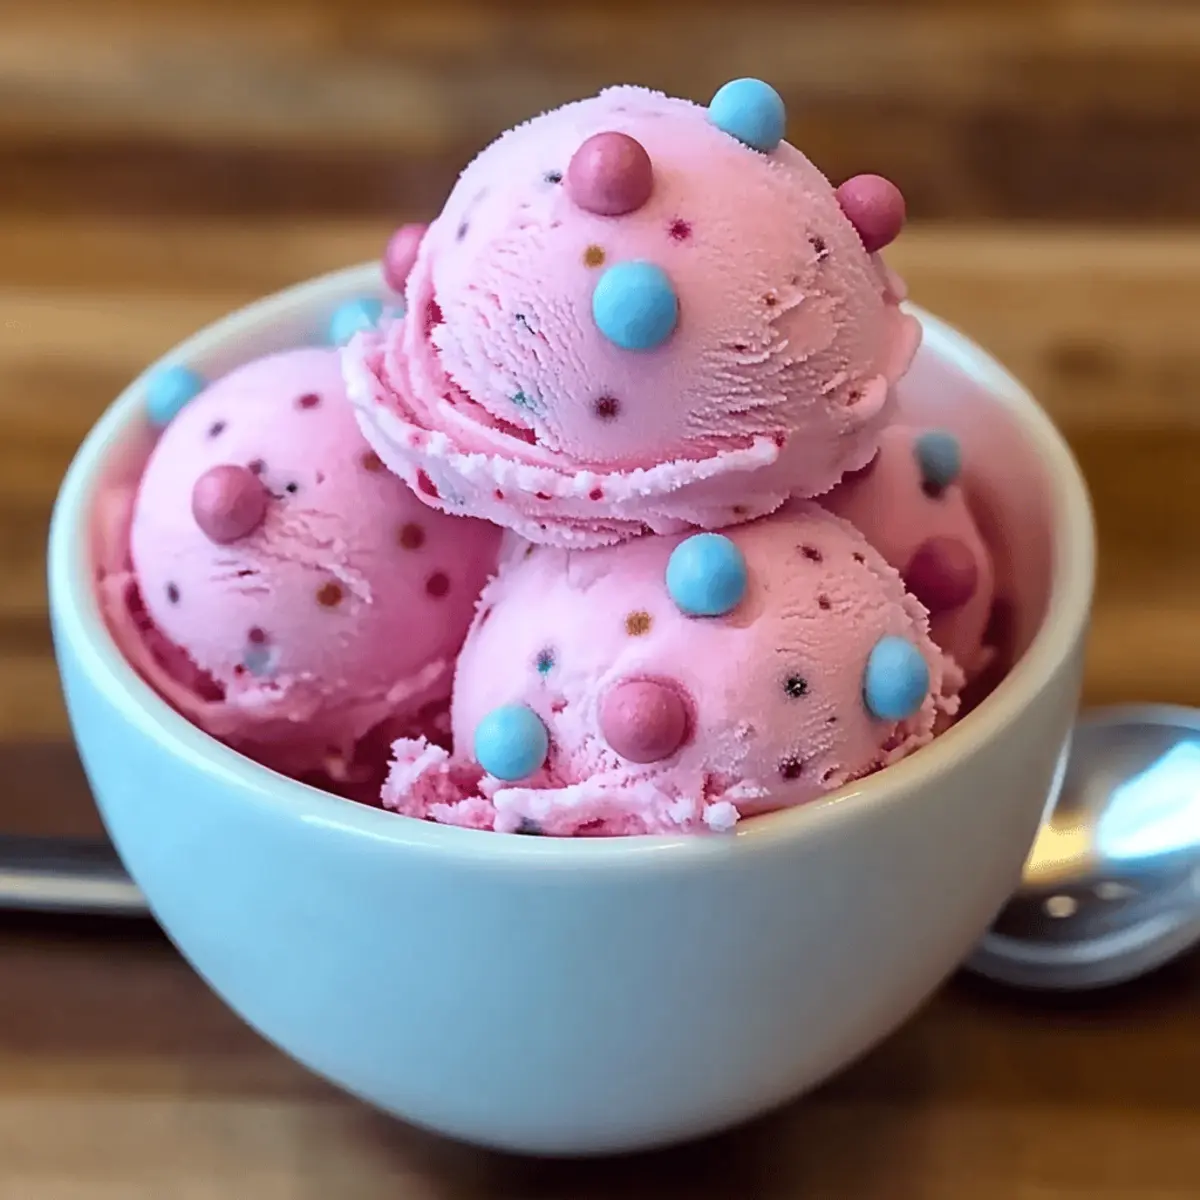
The moment I uncovered the vibrant pink of my homemade bubblegum ice cream, I was whisked back to sun-soaked childhood afternoons spent at the local ice cream parlor. This irresistibly creamy bubblegum ice cream captures that nostalgia beautifully—its sweet, candy-like flavor and velvety texture are truly a treat for all ages. What I love about this recipe is its simplicity; you only need a handful of ingredients, making it a breeze whether you're whipping it up for a summer get-together or just indulging on a cozy evening at home. Plus, with a customizable spin and a dairy-free option, it’s a deliciously wholesome alternative to store-bought varieties filled with artificial additives. Are you ready to dive in and make some childhood memories?
Why Choose Homemade Bubblegum Ice Cream?
Nostalgic flavors transport you back to childhood, making each scoop a delightful trip down memory lane. Customizable options allow you to play with different bubblegum brands, ensuring everyone at the table can enjoy their favorite twist. Dairy-free variations mean no one is left out—everyone can savor this creamy treat! Simple steps and easily accessible ingredients make this a perfect recipe for beginners and seasoned cooks alike. Plus, say goodbye to artificial additives—this homemade ice cream brings all the joy with none of the guilt! If you love unique desserts, be sure to check out our tips on dairy-free desserts.
Creamy Bubblegum Ice Cream Ingredients
Get ready to create this indulgent treat!
For the Ice Cream Base
- Bazooka Bubblegum – This is your main flavoring agent; choose a high-quality gum for optimal taste.
- Whole Milk – Provides a creamy texture; swap with full-fat coconut milk for a dairy-free option.
- Heavy Cream – Adds richness and enhances creaminess, giving the ice cream that dreamy mouthfeel.
- Cornstarch – Essential for thickening; it ensures a smooth and pleasing texture in your creamy bubblegum ice cream.
- Sugar – Sweetens the mixture; adjust to your taste for that perfect sweetness.
- Salt – A tiny pinch elevates all the flavors and balances out the sweetness.
Take a leap into the nostalgia of this creamy bubblegum ice cream by gathering these simple ingredients!
Step‑by‑Step Instructions for Creamy Bubblegum Ice Cream
Step 1: Prepare Cornstarch Slurry
Start by whisking together 1 tablespoon of cornstarch with 2 tablespoons of whole milk in a small bowl until the mixture is smooth and free of lumps. This slurry will help thicken your creamy bubblegum ice cream base later. Once it's ready, set it aside to use shortly.
Step 2: Blend Ingredients
In a blender, combine 45 pieces of Bazooka Bubblegum, 2 cups of whole milk, and 1 cup of heavy cream. Blend the mixture on high speed until it transforms into a smooth and vibrant pink liquid, which will ensure that every scoop of your creamy bubblegum ice cream is packed with flavor.
Step 3: Heat the Mixture
Pour the blended mixture into a medium saucepan and set it over a medium heat. Add 2 tablespoons of sugar and a pinch of salt. Stir occasionally as it heats, watching for small bubbles to form around the edges, indicating it’s simmering but not boiling—this usually takes about 5-7 minutes.
Step 4: Add Cornstarch Slurry
Once the mixture reaches a gentle simmer, slowly stir in the prepared cornstarch slurry while whisking continuously. Keep the mixture on medium heat and whisk vigorously for about 3-5 minutes, or until it thickens slightly and coats the back of a spoon, enhancing the texture of your creamy bubblegum ice cream.
Step 5: Cool the Mixture
To cool the thickened mixture quickly, pour it into a resealable plastic bag and submerge the bag in a bowl filled with ice water. Stir it occasionally for about 15 minutes, ensuring that it chills evenly. Once cooled, this will be the perfect time to move on to achieving that smooth ice cream texture.
Step 6: Strain the Mixture
After chilling, carefully remove the bag from the ice water. Next, strain the mixture through a cheesecloth-lined strainer into a clean bowl, discarding any solid bits of gum that may remain. This step helps create the silky smooth texture that you'll love in your creamy bubblegum ice cream.
Step 7: Churn the Ice Cream
Pour the strained mixture into your ice cream maker, following the manufacturer’s instructions. Usually, it will take about 20-25 minutes of churning for the ice cream to reach the right consistency, where it is thick and creamy. Keep an eye on it, as thickness will vary by machine.
Step 8: Freeze Before Serving
Once churning is complete, transfer your creamy bubblegum ice cream into an airtight container. Freeze it for at least 4 hours or until it is firm enough for scooping. This final step is essential to firm up the ice cream, allowing you to serve it perfectly when you’re ready for a nostalgic treat.
What to Serve with Irresistibly Creamy Bubblegum Ice Cream
Indulging in a vibrant scoop of homemade ice cream is a delightful treat, and the perfect accompaniments can turn it into a whimsical dessert spread.
-
Colorful Sprinkles: A shower of sprinkles adds a fun, festive touch, enhancing the playful vibe of your bubblegum ice cream.
-
Fluffy Whipped Cream: The light and airy texture of whipped cream balances the richness of the ice cream, creating a dreamy mouthfeel.
-
Fresh Berries: Juicy strawberries or tart raspberries provide a refreshing contrast, cutting through the sweetness of the bubblegum flavor for a well-rounded bite.
-
Chocolate Sauce: A drizzle of warm chocolate sauce mingles beautifully with the sweet ice cream, creating a delicious flavor combination.
-
Bubblegum Floats: For a refreshing twist, pair your creamy bubblegum ice cream with lemon-lime soda for a fizzy, fun treat that’s sure to delight all ages.
-
Graham Cracker Crumbs: The crunchy texture adds interest and pairs surprisingly well with the smooth, creamy ice cream for a burst of flavor.
-
Mini Chocolate Chips: Sweet morsels bring a rich, chocolatey counterpoint to the candy-like ice cream, offering a delightful surprise in every scoop.
-
Maraschino Cherries: These classic toppings add a burst of color and a touch of sweetness, making your ice cream sundae even more memorable.
Transform your dessert experience and enjoy the playful side of homemade treats!
Make Ahead Options
These creamy bubblegum ice cream preparations are perfect for busy cooks looking to save time! You can prepare the ice cream base up to 24 hours in advance by completing steps 1 through 6, then refrigerate the mixture until you’re ready to churn it. This not only enhances the flavors but also makes for a smoother ice cream. For an even quicker option, strain the mixture and store it in the fridge for up to 3 days before churning. When it's time to serve, simply follow step 7 to churn the ice cream and step 8 to freeze. By prepping ahead, you ensure that your homemade bubblegum ice cream is just as delicious and ready at a moment’s notice!
Storage Tips for Creamy Bubblegum Ice Cream
-
Fridge: Store in an airtight container for up to 3 days. Enjoy scooping it directly from the fridge for a soft and creamy treat!
-
Freezer: Keep in a well-sealed, airtight container in the freezer for up to 2 weeks. To maintain the best texture, try to consume within this timeframe.
-
Reheating: If the ice cream hardens too much, let it sit at room temperature for about 10 minutes before scooping to achieve that velvety texture again.
-
Make-Ahead: You can prepare the ice cream base up to 24 hours in advance, following steps 1-6, and refrigerate until you’re ready to churn the creamy bubblegum ice cream.
Tips for the Best Creamy Bubblegum Ice Cream
-
Quality Matters: Choose high-quality Bazooka Bubblegum for optimal flavor; lower-quality gums may not dissolve well and could affect the taste.
-
Cool Before Churning: Ensure the mixture is completely cool before churning in your ice cream maker. This step is crucial for achieving that perfectly smooth and creamy texture.
-
Strain Well: Strain the mixture more than once if needed to avoid any graininess from leftover gum bits. This will provide that delightful creamy consistency in your bubblegum ice cream.
-
Don’t Skip the Salt: A small pinch of salt elevates the flavors beautifully, rounding out the sweetness and enhancing the overall taste of your creamy bubblegum ice cream.
-
Room Temperature Scooping: Allow the churned ice cream to sit at room temperature for about 5-10 minutes before scooping. This makes serving much easier and more enjoyable.
Creamy Bubblegum Ice Cream Variations
Feel free to remix this recipe and make it uniquely yours with these fun twists!
-
Flavor Swap: Switch Bazooka Bubblegum for Double Bubble for a classic twist that might surprise you with a slightly different flavor profile.
-
Dairy-Free Delight: Use full-fat coconut milk in place of whole milk for a rich, creamy vegan version that everyone will adore.
-
Texture Boost: Add mini chocolate chips or crushed candy canes to the mixture before churning for a delightful crunch that complements the creaminess.
-
Fizzy Float: Transform your ice cream into a bubblegum float by serving it with a splash of lemon-lime soda or cream soda—perfect for summer days!
-
Nutty Variation: For a nutty twist, sprinkle in some crushed pistachios after churning. The subtle flavor pairs beautifully with the sweetness of the bubblegum.
-
Berry Bliss: Mix in fresh strawberries or raspberries before freezing for a fruity burst that perfectly balances the sweet nostalgia.
-
Spicy Kick: Add a pinch of cayenne pepper to the mixture for a surprising and fun spicy kick that contrasts beautifully with the sweetness—just a pinch will do!
-
Caramel Drizzle: Layer in homemade caramel or butterscotch sauce between scoops for a decadent treat that’s sure to please anyone having a moment of indulgence.
Each of these variations invites creativity and allows you to turn this nostalgic treat into something exciting for all tastes! If you're interested in exploring more options, consider our tips on dairy-free desserts that are equally delectable.
Creamy Bubblegum Ice Cream Recipe FAQs
How do I choose the right Bazooka Bubblegum?
Absolutely! For the best flavor in your creamy bubblegum ice cream, opt for high-quality Bazooka Bubblegum. Look for packs that feature fresher gum and free from any discoloration. This ensures it dissolves well and imparts its sweet flavor evenly throughout the ice cream.
How should I store the homemade bubblegum ice cream?
To maintain its delightful texture, store your creamy bubblegum ice cream in an airtight container in the freezer. It will keep well for up to 2 weeks. However, for the best quality, enjoy it within that timeframe to prevent ice crystals from forming.
Can I freeze the creamy bubblegum ice cream? What’s the best method?
Yes! You can absolutely freeze your creamy bubblegum ice cream. After churning, transfer it into an airtight container and freeze for at least 4 hours before serving. If it hardens too much, simply let it sit at room temperature for about 10 minutes to soften for easy scooping.
What if my mixture is too grainy? How can I fix that?
If your creamy bubblegum ice cream mixture ends up too grainy, the culprit is likely leftover gum bits. To fix this, try straining the mixture multiple times using a fine-mesh sieve or cheesecloth. This will help achieve that smooth, creamy texture you’re aiming for.
Is this recipe suitable for people with allergies?
Very! To make it friendly for various dietary needs, you can easily substitute whole milk with full-fat coconut milk for a dairy-free version. Always double-check the ingredients of the bubblegum and sugar to ensure they meet your specific allergy requirements.
How long will the ice cream last in the fridge?
You can store your creamy bubblegum ice cream in the fridge for up to 3 days, though it’s best enjoyed fresh. The warmer temperature will keep it creamy and soft, perfect for indulging in a sweet treat anytime!
Indulgent Creamy Bubblegum Ice Cream for Sweet Nostalgia
Ingredients
Equipment
Method
- Whisk together cornstarch with whole milk in a small bowl until smooth. Set aside.
- In a blender, combine Bazooka Bubblegum, whole milk, and heavy cream. Blend until smooth and pink.
- Pour the mixture into a saucepan. Add sugar and salt, heating until small bubbles form—about 5-7 minutes.
- Stir in the cornstarch slurry while whisking continuously for 3-5 minutes until slightly thickened.
- Pour the mixture into a resealable bag, submerge in ice water, and stir for 15 minutes to cool.
- Remove the bag and strain the mixture through cheesecloth to discard any solid bits.
- Pour the strained mixture into an ice cream maker and churn for 20-25 minutes until thick and creamy.
- Transfer to an airtight container and freeze for at least 4 hours before serving.


Leave a Reply