
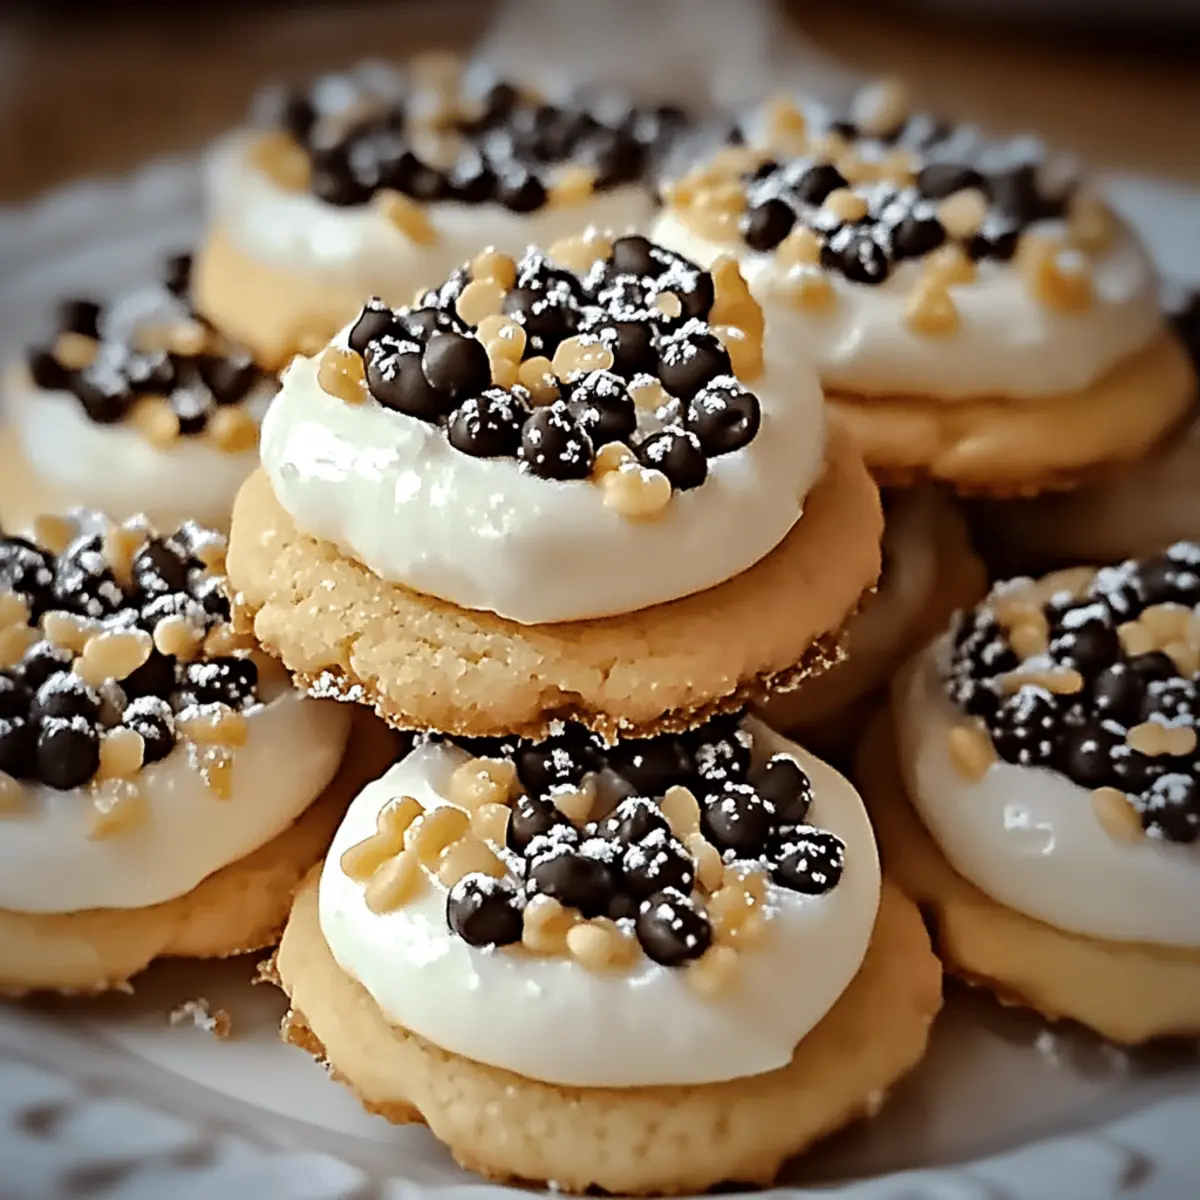
As the sweet scent of cinnamon and vanilla fills my kitchen, I can't help but smile knowing that these Cannoli Cookies are about to bring a touch of Italy right to my home. Traditional cannoli often require careful handling and intimidating techniques, but this recipe transforms those flavors into simple, bite-sized cookies that are perfect for any occasion. These delightful treats feature a soft, chewy center and a delightful creamy ricotta filling, making them an easy baking win you won't want to miss. Plus, their customizable nature allows for fun mix-ins like zesty citrus or decadent chocolate chips, ensuring you can create a version that suits every palate. So, who’s ready to indulge in these creamy, dreamy Cannoli Cookies that will leave everyone craving more?

Why Are Cannoli Cookies So Irresistible?
Uniquely Italian: These Cannoli Cookies capture the essence of traditional Italian cannoli in a fun, easy-to-make cookie form.
Customizable Flavors: Feel free to get creative with mix-ins like citrus zest, chocolate chips, or even dried fruits—there's a version for everyone!
Effortless Baking: With a simple process that requires no fancy techniques, these treats are perfect for both novice and seasoned bakers.
Perfect for Sharing: Great for gatherings, these cookies will impress your guests and have them asking for the recipe.
Quick to Prepare: In just about 30 minutes, you can whip up a delightful batch, making them a perfect choice for spontaneous dessert cravings.
Delightful Texture: Enjoy a chewy center with a delightful creamy filling, creating a satisfying bite that echoes classic Italian flavors.
Cannoli Cookies Ingredients
• This list covers everything you need to whip up heavenly Cannoli Cookies!
For the Cookie Base
- All-purpose flour – Provides structure for the cookies; gluten-free flour can be used for a gluten-free option.
- Baking powder – Essential for achieving a light texture and helps the cookies rise.
- Salt – Enhances the flavor; just a pinch will do.
- Unsalted butter – Adds richness and moisture; margarine works as a dairy-free substitute.
- Granulated sugar – Sweetens the cookie dough; you can reduce the amount for a less sweet treat.
- Large eggs – Contributes moisture and structure; for a vegan option, try flaxseed meal or applesauce.
- Vanilla extract – Provides flavor depth; almond extract can be a fun substitute.
For the Creamy Filling
- Ricotta cheese – Creates the iconic filling; whole-milk ricotta gives richness, while part-skim is a lighter choice.
- Powdered sugar – For dusting before serving, optional for a lovely presentation.
For Mix-ins
- Mini chocolate chips – Adds sweetness and texture; can be replaced with chopped nuts or omitted.
- Chopped pistachios – Brings a nutty crunch; walnuts or pecans are great substitutes.
Enjoy these Cannoli Cookies for a delightful treat that captures the essence of a classic Italian dessert, perfect for any occasion!
Step‑by‑Step Instructions for Cannoli Cookies
Step 1: Preheat the Oven
Begin by preheating your oven to 375°F (190°C). While the oven warms, prepare two baking sheets by lining them with parchment paper to prevent sticking. This will create a perfect surface for your Cannoli Cookies to bake evenly and release easily once done.
Step 2: Combine Dry Ingredients
In a medium mixing bowl, whisk together the all-purpose flour, baking powder, and a pinch of salt. This step is crucial for ensuring that your dry ingredients are evenly distributed, which will contribute to the perfect texture of your Cannoli Cookies. Set the bowl aside while you mix the wet ingredients.
Step 3: Cream Butter and Sugar
In a separate large bowl, use an electric mixer to beat the softened unsalted butter and granulated sugar together until the mixture is light and fluffy, typically about 3-4 minutes at medium speed. This process incorporates air into the dough, helping your Cannoli Cookies achieve that lovely chewy texture.
Step 4: Add Eggs and Vanilla
Once the butter and sugar are well creamed, add the large eggs one at a time, mixing thoroughly after each addition. Then, pour in the vanilla extract and continue mixing until the ingredients are fully combined. The eggs provide moisture and structure, essential for creating a delightful cookie.
Step 5: Mix in Ricotta
Carefully stir in the ricotta cheese until the mixture is smooth and fully blended. This creamy addition is what gives your Cannoli Cookies their signature filling-like texture, setting the stage for the delicious flavor to come. Ensure there are no lumps in the ricotta before proceeding.
Step 6: Combine Mixtures
With the wet ingredients ready, gradually add the dry flour mixture into the wet ingredients, stirring gently with a spatula or wooden spoon. Take your time to ensure everything is evenly mixed, avoiding overmixing—this helps keep your Cannoli Cookies tender and soft.
Step 7: Fold in Mix-ins
Now it’s time to make your Cannoli Cookies special! Fold in the mini chocolate chips and chopped pistachios until they are evenly distributed throughout the dough. This is your chance to add any additional mix-ins or substitutions if you prefer, creating a delightful twist on this classic cookie.
Step 8: Shape and Bake
Using a tablespoon, drop mounds of dough onto the prepared baking sheets, spacing them about 2 inches apart. Bake in the preheated oven for 12-15 minutes or until the edges are golden and the centers look set. Keep an eye on them to achieve that perfect golden color you desire for your Cannoli Cookies.
Step 9: Cool and Dust
Once baked, remove the trays from the oven and let the cookies cool on the baking sheets for about 5 minutes. Then, carefully transfer the Cannoli Cookies to a wire rack to cool completely. Before serving, dust them lightly with powdered sugar for an extra touch of sweetness and a beautiful presentation.

Cannoli Cookies Variations & Substitutions
Feel free to unleash your creativity and personalize these delightful Cannoli Cookies with fun and unique twists!
- Citrus Twist: Add grated lemon or orange zest for a vibrant and zesty flavor burst.
- Dried Fruit Delight: Mix in chopped dried fruits like cranberries or apricots for added sweetness and chewy texture.
- Nut Variations: Replace pistachios with walnuts or pecans for a delightful change in nuttiness and flavor.
- Dairy-Free Option: Use dairy-free cream cheese instead of ricotta for a rich, creamy filling that caters to dietary needs.
- Chocolate Variation: Swap mini chocolate chips for dark chocolate chips to indulge in a richer chocolate experience.
- Spiced Cookies: Sprinkle in a pinch of cinnamon or nutmeg for a cozy, warm spice flavor that elevates each bite.
- Gluten-Free Swap: Substitute all-purpose flour with gluten-free flour to make these cookies accessible for gluten-sensitive friends.
- Coffee Infusion: Add a tablespoon of instant coffee granules to the dough for a delightful mocha twist that coffee lovers will adore.
No matter how you decide to customize them, these Cannoli Cookies will always shine as a sweet treat brimming with love and flavor! Looking for more twists? You might also enjoy testing out various flavors in our delicious cookie recipes or learning about additional techniques to perfect your baking skills with tips from our baking guides.
Expert Tips for Cannoli Cookies
- Butter Temperature: Ensure your butter is softened at room temperature, not melted. This will help achieve a light, fluffy texture in your cookies.
- Gentle Mixing: Avoid overmixing the dough once you add the dry ingredients. Overmixing can create tough Cannoli Cookies instead of tender, chewy ones.
- Chilling Dough: If the dough feels sticky, refrigerate it for about 30 minutes before shaping. This makes it easier to handle and results in better cookies.
- Baking Time: Keep an eye on the cookies as they bake; baking times can vary based on size and your oven. Look for golden edges while ensuring the centers are just set.
- Creative Mix-ins: Don’t be afraid to experiment! Given their customizable nature, try various mix-ins, but avoid adding too much liquid to the dough to maintain cookie consistency.
- Storage Tricks: For lasting freshness, store your Cannoli Cookies in an airtight container. They keep well for up to a week at room temperature or can be frozen for up to three months.
Make Ahead Options
These Cannoli Cookies are perfect for busy home cooks looking to save time without sacrificing flavor! You can prepare the cookie dough up to 24 hours in advance by mixing all the ingredients together and storing it in an airtight container in the refrigerator. This not only enhances the flavors as they meld together, but it also ensures your cookies are just as delicious when baked fresh later. If you're planning even further ahead, the final cookies can be stored in an airtight container at room temperature for up to 5 days or frozen for up to 3 months; simply thaw overnight before serving. When you’re ready to serve, bake the dough directly from the fridge, adding a couple of extra minutes to the baking time for perfect, moist Cannoli Cookies that are sure to impress!
How to Store and Freeze Cannoli Cookies
Room Temperature: Store your Cannoli Cookies in an airtight container for up to 5 days. This keeps them soft and chewy while maintaining their delightful flavors.
Fridge: If you want to extend their freshness, refrigerate the cookies in an airtight container for up to 1 week. Just allow them to come to room temperature before enjoying!
Freezer: To preserve your Cannoli Cookies for longer, freeze them in a single layer on a baking sheet, then transfer to a freezer-safe container or bag for up to 3 months.
Reheating: When ready to enjoy frozen cookies, allow them to thaw in the refrigerator overnight, then warm in the oven for a few minutes to restore that fresh-baked goodness.
What to Serve with Creamy Cannoli Cookies
Indulging in cookies filled with creamy ricotta is a delightful way to end any meal, but why stop there?
- Espresso: This classic Italian coffee complements the cookies’ sweetness and enhances their rich flavors, making every bite more satisfying.
- Fresh Berries: Juicy strawberries or raspberries add a refreshing contrast, balancing the creamy filling with a pop of tartness.
- Gelato: A scoop of creamy gelato—especially pistachio or chocolate—takes your dessert experience to an elegant level of indulgence.
- Whipped Cream: Light, fluffy whipped cream drizzled over the cookies brings a dreamy texture and enhances their already luscious nature.
- Lemonade: The bright acidity of fresh lemonade cuts through the richness, creating a refreshing palate cleanser between bites.
- Chocolate Sauce: Drizzling warm chocolate sauce over the cookies adds an extra layer of decadence, perfect for chocolate lovers.
- Nutty Biscotti: Serve alongside crunchy biscotti for a textural contrast that pairs beautifully with the soft Cannoli Cookies.
- Spiced Tea: A warm spiced tea, like chai, harmonizes with the cookie spices, reinforcing the comforting and cozy vibes.
- Palate-Cleansing Sorbet: A fruit-based sorbet will refresh your palette while offering a delightful counterpoint to the creamy filling.
Cannoli Cookies Recipe FAQs
How do I choose the right ripeness for my ingredients?
Absolutely! When selecting your ricotta cheese for Cannoli Cookies, opt for fresh, whole-milk ricotta if possible. You want it to be creamy and not overly watery, so check for smooth texture without any lumps. The fresher, the better! As for eggs, look for ones that are clean and uncracked. Using large, fresh eggs will give you the best moisture and structure in your cookies.
How should I store Cannoli Cookies for maximum freshness?
Store your Cannoli Cookies in an airtight container at room temperature for up to 5 days. This helps maintain their chewy texture and delightful flavor. If you want to keep them longer, place the container in the refrigerator, where they can last about 1 week. Just ensure they come to room temperature before enjoying, as they taste best that way!
Can I freeze Cannoli Cookies? If so, how?
Very! To freeze your Cannoli Cookies, start by placing them in a single layer on a baking sheet and then freeze until firm, which usually takes about 1-2 hours. Once firm, transfer them to a freezer-safe container or bag, separating layers with parchment paper to prevent sticking. This way, they will stay fresh for up to 3 months! Just thaw in the refrigerator overnight and warm them in the oven for that fresh-baked taste.
What should I do if my cookie dough is too sticky?
If you find that your Cannoli Cookies dough is too sticky to handle, don't worry! Simply refrigerate the dough for about 30 minutes. This chilling process makes it much easier to scoop and shape the cookies. It also helps the cookies maintain their shape while baking, resulting in perfectly baked Cannoli Cookies without spreading too much.
Are there any dietary considerations I should be aware of?
Yes! If you’re catering to dietary needs, you can easily make these Cannoli Cookies dairy-free by substituting the ricotta cheese with a dairy-free cream cheese alternative. For nut allergies, you can omit the pistachios or replace them with seeds like sunflower seeds. As always, check the labels of all ingredients to ensure they're free from specific allergens. Enjoy your baking adventures with these delicious, customizable Cannoli Cookies!
Can I customize the flavors of my Cannoli Cookies?
The more the merrier! Feel free to get creative with your Cannoli Cookies. You can add grated lemon or orange zest for a refreshing citrus twist or swap in dark chocolate chips for a richer flavor. Dried fruits like cranberries or apricots can also introduce new dimensions of sweetness, so don’t hesitate to make it your own!

Indulgent Cannoli Cookies: A Sweet Italian Treat to Love
Ingredients
Equipment
Method
- Preheat your oven to 375°F (190°C) and line two baking sheets with parchment paper.
- In a medium bowl, whisk together the all-purpose flour, baking powder, and salt.
- In a large bowl, beat the softened butter and sugar together until light and fluffy, about 3-4 minutes.
- Add the eggs one at a time, mixing well after each addition, then add the vanilla extract.
- Stir in the ricotta cheese until the mixture is smooth and fully blended.
- Gradually add the dry mixture into the wet ingredients, stirring gently.
- Fold in the mini chocolate chips and chopped pistachios.
- Drop mounds of dough onto the prepared baking sheets, spacing them about 2 inches apart. Bake for 12-15 minutes.
- Remove cookies from the oven and let them cool before transferring to a wire rack and dusting with powdered sugar.


Leave a Reply