
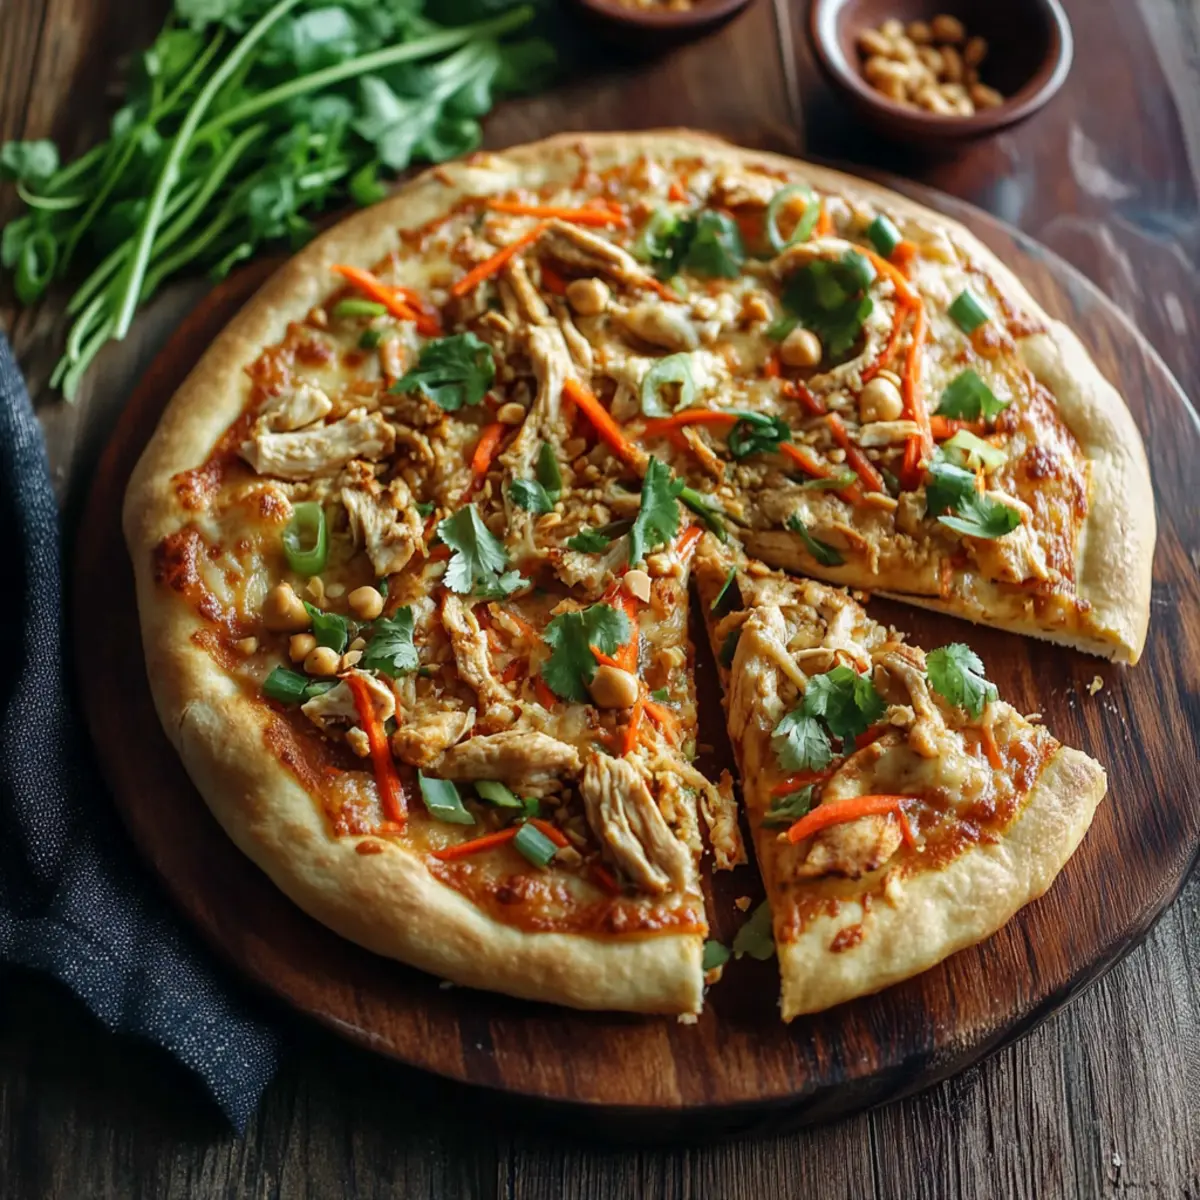
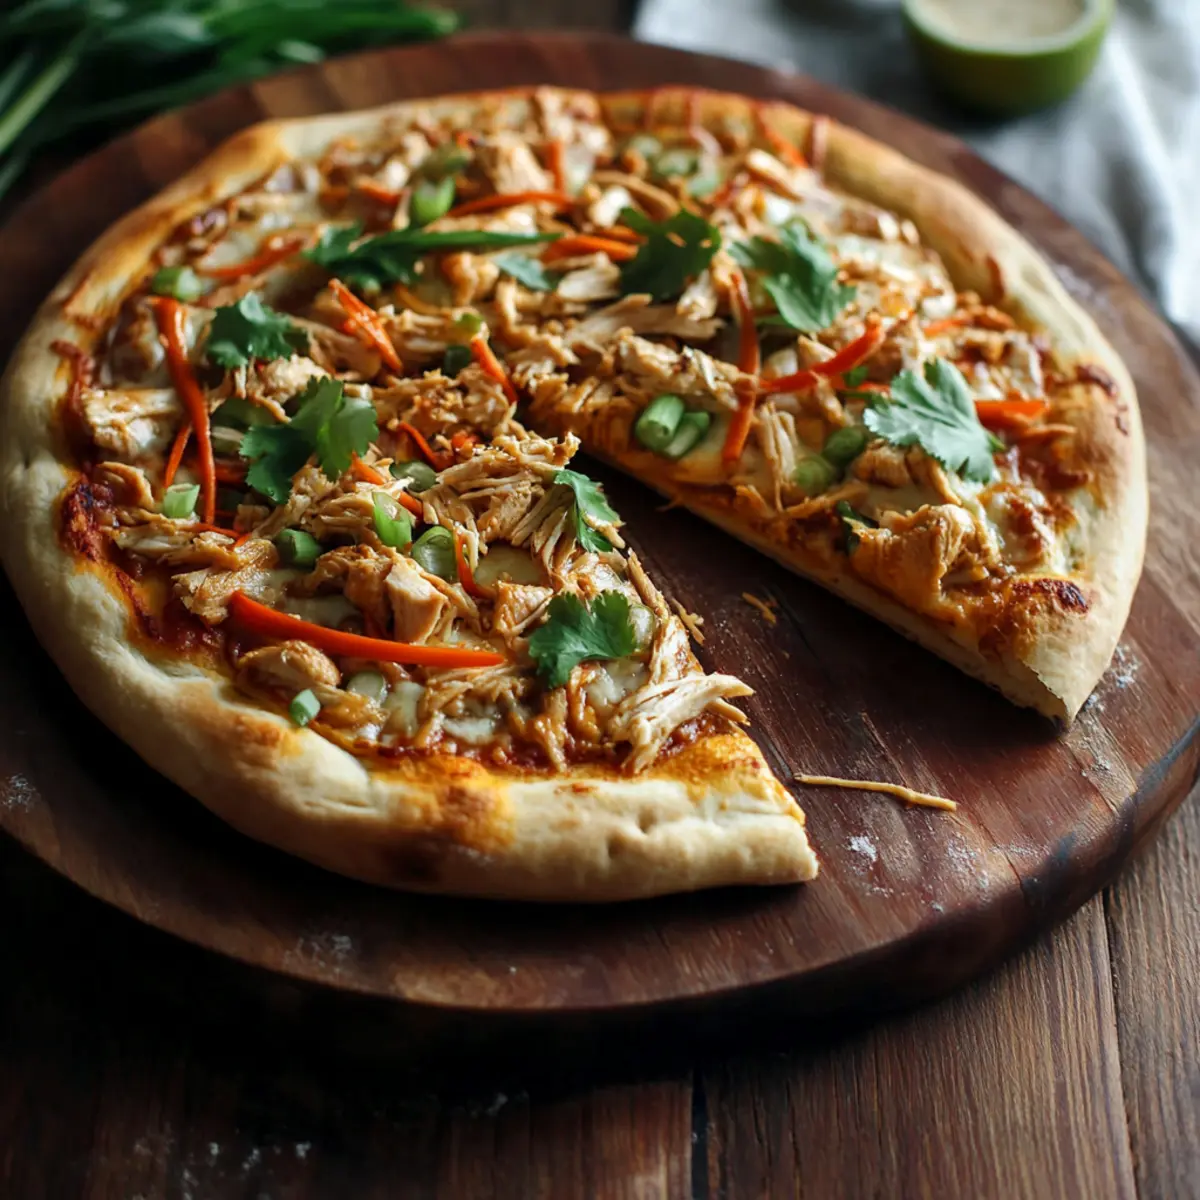
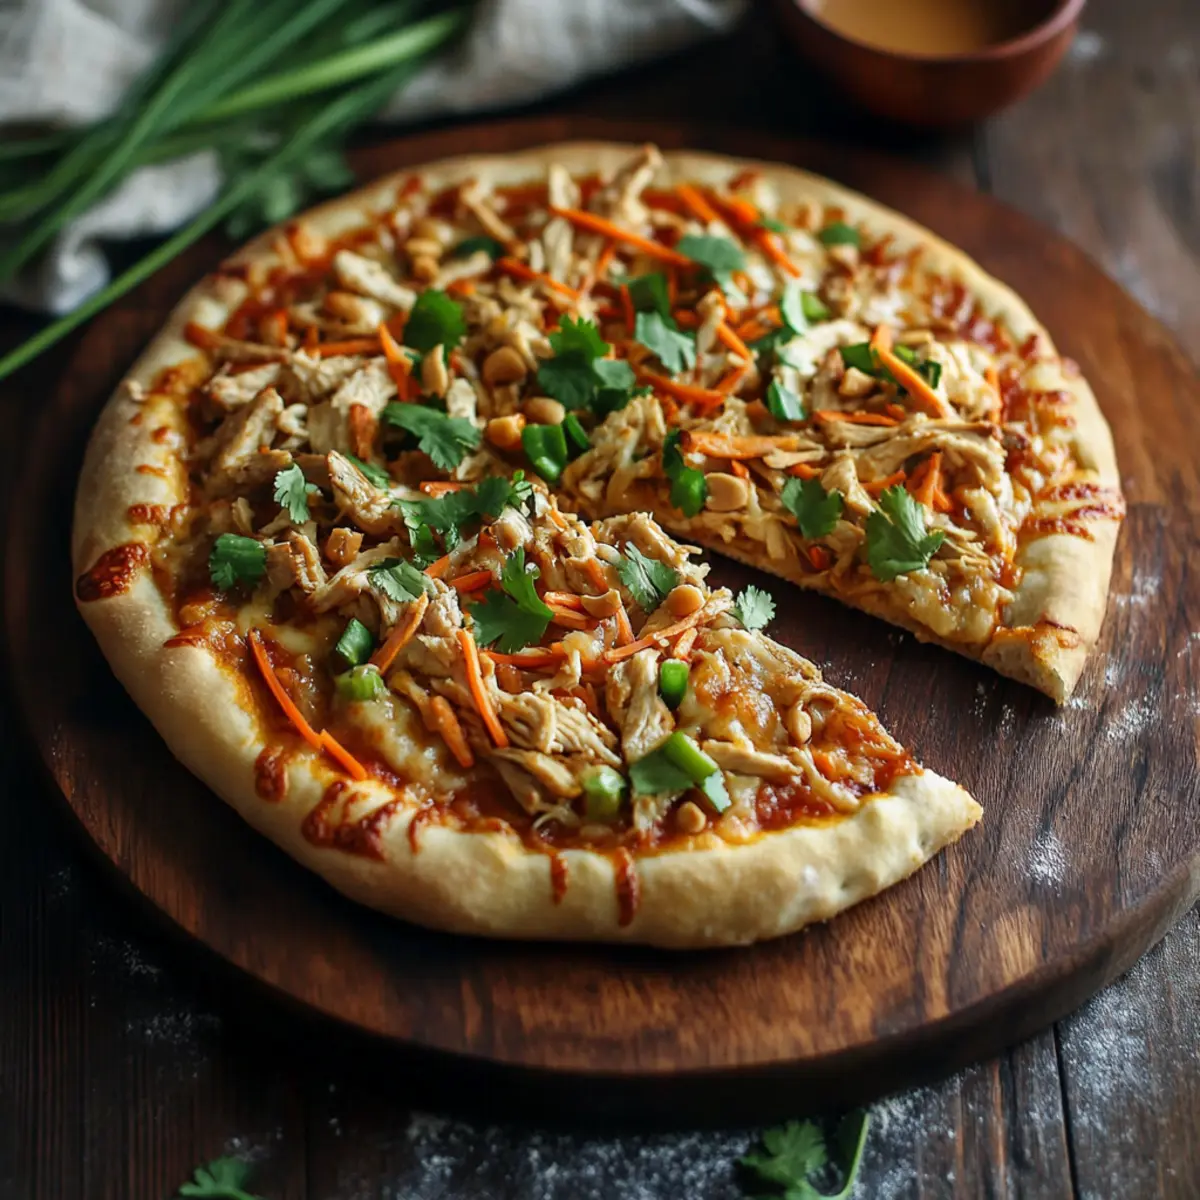
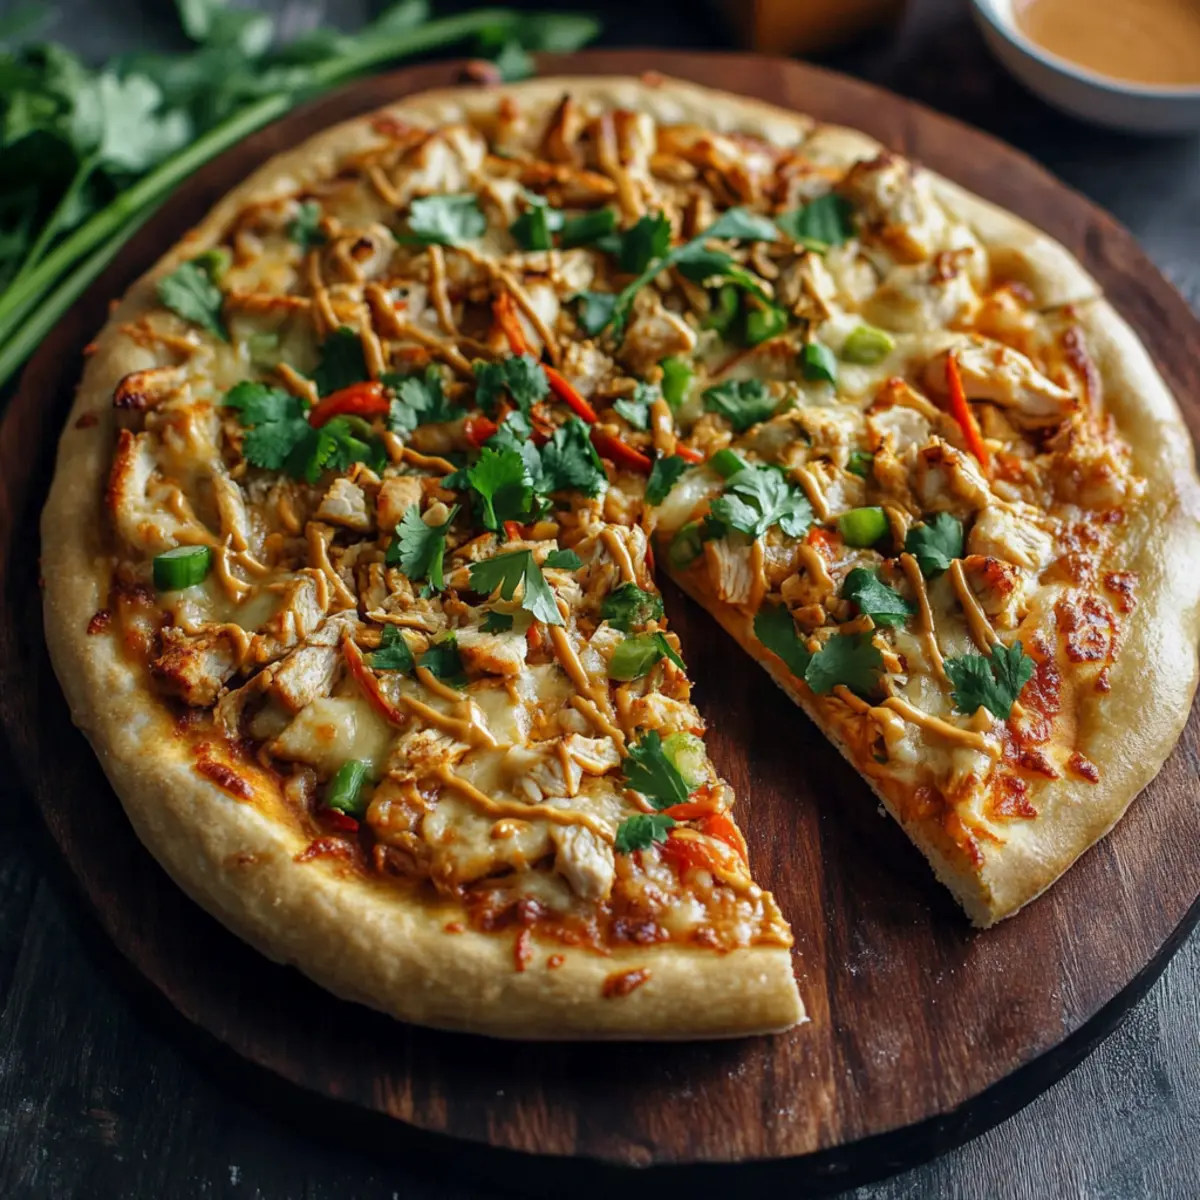
As I pulled my freshly baked Thai Chicken Pizza with Peanut Sauce from the oven, the tantalizing aroma filled my kitchen, inviting everyone to gather around. This delightful dish is far from your average pizza; it features a crispy thin crust smothered in a creamy peanut sauce that dances on your taste buds with its perfect blend of sweet, tangy, and slightly spicy flavors. What makes this recipe truly special is its versatility—whether you're in the mood for juicy shredded chicken, succulent shrimp, or even tofu, you can customize it to suit your palate. Plus, it comes together in just 27-30 minutes, making it a quick and satisfying meal that promises to impress at any casual gathering. Ready to elevate your pizza night with this delicious fusion? Keep scrolling for the full recipe and discover the magic of combining comforting and exotic flavors!
Why is Thai Chicken Pizza a Must-Try?
Unique Twist: This isn't just any pizza—it's a fusion masterpiece that elevates your traditional pizza night to new levels with a delicious blend of Thai flavors.
Customizable Options: Swap the chicken for tofu or shrimp, or add your favorite veggies, making each bite uniquely yours.
Quick Preparation: In just 27-30 minutes, you can serve up a gourmet meal, perfect for busy weeknights or entertaining friends.
Flavor Explosion: The combination of creamy peanut sauce and fresh toppings creates a taste sensation that’s both comforting and invigorating.
Diet-Friendly: With options for gluten-free crusts and vegan cheese, everyone can indulge without compromise! Check out more about gluten-free options to keep your meals inclusive!
Thai Chicken Pizza with Peanut Sauce Ingredients
• Dive into the deliciousness!
For the Dough
- Pizza Dough – Forms the crispy base; roll it out thin for that perfect crunch.
For the Peanut Sauce
- Peanut Butter – Provides rich creaminess; feel free to swap with almond butter for a different nutty flavor.
- Rice Vinegar – Adds a zesty brightness; apple cider vinegar works well in a pinch.
- Low-Sodium Soy Sauce – Offers essential saltiness without overpowering; tamari is a great gluten-free alternative.
- Olive Oil – Helps emulsify the sauce while enhancing flavors; extra virgin for quality!
- Crushed Red Pepper Flakes – For a kick of heat; adjust according to your spice preference.
- Freshly Grated Ginger – Brings aromatic warmth; ground ginger can be used in lesser amounts.
- Honey – Sweetens the sauce perfectly; maple syrup is a lovely vegan alternative.
- Sesame Oil – Adds a delightful nutty aroma; can be omitted if you don’t have it on hand.
- Water – Thins the sauce to your desired consistency, allowing it to spread smoothly.
For the Toppings
- Cooked, Shredded Chicken – A filling protein; rotisserie for quick prep or tofu for a vegetarian twist.
- Chopped Onions – Introduces a satisfying crunch; green onions are great for milder flavor.
- Shredded Carrot – Provides color and sweetness; remember to squeeze out any excess moisture before using!
- Shredded Mozzarella Cheese – Melts beautifully for a gooey finish; try dairy-free cheese for a vegan option.
- Fresh Chopped Cilantro – Adds a burst of flavor after baking; optional for those who prefer not to use it.
This Thai Chicken Pizza with Peanut Sauce is sure to become a family favorite! Don't forget to get creative with your toppings!
Step‑by‑Step Instructions for Thai Chicken Pizza with Peanut Sauce
Step 1: Preheat the Oven
Begin by preheating your oven to 425°F (220°C) according to your pizza dough instructions. This step is critical to achieving that deliciously crispy crust for your Thai Chicken Pizza with Peanut Sauce. While the oven warms up, prepare your ingredients to streamline the cooking process.
Step 2: Make the Peanut Sauce
In a mixing bowl, whisk together the creamy peanut butter, rice vinegar, low-sodium soy sauce, and olive oil. Add crushed red pepper flakes, freshly grated ginger, honey, sesame oil, and a splash of water to thin it out. Stir until smooth and creamy, adjusting the water until you reach your desired consistency—a luscious sauce that will elevate your pizza!
Step 3: Roll Out the Dough
Take your pizza dough and lightly flour your work surface. Roll it out into a thin, even layer, about 12 inches in diameter, for that perfect crispy base. Place the dough on a greased baking sheet or pizza stone, ensuring it is well-prepared to hold all the delicious toppings of your Thai Chicken Pizza with Peanut Sauce.
Step 4: Spread the Peanut Sauce
Generously spread the peanut sauce evenly over the rolled-out dough, leaving a small border along the edges for a traditional crust. The creamy layer provides a distinct flavor foundation, enhancing all the toppings that will follow. Make sure to reach every corner for a delightful taste in each bite.
Step 5: Add the Toppings
Sprinkle the cooked, shredded chicken evenly over the sauce, followed by the chopped onions and shredded carrots. The colors and textures of these toppings enhance the visual appeal and flavor profile of your Thai Chicken Pizza. Feel free to sprinkle any extra veggies you desire for a personalized touch.
Step 6: Sprinkle the Cheese
Evenly distribute shredded mozzarella cheese across the top of your assembled pizza. This gooey layer will melt perfectly during baking, binding all the toppings together for a deliciously satisfying bite. Make sure the cheese covers the toppings well for that ultimate stretch with every slice.
Step 7: Bake the Pizza
Carefully place your pizza into the preheated oven and bake for 12-15 minutes. Keep an eye on the oven; you're looking for a golden crust and melted, bubbly cheese. The aroma of the Thai Chicken Pizza with Peanut Sauce will fill your kitchen, making it hard to wait for that first bite!
Step 8: Garnish and Serve
Once baked to perfection, remove the pizza from the oven and let it cool for a couple of minutes. Garnish with fresh chopped cilantro for a burst of flavor and freshness. Slice into wedges and serve warm, allowing everyone to savor the delicious fusion of flavors that lies in your homemade Thai Chicken Pizza with Peanut Sauce.
How to Store and Freeze Thai Chicken Pizza
Fridge: Store leftover pizza in an airtight container for up to 3 days. Place parchment paper between slices to prevent sticking and keep toppings fresh.
Freezer: For longer storage, wrap individual slices tightly in plastic wrap and then place them in a freezer-safe bag. They can last up to 2 months without losing flavor.
Reheating: To reheat, place frozen slices directly in a preheated oven at 350°F for 10-15 minutes. This ensures the crust remains crispy and the toppings warm through.
Peanut Sauce Storage: If you have leftover peanut sauce, keep it in a sealed jar in the fridge for up to a week. Use it for dips or drizzles on salads or other dishes!
Thai Chicken Pizza with Peanut Sauce Variations
Get ready to unleash your creativity in the kitchen! This recipe is all about flavor and flexibility, inviting you to play with your ingredients.
-
Protein Swap: Replace shredded chicken with tofu or shrimp for a delightful twist on protein. Both alternatives bring their own unique textures, enriching the overall taste.
-
Veggie Boost: Add colorful bell peppers, crunchy bean sprouts, or spicy jalapeños for extra layers of flavor and crunch. Each topping makes this pizza a vibrant feast for the senses.
-
Dairy-Free Delight: Use dairy-free cheese for a vegan-friendly version that still provides that gooey, comforting melt. You won’t miss the traditional cheese at all!
-
Gluten-Free Option: Opt for a gluten-free pizza crust to cater to dietary needs. This way, everyone at the table can enjoy this crowd-pleaser without compromise.
-
Flavorful Sriracha: Drizzle some Sriracha or your favorite hot sauce on top for a spicy kick that amps up the flavor sensation. Adjust the heat level to suit your taste buds!
-
Fresh Herbs: Swap the cilantro for fresh basil or mint if you’re looking for a new flavor profile. These herbs lend a lovely aromatic touch that complements the peanut sauce beautifully.
-
Sweeten the Deal: Consider adding thinly sliced pineapple or mango to introduce a sweet contrast to the savory elements. This fruity enhancement beautifully complements the dish's tropical vibe.
-
Easy-Peasy Sauce: For a quick weeknight meal, rely on store-bought peanut sauce and shredded rotisserie chicken for convenience. It streamlines the process without sacrificing flavor!
That's the beauty of this Thai Chicken Pizza with Peanut Sauce—you can mix and match until you find your own perfect combination! Don't hesitate to explore and create a dish that's uniquely yours.
Make Ahead Options
Planning ahead with this Thai Chicken Pizza with Peanut Sauce can save you precious time on busy weeknights! You can prepare the peanut sauce up to 3 days in advance by storing it in an airtight container in the refrigerator; this will keep it fresh and delicious while deepening the flavors. Additionally, you can roll out the pizza dough and leave it in the fridge for up to 24 hours. When you're ready to serve, simply spread the prepared peanut sauce over the dough, add your toppings, and bake as directed. With these make-ahead steps, you'll enjoy a gourmet pizza experience with minimal effort!
Expert Tips for Thai Chicken Pizza
-
Dough Thickness: Roll the pizza dough thinly to achieve that crispy crust characteristic of a perfect Thai Chicken Pizza with Peanut Sauce. A thicker crust can result in a doughy texture.
-
Sauce Consistency: Adjust the water in your peanut sauce based on your preference. The right thickness will enhance the spreadability without sogging the crust.
-
Topping Order: Always layer the ingredients properly, starting with the peanut sauce, followed by proteins, veggies, and finally cheese. This ensures even melting and flavor distribution.
-
Vegetable Prep: Squeeze excess moisture from shredded carrots and other veggies to avoid a soggy pizza. Excess liquid can ruin the crispy experience you're aiming for.
-
Serving Fresh: For the best experience, serve your Thai Chicken Pizza immediately after baking. Reheating can compromise the crust's texture; always prefer to enjoy it fresh out of the oven.
-
Customize Freely: Feel free to experiment with your protein choices or veggies! Using shrimp or tofu can provide a delightful twist, keeping your meals exciting.
What to Serve with Thai Chicken Pizza with Peanut Sauce
There's something magical about crafting a meal that brings everyone together, and this flavorful pizza is just the beginning!
- Cool Cucumber Salad: A refreshing mix of cucumbers, mint, and lime juice offers a crisp, clean contrast to the rich peanut sauce.
- Garlic Edamame: Steamed edamame tossed with garlic and sea salt make for a delightful and healthy side, bringing a taste of Asia to your table. These little pods are both fun to eat and packed with protein!
- Thai Peanut Slaw: Crunchy cabbage, carrots, and bell peppers tossed in a light peanut vinaigrette mirror the flavors of your pizza, creating a cohesive meal.
- Roasted Sweet Potatoes: Sweet and slightly charred, these side dishes balance well with the savory aspects of the pizza. Toss them in a bit of olive oil and spices for extra flavor!
- Mango Sticky Rice: For dessert, this classic Thai sweet treat provides a perfect balance, with the creaminess of coconut rice contrasting against the vibrant mango slices. It’s a delightful way to end your meal!
- Herbal Tea: Complement the fusion flavors with a cup of calming jasmine or lemongrass tea to cleanse your palate as you enjoy each bite. The delicate floral notes will enhance your dining experience!
- Spring Rolls: Light and full of fresh veggies, these rolls are a great appetizer to start your meal. Serve with a tangy dipping sauce to echo the flavors of the pizza.
Thai Chicken Pizza with Peanut Sauce Recipe FAQs
What type of pizza dough should I use?
You can use any pre-made or homemade pizza dough for this Thai Chicken Pizza with Peanut Sauce. If you're looking for a gluten-free alternative, consider using a gluten-free pizza crust or cauliflower crust which can be quite delicious and adds a healthy twist to this dish!
How do I store leftovers properly?
Absolutely! To keep your leftover Thai Chicken Pizza fresh, store it in an airtight container in the fridge for up to 3 days. I recommend placing parchment paper between slices to prevent sticking and maintain the integrity of the toppings. This way, you'll enjoy that yummy flavor for meals to come!
Can I freeze the pizza?
Yes, you can freeze this pizza! Wrap individual slices tightly in plastic wrap and then place them in a freezer-safe bag. They can last up to 2 months in the freezer. When you're ready to enjoy them again, simply reheat straight from the freezer in a preheated oven at 350°F for about 10-15 minutes to keep the crust crispy.
What should I do if my pizza crust turns out soggy?
If you find your crust turning soggy, it could be due to excess moisture from the toppings. To combat this, I recommend squeezing out the moisture from shredded carrots and any other vegetables before putting them on your pizza. Additionally, rolling the dough thinly and pre-baking it for 5 minutes can help create a sturdier base!
Can I make this pizza vegetarian or vegan?
Very much so! You can easily make your Thai Chicken Pizza vegetarian by substituting the shredded chicken with tofu or an assortment of vegetables like bell peppers and mushrooms. For a vegan version, replace the mozzarella cheese with your favorite dairy-free cheese. This way, everyone can enjoy a tasty slice of pizza!
Irresistible Thai Chicken Pizza with Creamy Peanut Sauce
Ingredients
Equipment
Method
- Preheat the oven to 425°F (220°C) to achieve a crispy crust. Prepare your ingredients while the oven warms up.
- In a mixing bowl, whisk together peanut butter, rice vinegar, soy sauce, and olive oil. Add the red pepper flakes, ginger, honey, sesame oil, and water. Mix until smooth and creamy.
- Roll out the pizza dough on a floured surface into a 12-inch diameter for a crispy base. Place on a greased baking sheet.
- Spread the peanut sauce evenly over the rolled-out dough, leaving a small border for crust.
- Sprinkle the shredded chicken, chopped onions, and shredded carrots over the sauce.
- Distribute shredded mozzarella cheese evenly on top.
- Bake in the preheated oven for 12-15 minutes until the crust is golden and the cheese is bubbly.
- Remove from oven, garnish with cilantro, slice, and serve warm.
Leave a Reply