
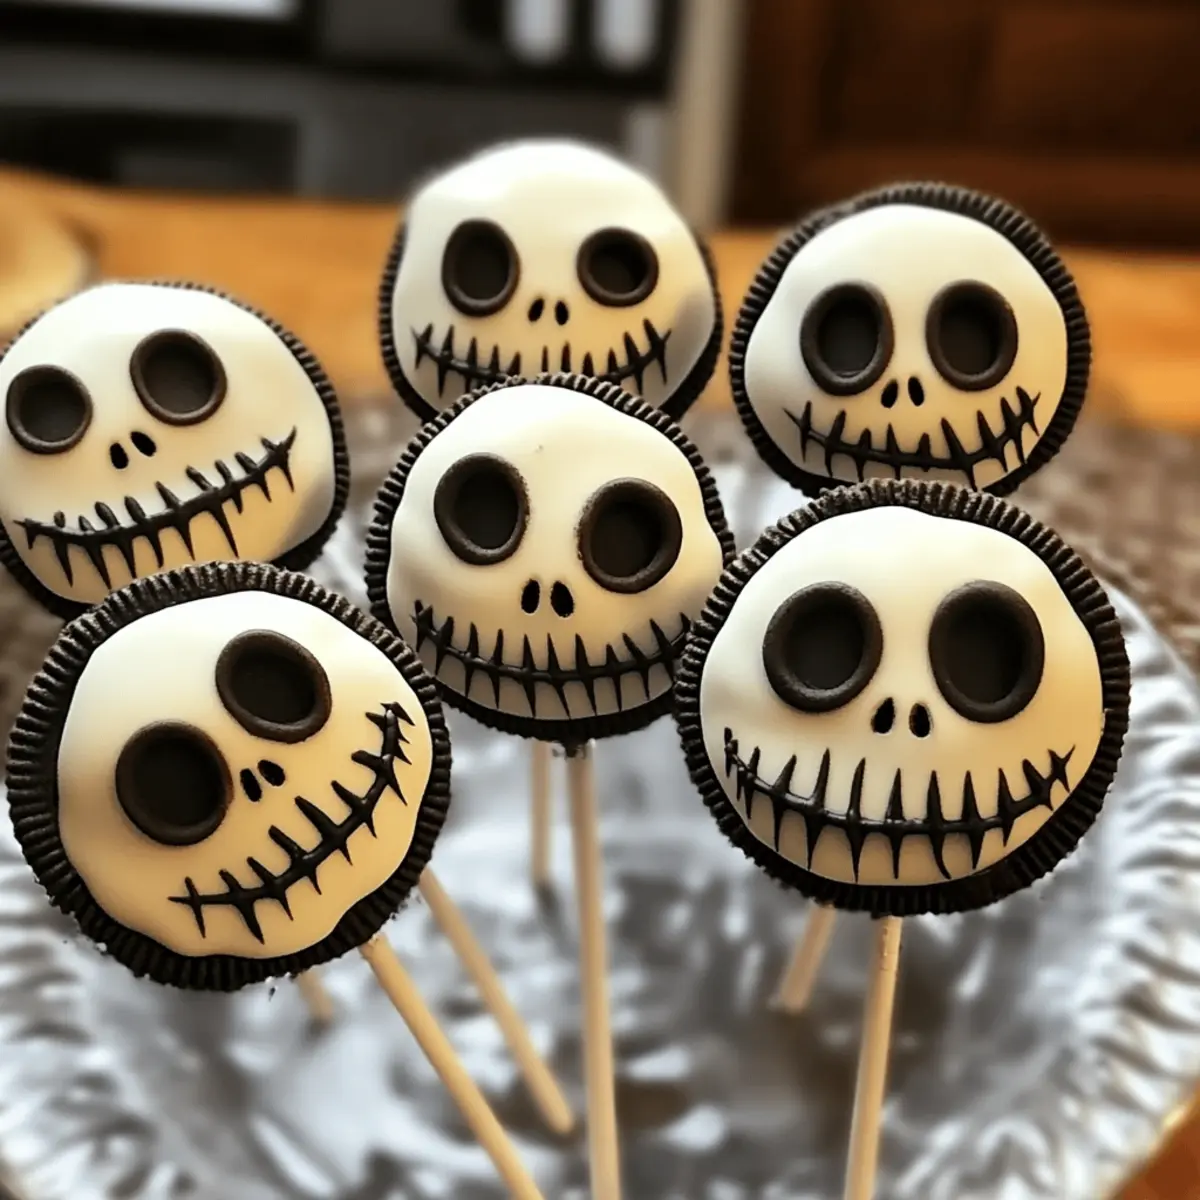
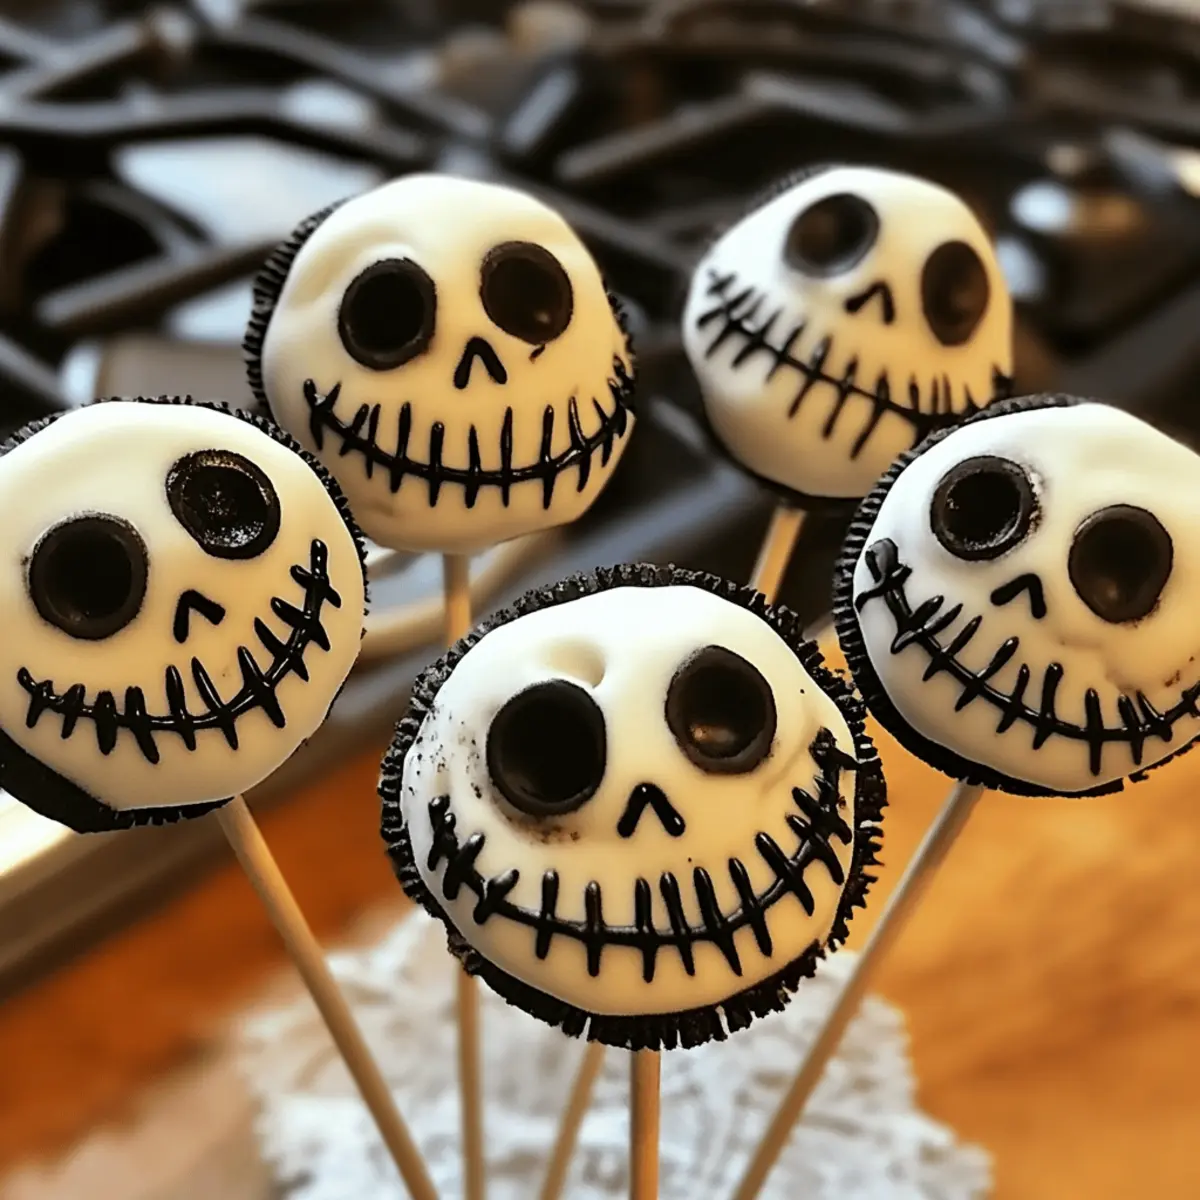
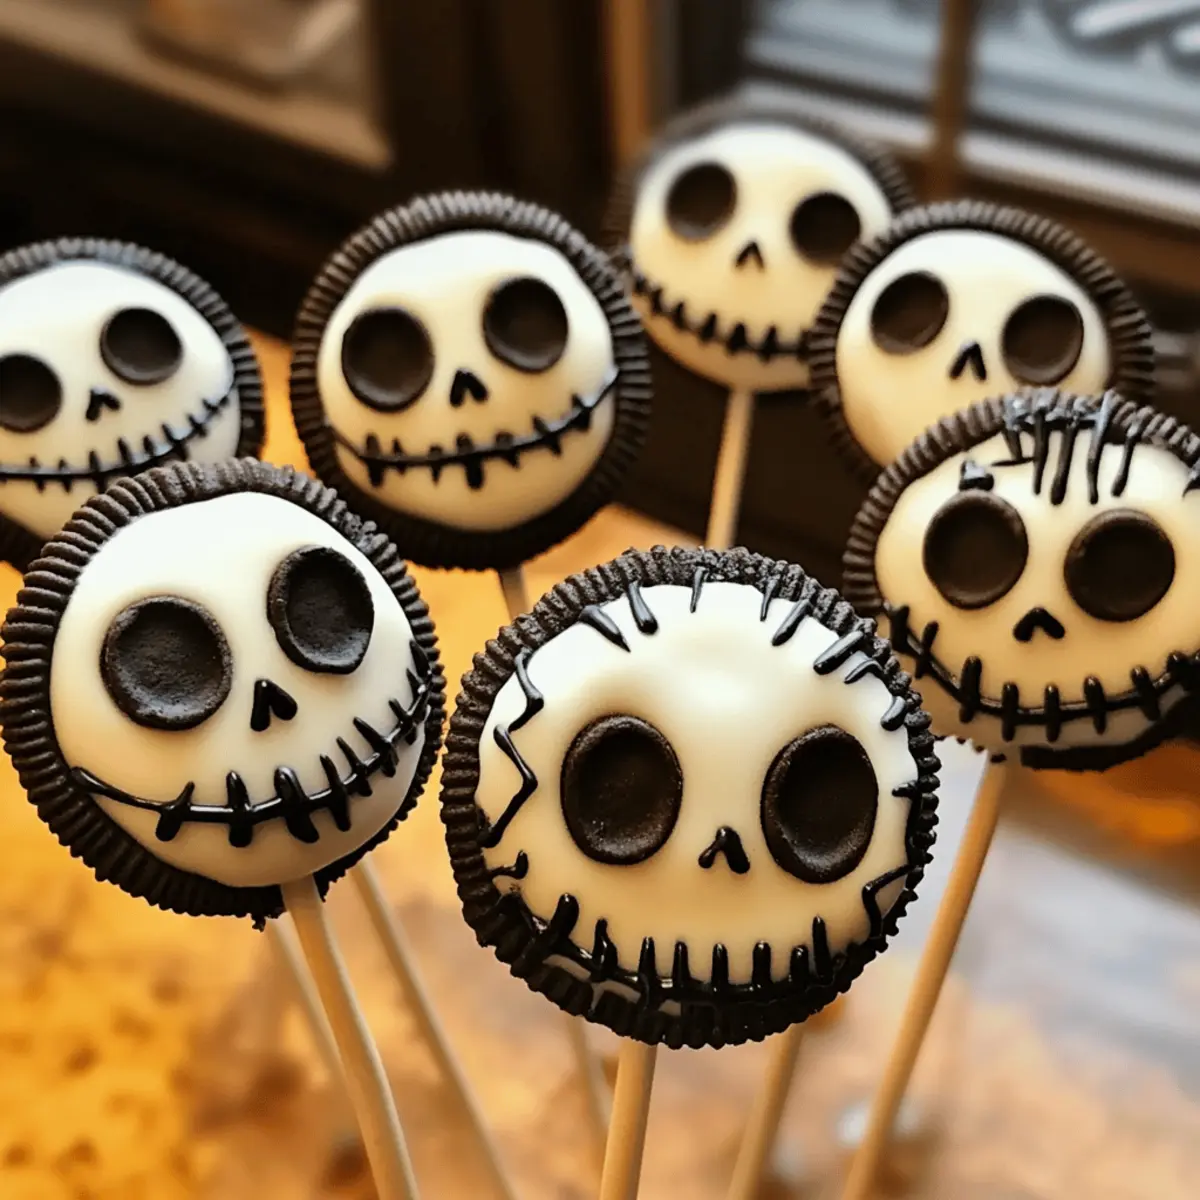
As I sifted through a sea of Halloween recipes, I stumbled upon a delightful surprise: Jack Skellington Oreo Pops beckoning to be made in my kitchen. This no-bake treat is not only a festive nod to the beloved film, but also an easy and playful way to engage the little ones in the kitchen. With a creamy white chocolate coating enveloping those classic crunchy Oreos, these pops are an absolute crowd-pleaser that bring smiles to both kids and adults. Not to mention, they make for an unforgettable addition to your spooky celebrations—super quick to whip up and even easier to customize. Curious how to transform your ordinary Oreos into these fun Halloween delights? Let’s dive in!
Why are Jack Skellington Oreo Pops a must-try?
Easy preparation: No baking required! Simply dip, chill, and decorate for a quick festive treat.
Customizable flavors: Substitute with your favorite Oreo variations—think mint or peanut butter!
Fun for all ages: Kids and adults alike will love crafting these playful pops together.
Perfect for gatherings: A delightful addition to your Halloween spread that will impress your guests.
Whimsical presentation: Transform ordinary snacks into festive decorations, embodying the spirit of Halloween!
Give these Jack Skellington Oreo Pops a try, and discover the magic of turning simple ingredients into delightful treats. For more Halloween-inspired fun, check out our spooky treat ideas!
Jack Skellington Oreo Pops Ingredients
• For the Oreo Pops
- Oreos – The irresistible chocolate base providing rich flavor. Consider Halloween-themed Oreos for added color and fun.
- White Chocolate Candy Melts – Sweet and creamy coating giving pops their smooth finish. White chocolate chips mixed with coconut oil can be used as a substitute.
- Black Edible Marker – Essential for drawing Jack Skellington's eyes and smile. AmeriColor is recommended for consistent quality.
- Lollipop Sticks – Provides easy handling for the pops. Insert into the cream filling for stability.
- Black Ribbon – Adds a decorative touch to the final presentation. Choose any ribbon that fits your Halloween theme.
- Baking Sheet lined with Foil – Ensures easy cleanup and prevents sticking. Essential for the setting process.
Step‑by‑Step Instructions for Jack Skellington Oreo Pops
Step 1: Melt the Chocolate
In a microwave-safe bowl, heat the white chocolate candy melts in 30-second intervals, stirring well between each to ensure even melting. It should take about 1-2 minutes total to become smooth and glossy. This melted chocolate will be the delicious coating for your Jack Skellington Oreo Pops, so take care to avoid overheating.
Step 2: Insert Lollipop Sticks
Dip one end of each lollipop stick into the melted chocolate, then gently insert it into the cream filling of each Oreo. Space the Oreos apart on a foil-lined baking sheet to prevent sticking. This step will secure the sticks in place, making it easier to coat the pops later.
Step 3: Chill the Oreos (Optional)
For added stability, place the baking sheet with the Oreos in the freezer for about 1 minute. This brief chill will help the melted chocolate on the stick set a bit, ensuring that your Jack Skellington Oreo Pops maintain their shape during the next steps.
Step 4: Dip the Oreos
Carefully dip each Oreo fully into the melted chocolate, allowing any excess to drip off before placing them back on the foil-lined baking sheet. Ensure a nice, even coating around the Oreos so they look lovely and festive once set. Work with a steady hand to prevent splashes.
Step 5: Refrigerate to Set
Transfer the baking sheet with the coated Oreos to the refrigerator for about 5 minutes or until the chocolate coating is firm and fully set. This step is crucial for achieving that delightful crunch when biting into your finished Jack Skellington Oreo Pops.
Step 6: Decorate the Pops
Once set, take the black edible marker and carefully draw Jack Skellington's eyes and wide grin onto each pop. Let your creativity shine as you decorate these pops to look just like the beloved character, ensuring that each Jack Skellington Oreo Pop is uniquely charming.
Step 7: Add Final Touch
To add a festive flair to your Jack Skellington Oreo Pops, tie a black ribbon around the base of each stick. This not only enhances their Halloween charm but also makes them easy to handle. Now they’re ready to delight friends and family at your spooky gatherings!
Jack Skellington Oreo Pops Variations
Feel free to unleash your creativity and make these Jack Skellington Oreo Pops truly your own with these fun and flavorful twists!
-
Minty Surprise: Swap out standard Oreos for mint-flavored ones to give your pops a refreshing taste. Just imagine that cool mint flavor peeking through the creamy coating.
-
Peanut Butter Bliss: Use peanut butter Oreos for a rich, nutty twist that pairs perfectly with the sweet white chocolate. The combination brings together sweet and savory in a delightful way.
-
Are you Nut-Free? Go for dairy-free chocolate melts and gluten-free Oreos, ensuring everyone can enjoy these spooktacular treats without worry. These customized pops are both tasty and inclusive.
-
Dazzling Colors: Use vibrant colored candy melts like orange or purple for a range of festive pops. They not only look great but also add a fun flavor dimension to each delectable bite.
-
Spiced Up Heat: Add a pinch of cayenne or chili powder to your white chocolate for a sweet-and-spicy kick that will surprise your taste buds and impress adventurous eaters!
-
Coco-Nutty Variation: Coat your pops in shredded coconut after dipping for a tropical twist. The coconut adds both texture and a delightful chewiness that pairs wonderfully with the chocolate.
-
Jack's Melting Pumpkin: Use pumpkin spice Oreos to bring a seasonal flavor to the mix. They're perfect for Halloween and add a touch of autumn warmth to each bite!
-
Ghoulish Ghoul Friend: Transform them into themed characters using different designs. Create ghostly faces or Frankenstein pops with simple edible decorations for even more festive fun!
Let your imagination thrive as you whip up these variations, and don't forget to check out our creative serving ideas for a hauntingly good presentation! Enjoy making memories while crafting these delightful treats together.
Storage Tips for Jack Skellington Oreo Pops
-
Room Temperature: Keep Jack Skellington Oreo Pops at room temperature for up to 2 hours if serving at a party. After that, it's best to refrigerate to maintain freshness.
-
Fridge: Store leftover pops in an airtight container in the refrigerator for up to 3 days. This helps keep the chocolate coating firm and prevents them from becoming soggy.
-
Freezer: For longer storage, freeze the Oreo pops for up to 3 months. Wrap each pop in plastic wrap and place them in a freezer bag. Thaw in the refrigerator before serving.
-
Reheating: No reheating is necessary for these pops. Simply enjoy them cold straight from the fridge or at room temperature for a delightful crunch!
Expert Tips for Jack Skellington Oreo Pops
-
Warm Chocolate: Ensure the melted chocolate is warm but not hot to prevent breaking the Oreos while dipping.
-
Double-Stuffed Delight: Opt for double-stuffed Oreos; they provide better stability when inserting lollipop sticks for your Jack Skellington Oreo Pops.
-
Chill Briefly: Chilling the pops for about a minute before dipping makes handling easier and helps maintain their shape.
-
Moisten Marker Tip: Keep your edible marker tip moist with a damp paper towel when decorating, ensuring your designs stay sharp and prevent dryness.
-
Customize Colors: Experiment with colorful candy melts for a variety of themed designs beyond just Jack Skellington, perfect for any occasion!
Make Ahead Options
These delightful Jack Skellington Oreo Pops are perfect for busy home cooks looking to save time during Halloween festivities! You can prepare the pops up to 3 days in advance by following these simple steps. First, complete Steps 1 through 5 (melting the chocolate, inserting sticks, chilling, dipping, and refrigerating to set). Once set, store the coated Oreo pops in an airtight container in the refrigerator to maintain freshness. To keep them looking sharp, decorate them with the edible marker just before serving, ensuring your pops remain just as cute and tasty as when first made. Enjoy the time-saving benefits and the delightful results of these spooky treats!
What to Serve with Jack Skellington Oreo Pops
Elevate your Halloween festivities with delightful accompaniments that will complement these whimsical treats and bring joy to every guest.
-
Creamy Pumpkin Soup: This velvety soup’s warm spices will balance the sweetness of the pops while keeping the Halloween spirit alive.
-
Crispy Sweet Potato Fries: Their natural sweetness and crispy texture create a lovely contrast to the rich chocolatey pops. Serve with a sprinkle of cinnamon for added flavor.
-
Spooky Themed Cheese Platter: Incorporate Halloween-themed cheeses, like ghost-shaped brie or cheddar pumpkins, to add a savory touch that pairs well with the sweet Oreo pops. It invites creativity and fun in presentation!
-
Apple Cider: The tartness of chilled apple cider refreshes the palate after indulging in a sweet treat, providing a comforting autumn vibe.
-
Chocolate-Dipped Pretzels: These crunchy, salty treats provide a delightful textural contrast and enhance the chocolate theme of your dessert table.
-
Halloween Cupcakes: Serve vibrant, themed cupcakes to sweeten the occasion even more and let guests enjoy a variety of flavors alongside their deliciously fun Oreo pops.
-
Caramel Popcorn: Light and airy with a touch of sweetness, this snack creates a festive atmosphere while adding a playful crunch. It’s perfect for nibbling during spooky storytelling!

Jack Skellington Oreo Pops Recipe FAQs
What kind of Oreos should I use for the pops?
You can use any regular Oreos, but I highly recommend trying Halloween-themed Oreos for an extra festive look! Double-stuffed Oreos are also a great choice as they offer more stability when inserting the lollipop sticks.
How should I store Jack Skellington Oreo Pops?
To keep your Jack Skellington Oreo Pops fresh, store them in an airtight container in the refrigerator for up to 3 days. This prevents the chocolate coating from becoming soggy and maintains that delightful crunch!
Can I freeze the Jack Skellington Oreo Pops?
Absolutely! You can freeze these pops for up to 3 months. Simply wrap each pop in plastic wrap and place them in a freezer bag. When you're ready to enjoy them, thaw them in the refrigerator for a few hours before serving.
What if my chocolate isn't melting properly?
If your chocolate isn’t melting smoothly, it may be overheating. Make sure to heat in 30-second intervals and stir thoroughly each time. If it’s too thick, adding a teaspoon of coconut oil can help achieve a smoother consistency.
Are there any dietary considerations for these pops?
Yes, be cautious if anyone has dietary restrictions! While the basic recipe is gluten-containing due to the Oreos, you can substitute with gluten-free Oreos to accommodate those with gluten sensitivities. Always check ingredient labels for potential allergens.
How can I make the pops more fun?
For a creative twist, try using different colored candy melts for the coating or substitute in various Oreo flavors like mint or peanut butter! You can also add edible glitter or sprinkles after dipping for added visual appeal.
Deliciously Fun Jack Skellington Oreo Pops for Halloween
Ingredients
Equipment
Method
- Melt the Chocolate: In a microwave-safe bowl, heat the white chocolate candy melts in 30-second intervals, stirring well between each to ensure even melting. It should take about 1-2 minutes total to become smooth and glossy.
- Insert Lollipop Sticks: Dip one end of each lollipop stick into the melted chocolate, then gently insert it into the cream filling of each Oreo. Space the Oreos apart on a foil-lined baking sheet.
- Chill the Oreos (Optional): For added stability, place the baking sheet with the Oreos in the freezer for about 1 minute.
- Dip the Oreos: Carefully dip each Oreo fully into the melted chocolate, allowing any excess to drip off before placing them back on the foil-lined baking sheet.
- Refrigerate to Set: Transfer the baking sheet with the coated Oreos to the refrigerator for about 5 minutes or until the chocolate coating is firm.
- Decorate the Pops: Once set, take the black edible marker and carefully draw Jack Skellington's eyes and wide grin onto each pop.
- Add Final Touch: Tie a black ribbon around the base of each stick to enhance their Halloween charm.


Leave a Reply