
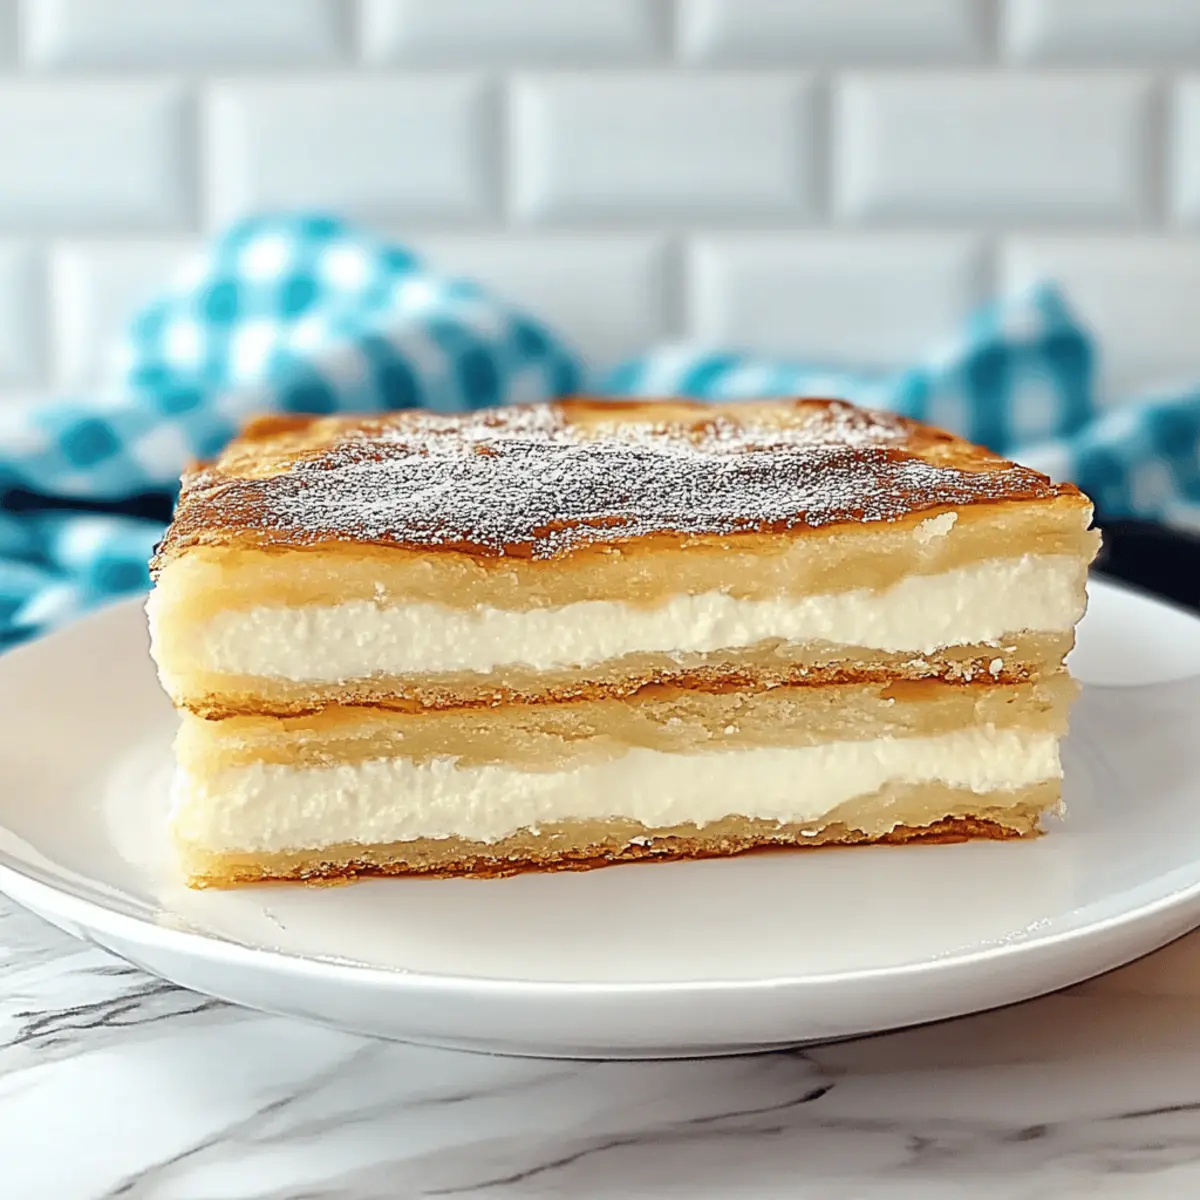
The first bite of Sopapilla Cheesecake takes me back to a cherished family gathering where laughter mingled with the sweet aroma of cinnamon. This delightful dessert combines flaky crescent rolls with a velvety cream cheese filling, creating a treat that's both simple to prepare and irresistibly satisfying. An easy dessert that requires minimal effort, this Sopapilla Cheesecake is perfect for impressing guests without the kitchen frenzy. Plus, it’s a guaranteed crowd-pleaser that will have everyone coming back for seconds! Whether you're hosting a festive celebration or simply craving a sweet indulgence, this dessert will elevate your experience. Curious about how to bring this creamy cinnamon heaven to life? Let’s get started!

Why is Sopapilla Cheesecake a Must-Try?
Simplicity at Its Best: Making this dessert is a breeze, requiring minimal prep and common ingredients you likely already have at home.
Crowd-Pleaser: Everyone loves the sweet blend of cinnamon and creamy cheesecake, making it perfect for parties and gatherings.
Versatile Variations: From fruity to chocolatey, there are ample options to customize this recipe to suit any palate. Check out additional ideas for creative variations you can easily try!
Impress Your Guests: Serve this delightful treat and watch as it disappears—your guests will think you spent hours in the kitchen!
Nostalgic Flavors: With flavors reminiscent of churros, it’s a nostalgic dessert that appeals to all ages—perfect for the young and the young at heart!
Sopapilla Cheesecake Ingredients
For the Crust
- Crescent Rolls – These provide a flaky and buttery base; feel free to substitute with puff pastry for extra flakiness.
- Butter – Adds richness while helping the layers stick together for that perfect texture.
For the Cheesecake Filling
- Cream Cheese – Essential for that creamy filling; make sure it’s softened for a smooth blend.
- Sweetened Condensed Milk – This not only sweetens but also binds the filling, giving it that delightful creaminess.
- Egg – An important binder that ensures the cheesecake sets properly.
- Mexican Vanilla – For a rich, aromatic flavor; regular vanilla can work in a pinch.
- Sugar – Adds just the right sweetness to both the filling and the topping.
For the Cinnamon Topping
- Ground Cinnamon – The star of the show; provides that irresistible cinnamon flavor reminiscent of churros.
- Sugar – Mixed with cinnamon to create a deliciously sweet topping that contrasts the creamy filling.
Now that you have all the ingredients gathered for this Sopapilla Cheesecake, you’re one step closer to creating your family's new favorite dessert!
Step‑by‑Step Instructions for Sopapilla Cheesecake
Step 1: Preheat Your Oven
Begin by preheating your oven to 350°F (175°C). This step is crucial for ensuring that your Sopapilla Cheesecake bakes evenly. As the oven warms, gather your ingredients and prepare for the delicious assembly of flavors to come. A preheated oven helps achieve that perfect golden-brown crust on your dessert.
Step 2: Mix the Cinnamon Sugar
In a small bowl, combine sugar and ground cinnamon, mixing well to create a uniform mixture. Set this aside for later use; it will enhance both the crust’s flavor and the top of your Sopapilla Cheesecake. This sweet cinnamon blend evokes the nostalgic taste of churros, building excitement for what’s to come.
Step 3: Prepare the Crescent Dough
Unroll the crescent roll dough, carefully stretching it to fit your greased baking dish. Trim any excess dough, ensuring you cover the entire base. This flaky layer will provide the foundation for your cheesecake. The dough should easily drape over the corners, creating a neat and tidy crust ready to hold that luscious filling.
Step 4: Brush with Butter and Sprinkle Cinnamon Sugar
Liberally brush the bottom of your baking dish with melted butter, allowing it to soak into the dough. Next, sprinkle half of your cinnamon-sugar mixture over the buttered surface. This creates a sweet base that will elevate the flavors of your Sopapilla Cheesecake, preparing your taste buds for a delightful experience.
Step 5: Par-Bake the Crust
Place the baking dish in the oven and par-bake the crescent dough for 5-6 minutes. This step is key to preventing a soggy bottom crust. After the timer goes off, the dough should be slightly set but not fully browned. Remove it from the oven and let it cool for a moment while you prepare the creamy filling.
Step 6: Mix the Creamy Filling
In a mixing bowl, add softened cream cheese and whisk until smooth and creamy. Gradually mix in the sweetened condensed milk, followed by the egg and vanilla. Continue to blend these ingredients until combined. This rich cheesecake filling will create a luscious contrast to the flaky crust of the Sopapilla Cheesecake.
Step 7: Pour the Filling Onto the Crust
Carefully pour the creamy cheesecake filling over the par-baked dough, using a spatula to spread it evenly. This ensures each bite of your Sopapilla Cheesecake is packed with that irresistible creaminess. Take your time to make sure the filling is well-distributed, setting it up for the delightful second layer of dough.
Step 8: Add the Second Layer of Crescent Dough
Unroll the second package of crescent dough and place it over the cheesecake filling, gently pressing it down to adhere. Brush this layer with melted butter and sprinkle the remaining cinnamon-sugar mixture on top. This delicious topping will caramelize while baking, creating a beautifully sweet crust that complements the filling.
Step 9: Bake Until Golden
Return the dish to the oven and bake for 30-35 minutes. You'll know your Sopapilla Cheesecake is ready when the top is golden brown and the filling has set. Allow the sweet aroma to fill your kitchen, building anticipation for the satisfying dessert that awaits. Keep an eye on it to prevent over-browning.
Step 10: Cool and Chill
Once baked, remove the dish from the oven and let the Sopapilla Cheesecake cool at room temperature. This step is essential to let the flavors meld and the texture firm up. After cooling, refrigerate for at least 4 hours, allowing the layers to come together beautifully, which is vital for clean slicing.
Step 11: Slice and Serve
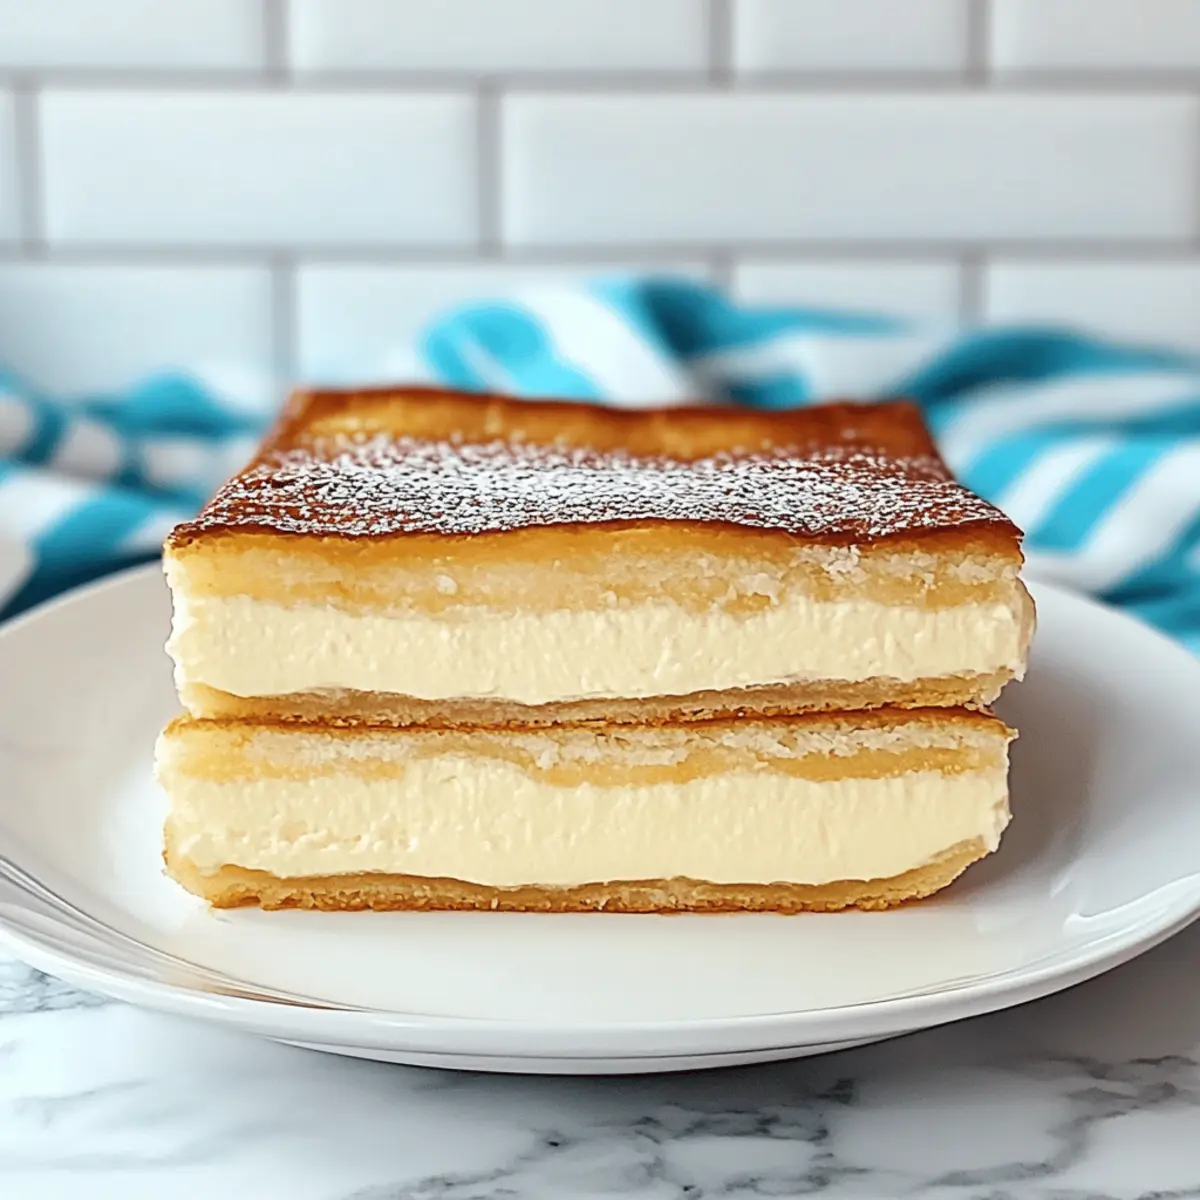
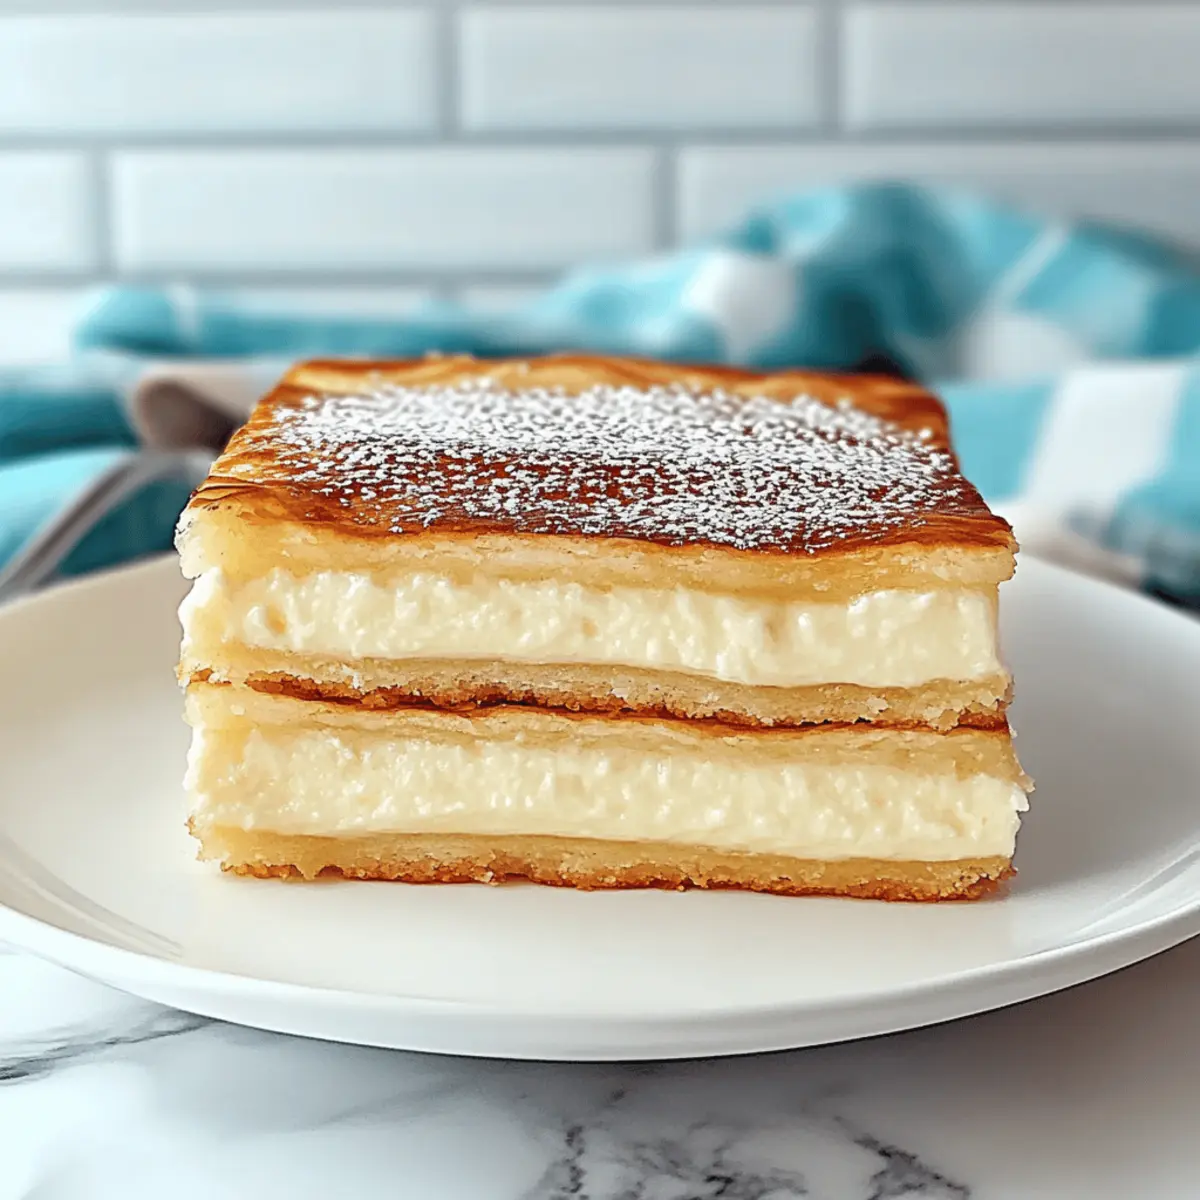
After chilling, use a sharp knife to cut your Sopapilla Cheesecake into bars for serving. The crisp edges will contrast delightfully with the creamy filling. You can serve these decadent treats with optional toppings like a drizzle of honey or fresh fruit, enhancing every bite and making this dessert truly special.
Sopapilla Cheesecake Variations
Feel free to unleash your creativity and personalize this delightful dessert with these enticing twists!
-
Puff Pastry: Substitute crescent rolls with puff pastry for an extra flaky and buttery crust, elevating the texture.
-
Chocolate Chips: Fold mini chocolate chips into the cheesecake filling for a decadent chocolatey surprise that complements the cinnamon beautifully.
-
Berry Bliss: Add fresh or frozen blueberries, strawberries, or raspberries to the filling for a burst of fruity goodness that balances the sweetness.
-
Pumpkin Spice: Swap out cinnamon for pumpkin pie spice to create a seasonal variation that’s perfect for fall gatherings; it brings warmth to every bite.
-
Coconut Dream: Incorporate shredded coconut into the filling for a tropical flair, transporting your taste buds to a sunny paradise.
-
Nutty Crunch: Add chopped nuts like pecans or walnuts to the topping for a delightful crunchy texture that contrasts with the creamy filling.
-
Zesty Lemon: Stir in some lemon zest to the filling for a bright, citrusy twist that lightens the richness of the cheesecake.
-
Spicy Kick: For those who love heat, add a pinch of cayenne pepper to the filling for a surprising and delicious spicy undertone.
Each variation opens up a world of delicious possibilities, inviting you to tailor this Sopapilla Cheesecake to your tastes! If you’re up for a flavor adventure, explore other ideas for adding a fresh touch to your dessert repertoire with these creative variations.
Expert Tips for Sopapilla Cheesecake
• Chill Time Importance: Always chill the Sopapilla Cheesecake for at least 4 hours. This ensures clean slices and enhances the flavors.
• Par-Bake Precision: Don’t skip the par-baking step! It prevents a soggy crust, giving you that delightful flaky texture.
• Use Sharp Tools: For the best slicing experience, use a sharp knife or a pizza cutter. This will create clean edges for a beautiful presentation.
• Ingredient Temperature: Ensure your cream cheese is softened at room temperature. This helps achieve a smooth and creamy filling that blends perfectly.
• Watch the Bake Time: Keep an eye on the oven as baking times may vary slightly. Look for a golden top and firm filling to ensure perfect results.
What to Serve with Sopapilla Cheesecake?
Elevate your dessert experience by pairing this creamy delight with complementary flavors and textures.
-
Fresh Berries: A burst of vibrant strawberries or blueberries adds a refreshing contrast to the richness of the cheesecake.
-
Honey Drizzle: A warm drizzle of honey creates a beautiful sweetness, enhancing the cinnamon flavors and adding a touch of elegance.
-
Vanilla Ice Cream: The creamy, cool texture of vanilla ice cream pairs wonderfully with the warm cheesecake, creating an indulgent experience.
-
Caramel Sauce: A drizzle of rich caramel adds an extra layer of sweetness that harmonizes with the cinnamon and cream cheese.
-
Whipped Cream: Light and airy whipped cream balances the rich filling, providing a delightful creamy contrast with every bite.
-
Coffee or Espresso: A rich cup of coffee or a shot of espresso brings out the dessert's warmth, creating a perfect end to any meal.
-
Chocolate Sauce: A sprinkle of chocolate sauce introduces a decadent twist, harmonizing beautifully with the creamy, cinnamon notes of the cheesecake.
-
Chopped Nuts: Crushed pecans or walnuts add a delightful crunch, introducing an earthy flavor that pairs well with the sweetness of the cheesecake.
Make Ahead Options
These Sopapilla Cheesecake bars are perfect for meal prep enthusiasts looking to save time during busy weeknights! You can prepare the cheesecake filling up to 24 hours in advance and store it in an airtight container in the refrigerator. Moreover, you can par-bake the crescent roll crust up to 3 days ahead; just ensure it's cooled completely before refrigerating to maintain its flaky texture. When you're ready to serve, simply assemble the filling on the crust, top it with the second layer of dough, and bake as instructed. Following these steps ensures that your Sopapilla Cheesecake is just as delicious and satisfying when it's finally served!
How to Store and Freeze Sopapilla Cheesecake
Fridge: Store leftover Sopapilla Cheesecake in an airtight container for up to 3 days to maintain its delicious creaminess and flaky texture.
Freezer: Wrap individual pieces in plastic wrap and aluminum foil, then freeze for up to 3 months. Thaw in the fridge overnight before serving.
Reheating: To enjoy warm, place a slice in the microwave for 15-20 seconds. This will refresh the flaky crust and keep the creamy filling delightful.
Make-Ahead Tips: You can prepare the cheesecake filling up to 24 hours in advance and par-bake the crust up to 3 days prior to assembly for a seamless baking day!
Sopapilla Cheesecake Recipe FAQs
What kind of crescent rolls should I use?
Absolutely! I recommend using regular refrigerated crescent rolls for that classic flaky crust, but if you prefer a flakier texture, puff pastry works wonderfully too. Just be sure to roll it out to fit your baking dish.
How should I store leftover Sopapilla Cheesecake?
Very! You can store your leftover Sopapilla Cheesecake in an airtight container in the refrigerator for up to 3 days. This will help retain its creamy filling and flaky layers, keeping it fresh and delicious for your next serving.
Can I freeze Sopapilla Cheesecake?
Of course! To freeze, wrap individual pieces in plastic wrap and then in aluminum foil for added protection. It can be stored in the freezer for up to 3 months. When you’re ready to enjoy, simply thaw it in the fridge overnight for the best results!
What should I do if my cheesecake filling is lumpy?
No worries! If your cheesecake filling turns out lumpy, it could be because the cream cheese wasn’t well softened. I recommend letting the cream cheese sit at room temperature for about 30 minutes before mixing. If you've already combined the ingredients, try blending it with a hand mixer or whisking vigorously to smooth it out.
Can pets eat Sopapilla Cheesecake?
Definitely not! While the ingredients may seem harmless, the sugary and dairy content is not suitable for pets. Always share only pet-friendly treats with our furry friends to keep them happy and healthy.
What can I do if my crust is soggy after baking?
If your crust ends up soggy, there are a couple of precautions to take next time! Be sure to par-bake your crust for 5-6 minutes as instructed to establish a good base. Additionally, ensure that the filling is not too watery by fully mixing and measuring your ingredients accurately.
Indulge in Sopapilla Cheesecake: Easy Flaky Family Delight
Ingredients
Equipment
Method
- Preheat your oven to 350°F (175°C).
- In a small bowl, combine sugar and ground cinnamon.
- Unroll the crescent roll dough and fit it into a greased baking dish.
- Brush the bottom of the baking dish with melted butter and sprinkle half of the cinnamon-sugar mixture.
- Par-bake the crust for 5-6 minutes.
- In a mixing bowl, whisk softened cream cheese until smooth, then add condensed milk, egg, and vanilla.
- Pour the creamy filling over the par-baked dough.
- Place the second layer of crescent dough over the top and sprinkle with remaining cinnamon-sugar mixture.
- Bake for 30-35 minutes until golden brown.
- Cool at room temperature, then refrigerate for at least 4 hours.
- Slice into bars and serve with optional toppings.


Leave a Reply