
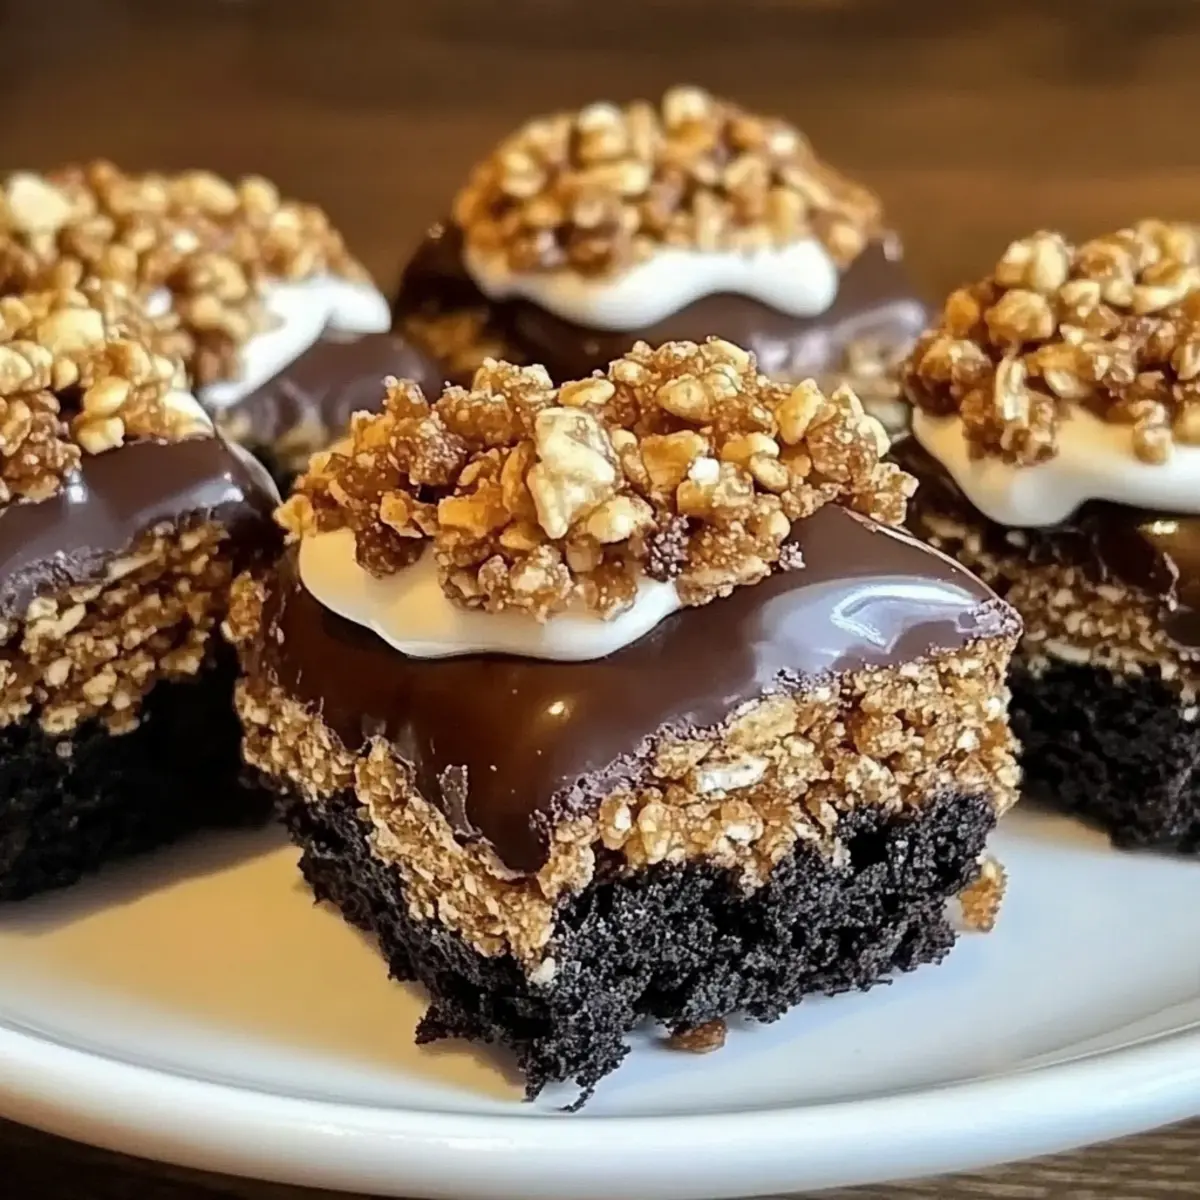
While rummaging through the pantry, I stumbled upon some classic Oreos, and instantly, nostalgia kicked in. Remember those carefree afternoons when we’d snack on Oreos and watch our favorite shows? Today, we’re bringing that spirit back with a twist, making my Deliciously Crunchy Oreo Krispies! This easy dessert captures the crunchy goodness of Rice Krispies and the rich flavor of Oreos, creating a delightful union that’s perfect for all ages. Not only is this no-bake treat quick to whip up, but it’s also incredibly customizable—think peanut butter twists or s'mores adaptations that can cater to every palate. Whether you’re entertaining friends or simply indulging your sweet tooth, these Oreo Krispies are sure to elevate any moment into a celebration. So, are you ready to dive into this delightful dessert mashup? Let’s get started!

Why Are Oreo Krispies So Irresistible?
Simplicity at its finest: With just a few ingredients, these no-bake Oreo Krispies make dessert preparation a breeze, perfect for even the busiest home cooks. Endless Customization: You can tailor this recipe to suit any taste—try adding peanut butter cups or s'mores elements for a unique twist. Crowd-Pleasing: Whether it’s a gathering of friends or a family movie night, these treats are guaranteed to please everyone. Nostalgic Flavor: Infused with the familiar taste of Oreos, each bite reminds us of carefree childhood moments. Don't forget to check out our tips on storage methods to keep them fresh longer!
Oreo Krispies Ingredients
For the Treats
• Rice Krispies cereal – Provides the base crunch; substitute with gluten-free puffed rice if needed.
• Oreo cookies – Adds rich chocolate flavor; gluten-free Oreos can be used for a gluten-sensitive option.
• Unsalted butter – Aids in binding the mixture; use coconut oil for a dairy-free version.
• Mini marshmallows – Create a gooey texture when melted; opt for vegan marshmallows for a plant-based twist.
Optional Add-ins
• Peanut butter cups – Add for a nutty flavor kick; mix in mini ones for a delightful surprise.
• Crushed graham crackers – Perfect for a s’mores inspired twist; adds nostalgic flavor and crunch.
• Seasonal candies or sprinkles – Customize for special occasions; makes these Oreo Krispies festive and fun!
Step‑by‑Step Instructions for Deliciously Crunchy Oreo Krispies
Step 1: Prepare the Baking Dish
Begin by lightly greasing an 8x8-inch baking dish with butter or cooking spray. This important first step ensures that the Oreo Krispies will release easily once they’re set. Set the prepared dish aside while you move on to melting the butter and marshmallows.
Step 2: Melt the Butter
In a medium saucepan over low heat, add the unsalted butter. Stir gently as it begins to melt, making sure not to let it brown. This should take about 2-3 minutes. Once melted, make sure the butter is fully liquefied and shiny before proceeding to the marshmallows.
Step 3: Add the Marshmallows
Next, pour in the mini marshmallows into the saucepan with the melted butter. Stir continuously for about 3-5 minutes or until the marshmallows are completely melted and smooth, looking glossy and cohesive. Be vigilant to keep the heat low; this prevents the marshmallows from becoming grainy.
Step 4: Incorporate the Crushed Oreos
Remove the saucepan from heat and fold in the crushed Oreo cookies gently. Mix until the Oreos are evenly coated in the melted marshmallow mixture, creating a rich chocolate base for your Deliciously Crunchy Oreo Krispies. Allow the mixture to cool slightly before adding the Rice Krispies.
Step 5: Mix in the Rice Krispies
In a large mixing bowl, pour the Rice Krispies cereal. Then, pour the Oreo-marshmallow mixture over the cereal. With a wooden spoon or spatula, gently stir until every piece of cereal is evenly coated, ensuring the mixture is well combined and ready for shaping.
Step 6: Press into the Baking Dish
Transfer the mixture into the prepared baking dish, spreading it out evenly. Use your hands or another flat utensil to press the mixture firmly down into the dish. This step is crucial for ensuring that your Oreo Krispies hold together once they cool, creating a perfect, cohesive treat.
Step 7: Cool and Cut
Allow the mixture to cool at room temperature for at least 30 minutes. Once set, use a sharp knife to cut them into squares or rectangles. The finished Oreo Krispies should be firm yet slightly sticky, providing that delightful crunch when enjoyed.
Step 8: Enjoy Your Treats
Serve your Deliciously Crunchy Oreo Krispies immediately or store them in an airtight container at room temperature. The sweet, nostalgic flavor enriched with Oreo's goodness will surely elevate your dessert game and please all palates. Enjoy the tasty satisfaction!
What to Serve with Deliciously Crunchy Oreo Krispies
Indulging in a sweet treat should always be complemented by delightful pairings that enhance the experience.
- Vanilla Ice Cream: Creamy and cool, ice cream balances the sweetness of the Krispies, creating a delicious contrast.
- Chocolate Drizzle: A rich chocolate drizzle adds an elegant touch and enhances the chocolate flavor of the Oreos.
- Fresh Berries: Bright, juicy berries introduce a burst of freshness that beautifully offsets the richness of the dessert.
- Whipped Cream: Light and airy whipped cream adds a luscious texture that complements the crunchy bites of Oreo Krispies.
- Milk or Dairy Alternatives: A classic pairing, a cold glass of milk makes every bite more delightful—perfect for dipping!
Pairing these options not only enhances the flavors of your Oreo Krispies but transforms your dessert experience into a delightful feast for the senses.
Oreo Krispies Variations & Substitutions
Get ready to explore a world of tasty transformations! These simple adjustments invite your culinary creativity to shine through.
-
Peanut Butter Cups: Add mini peanut butter cups to the mixture for a delightful nutty flavor explosion. Imagine the harmonious blend of chocolate and peanut butter in every bite!
-
S’mores Inspired: Mix in crushed graham crackers and mini marshmallows for a delightful take on the classic campfire treat. The combination of crunchy and gooey will transport you straight to summer nights!
-
Holiday Variants: Customize your Oreo Krispies with seasonal candies or festive sprinkles to celebrate special occasions. A sprinkle of joy can turn your treats into a colorful festive centerpiece!
-
Nut-Free Version: Swap out any peanut products for sunflower seed butter to keep things nut-free. Not only will it cater to allergies, it also adds a new texture that’s just as delicious!
-
Vegan Delight: Use plant-based butter and vegan marshmallows to make this recipe accessible for dairy-free friends. The taste remains unwaveringly delicious, ensuring no one misses out on the fun!
-
Gluten-Free Option: Choose gluten-free Oreos and puffed rice to cater to dietary needs without sacrificing flavor. You’ll create a dessert that everyone can enjoy together!
-
Spicy Kick: For those who enjoy a bit of heat, add a pinch of cayenne pepper or crushed red pepper flakes to the melted marshmallows for an exciting kick. It’s a daring twist that will surprise your taste buds!
-
Caramel Drizzle: Before serving, drizzle some melted caramel on top for an extra indulgent treat. The way the sweetness of caramel pairs with the chocolaty Oreos creates a blissful experience that you won’t forget.
Feel free to experiment with these variations, and don't hesitate to share your own creative twists! And if you’re interested in learning more about meal prep, check out our guide on storage methods to keep your delicious creations at their absolute best!
Expert Tips for Delicious Oreo Krispies
- Heat Control: Always melt the marshmallows over low heat to avoid a grainy texture; consistent stirring is key for a smooth finish.
- Firm Pressure: Press the mixture firmly into the baking dish to ensure the Oreo Krispies hold together well once cut; this step is essential for structure.
- Fresh Ingredients: Use fresh Oreos and marshmallows for the best flavor—stale ingredients can diminish the delicious taste of your treats.
- Cooling Time: Be patient and let the Krispies cool completely before cutting; this helps maintain the perfect texture and prevents them from falling apart.
- Customization: Don’t hesitate to experiment with add-ins like peanut butter cups or graham crackers to create unique Oreo Krispies tailored to your tastes.
How to Store and Freeze Oreo Krispies
Room Temperature: Store Oreo Krispies in an airtight container at room temperature for up to 1 week for optimal freshness and texture.
Fridge: For a firmer texture, refrigerate the treats in an airtight container for up to 2 weeks, ensuring they remain deliciously crunchy.
Freezer: Freeze Oreo Krispies for up to 3 months—wrap them tightly in plastic wrap followed by foil to prevent freezer burn.
Reheating: If desired, thaw at room temperature for a few hours before enjoying, or warm them in the microwave for 10-15 seconds for a soft and gooey treat.
Make Ahead Options
These Deliciously Crunchy Oreo Krispies are perfect for busy home cooks looking to save time! You can prepare the mixture of melted marshmallows, butter, and crushed Oreos up to 24 hours in advance. Simply combine these ingredients, allow them to cool slightly, and store them in an airtight container in the refrigerator. When you're ready to finish the recipe, simply mix in the Rice Krispies, press the mixture into your prepared baking dish, and let it set. This method not only keeps everything fresh but also ensures that your Oreo Krispies remain just as delicious when you're ready to serve them! Enjoy your sweet treat without the last-minute rush!
Deliciously Crunchy Oreo Krispies Recipe FAQs
How do I choose the right Oreo cookies for this recipe?
Absolutely! It's essential to select fresh Oreo cookies without any visible damage, like dark spots or a crumbly texture. If you're looking for a gluten-sensitive option, be sure to grab a pack of gluten-free Oreos—I'm always thrilled when I can accommodate everyone at the table!
How should I store leftover Oreo Krispies?
Very simple! Place your Oreo Krispies in an airtight container at room temperature for up to 1 week. You can also refrigerate them for a firmer texture—this helps them last for up to 2 weeks. Don’t forget to label your container with the date!
Can I freeze Oreo Krispies, and if so, how?
Absolutely, you can freeze these delightful treats! Wrap the Oreo Krispies tightly in plastic wrap, then cover them with aluminum foil to prevent freezer burn. They can be stored in the freezer for up to 3 months. When you’re ready to enjoy them, thaw at room temperature for a few hours, or warm them in the microwave for a gooey treat!
What should I do if my Oreo Krispies are too crumbly?
If your Oreo Krispies are too crumbly, it could be due to not pressing the mixture firmly enough into the baking dish. Be sure to press down hard with your hands or another flat object to compact the treats as you add them to the dish. If you find them too dry after cutting, you can drizzle a bit of melted chocolate or peanut butter on top for added moisture and flavor!
Are there any dietary considerations I should be aware of?
Certainly! If you’re making these for someone with dietary restrictions, you can substitute the unsalted butter with coconut oil for a dairy-free version, and use vegan marshmallows instead of regular ones. Additionally, gluten-free Oreos and puffed rice can accommodate gluten-sensitive guests. Always check ingredient labels for allergens as well!
How long do these treats last, and how do I ensure they stay fresh?
To maintain the best texture and flavor, store your Oreo Krispies in an airtight container. At room temperature, they’ll stay fresh for about 1 week; refrigerate for up to 2 weeks. If you're not eating them within that time frame, it’s best to freeze them. Just follow the freezing instructions mentioned earlier to ensure they stay delicious!

Irresistibly Easy Oreo Krispies for Your Sweet Cravings
Ingredients
Equipment
Method
- Prepare the Baking Dish: Lightly grease an 8x8-inch baking dish with butter or cooking spray and set aside.
- Melt the Butter: In a medium saucepan over low heat, melt the unsalted butter for 2-3 minutes until fully liquefied.
- Add the Marshmallows: Pour in the mini marshmallows and stir continuously for 3-5 minutes or until melted and smooth.
- Incorporate the Crushed Oreos: Remove from heat and fold in the crushed Oreo cookies until evenly coated.
- Mix in the Rice Krispies: In a large bowl, combine the Rice Krispies cereal with the Oreo-marshmallow mixture, stirring gently.
- Press into the Baking Dish: Transfer the mixture into the prepared baking dish and press firmly down.
- Cool and Cut: Allow to cool at room temperature for at least 30 minutes, then cut into squares.
- Enjoy Your Treats: Serve immediately or store in an airtight container.


Leave a Reply