
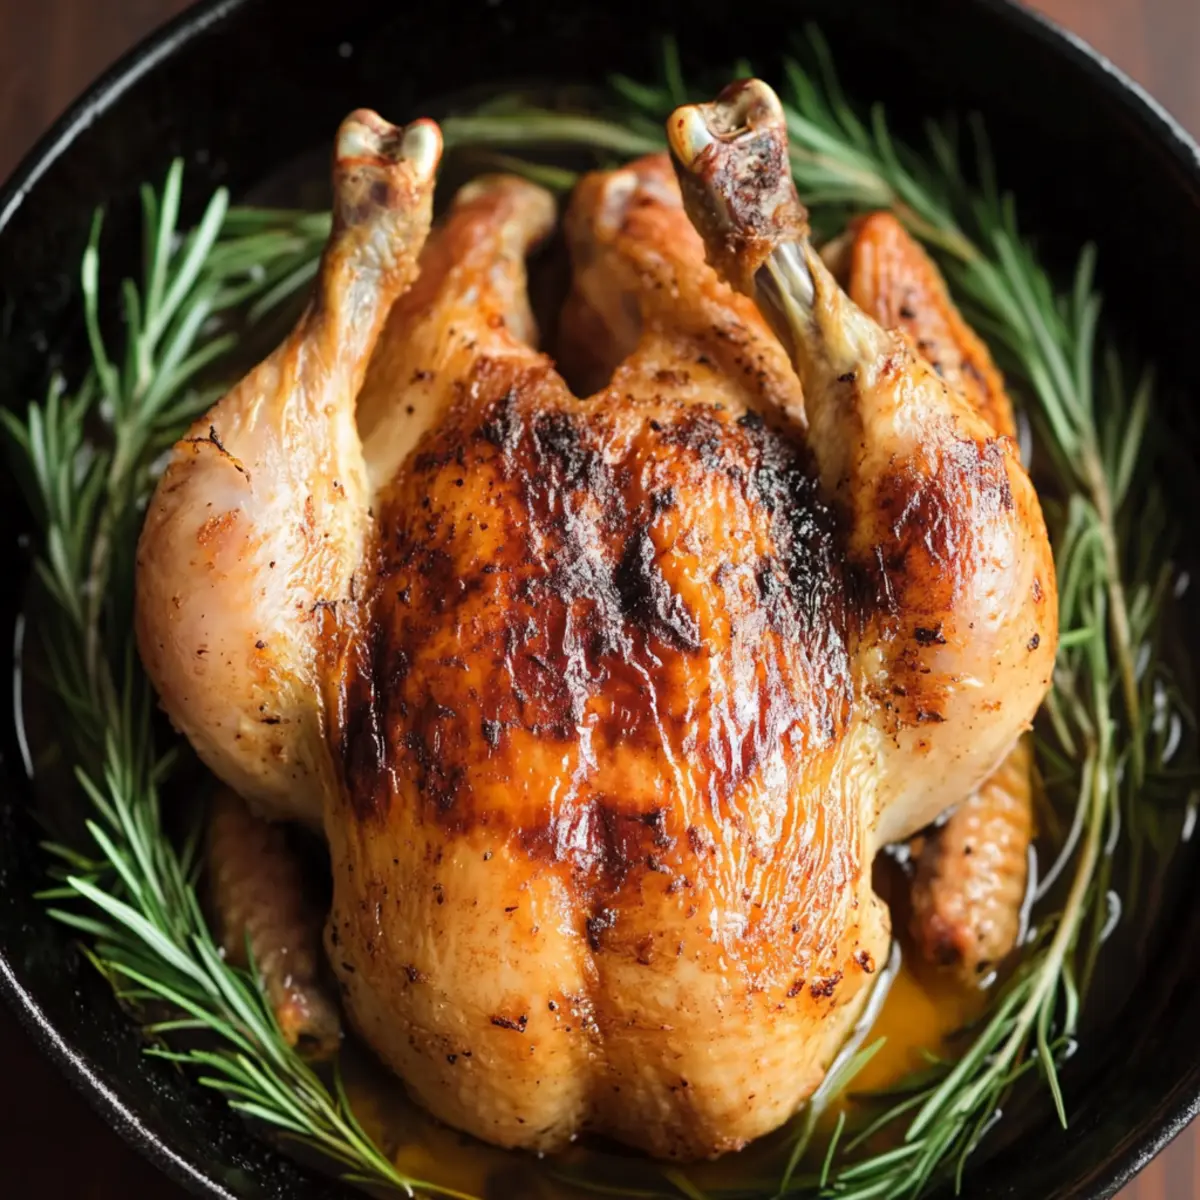
Every time I roast a chicken, I can't help but marvel at how something so simple can turn into a culinary masterpiece, thanks to a little secret weapon: chicken brine. This technique, infused with aromatic herbs, garlic, zesty lemon, and a hint of honey, ensures that each piece of meat is juicy and bursting with flavor. The BEST Chicken Brine is not just easy to whip up; it's a game-changer for both weeknight dinners and special occasions. With this brine, you’ll enjoy a beautifully roasted chicken with a crispy exterior and succulent insides—perfect for impressing family and friends or simply savoring a homemade meal. Have you ever wondered how to achieve that restaurant-quality texture at home? Let’s dive into this foolproof brining method that will elevate your chicken dishes to a whole new level!
Why is Chicken Brine Essential?
Juiciness Guaranteed: The BEST Chicken Brine transforms your roast into a succulent delight, ensuring each bite remains moist and flavorful.
Simplicity: With just a few easy-to-find ingredients, this brining technique fits seamlessly into busy schedules—you’ll wonder how you ever cooked without it!
Flavor Explosion: Say goodbye to bland poultry; the infusion of herbs, garlic, and lemon creates a mouthwatering flavor profile that will impress anyone.
Versatile Use: Perfect for roasting, grilling, or frying—your options are endless! You can even experiment with different herbs to suit your taste preferences.
Crowd-Pleasing: Serve a beautifully roasted chicken that rivals any restaurant masterpiece, making it the star of family dinners or holiday feasts. Enjoy the show!
Chicken Brine Ingredients
Unlock the secret to soft, juicy roast chicken with the perfect blend of flavors.
For the Brine
- Kosher Salt – A key ingredient for flavor and moisture that ensures your chicken stays juicy; you can substitute with table salt but use less.
- Water – The base of your brine solution; opt for filtered water for the best taste.
- Honey – Adds a hint of sweetness balancing the saltiness; agave syrup works for a vegan option.
- Aromatic Herbs (parsley, rosemary, thyme) – Enhance overall flavor with fresh, earthy notes; dried herbs can be used but in smaller amounts.
- Garlic – Brings depth and tanginess to the brine; fresh crushed garlic is ideal, though garlic powder can substitute.
- Lemon – Provides brightness to complement the richness; swap with lime for a refreshing twist.
Step‑by‑Step Instructions for The BEST Chicken Brine
Step 1: Prepare the Brine Base
In a large pot, combine 8 cups of filtered water with ⅓ cup of kosher salt. Heat the mixture over low flame for about 2 minutes, stirring continuously until the salt is completely dissolved. This creates the foundation of your chicken brine. Once dissolved, add in ¼ cup of honey, mixing well until all ingredients are fully integrated.
Step 2: Bring to a Boil
Increase the heat and bring the brine mixture to a rolling boil while stirring. This step ensures that the salt and honey are thoroughly mixed into the water for maximum flavor infusion. Once boiling, allow it to bubble for 2-3 minutes, then remove the pot from the heat. The brine will thicken slightly and deepen in aroma, enticing your taste buds.
Step 3: Cool the Brine
Let the brine cool completely to room temperature. To accelerate cooling, transfer the pot to the refrigerator for about 30 minutes. Ensure the brine is entirely cooled before using it for brining the chicken, as adding the poultry to hot brine can promote bacterial growth, affecting safety and flavor.
Step 4: Brine the Chicken
Fully submerge your clean chicken in the cooled brine, ensuring it is covered entirely. Use a large, non-reactive container and cover it to prevent any contaminants from entering. Allow the chicken to brine in the refrigerator for 8 to 24 hours, depending on how salty you prefer the final flavor—just avoid exceeding 24 hours to prevent over-salting.
Step 5: Rinse and Dry
After the brining period, take the chicken out of the brine and rinse it thoroughly under cold tap water. This step is crucial for removing excess salt from the surface. Pat the chicken dry with paper towels, which will help achieve that beautifully crispy skin when roasted.
Step 6: Prepare for Roasting
Rub softened butter all over the surface of the chicken to lock in moisture and promote browning. Then, sprinkle crushed black pepper to taste for extra flavor. Place the chicken uncovered in the refrigerator for 15-20 minutes, allowing the skin to dry out slightly, which contributes to that sought-after crunch during roasting.
Step 7: Preheat and Roast
Preheat your oven to 400°F (200°C). Once hot, place the chicken in the oven and roast for 30 minutes. Afterward, carefully flip the bird and continue roasting for an additional 30-40 minutes, basting it with butter every 10-15 minutes. The skin should turn golden brown and crispy, while the internal meat remains juicy.
Step 8: Check for Doneness
Use a meat thermometer to check the chicken's internal temperature, aiming for 165°F (74°C) in the thickest part of the thigh. Once it reaches the desired temperature, remove it from the oven and let it rest for about 15 minutes. This resting period allows the juices to redistribute, ensuring each bite is tender and succulent before carving.

Make Ahead Options
These Chicken Brine preparations are perfect for busy home cooks looking to save time during hectic weeknights! You can prepare the brine solution (combine kosher salt, water, honey, and herbs) up to 24 hours in advance, allowing the flavors to meld beautifully. Once cooled, simply refrigerate it until you’re ready to brine the chicken. The actual brining process can also be done a day in advance, letting the chicken soak in the flavorful brine for 8 to 24 hours. To maintain quality, make sure to rinse off the excess salt and pat the chicken dry before cooking. When you're ready, just follow the roasting instructions, and you'll have a juicy roast chicken that tastes as good as if you made it the same day!
Chicken Brine Variations & Substitutions
Feel free to explore and customize your chicken brine experience with these delightful variations!
-
Herb Swap: Replace parsley with fresh sage or dill for a unique flavor twist that adds depth and earthiness. Think of it as a way to embrace seasonal ingredients or match your dish with the side you’re serving.
-
Sweetness Switch: Use maple syrup instead of honey for a rich, earthy sweetness that pairs wonderfully with roasted chicken. It adds a layer of complexity and lovely notes that dance alongside the savory flavors.
-
Zesty Upgrade: Substitute lemon juice with orange juice for a sweet citric twist. This will provide a bright and refreshing flavor profile, perfect for summer dinners.
-
Spice it Up: For those craving heat, add 1 teaspoon of cayenne pepper or crushed red pepper flakes to the brine. It will infuse the chicken with just the right amount of warmth, making every bite exciting. Don’t be afraid to taste along the way!
-
Vegan-Friendly: Swap out honey with agave syrup to cater to vegan diets while imparting the perfect touch of sweetness. It’s a smooth substitute that maintains the essence of the brine without compromising flavor.
-
Iodine-Free: If you're sensitive to iodized salt, consider using sea salt or Himalayan pink salt as a brine alternative. These salts add their own unique minerals that enhance flavor while avoiding unwanted iodine.
-
Umami Boost: For more depth, toss in a tablespoon of soy sauce or Worcestershire sauce for an umami flavor explosion. This addition will elevate your brine and bring out a richer taste in the chicken.
-
Citrus Combo: Mix lemon and lime juice for a vibrant and zesty brine that brings a refreshing tang. Both complement the natural flavors of chicken beautifully, creating a mouthwatering dish everyone will love!
Feel free to let your creativity flow while brining! Happy cooking!
What to Serve with The BEST Chicken Brine
Imagine a bustling family kitchen filled with comforting aromas as you create a well-rounded meal that everyone will cherish.
- Roasted Vegetables: Bright, caramelized veggies add vibrant colors and earthy flavors, balancing the richness of the chicken.
- Classic Mashed Potatoes: Creamy and buttery, these potatoes are perfect for soaking up any delicious juices from the chicken.
- Fresh Garden Salad: A light and refreshing salad with crisp greens and tangy dressing provides a crisp contrast to the tender meat.
- Garlic Bread: Warm, toasty slices infused with garlic butter are irresistible, making your meal feel comforting and indulgent.
- Grilled Asparagus: Tender, slightly charred asparagus brings a touch of elegance while complementing the savory flavors of the chicken.
- Honey-Glazed Carrots: Sweet and tender, these carrots’ natural sugars harmonize beautifully with the salty brine flavors.
- Apple Cider: A glass of crisp apple cider can enhance the meal's warmth and provide a delightful contrast to the savory chicken.
- Chocolate Mousse: For dessert, this rich, light treat is the perfect way to end dinner, balancing flavors with its luxurious creaminess.
- Herb-Infused Rice: Fluffy rice cooked with herbs echoes the flavor profile of your chicken brine, creating harmony on the plate.
Expert Tips for Chicken Brine
Cool Brine First: Always ensure your chicken brine is completely cooled before submerging the chicken to prevent harmful bacteria.
Monitor Brining Time: Avoid brining your chicken for more than 24 hours to prevent over-salting, which can lead to a too-salty flavor.
Rinse Thoroughly: Don’t skip rinsing the chicken after brining! This step removes excess salt and helps achieve the perfect seasoning.
Avoid Basting with Drippings: Use fresh butter for basting instead of pan drippings; this keeps the flavor balanced and avoids excessive saltiness.
Check Doneness: Use a meat thermometer to confirm that the chicken reaches 165°F (74°C) for juicy, safe-to-eat meat every time.
Experiment with Flavors: Feel free to adjust the herbs and spices in your chicken brine to tailor it to your taste—a little creativity goes a long way!
How to Store and Freeze Chicken Brine
Fridge: Store leftover chicken brine in an airtight container in the fridge for up to 3 days. This allows you to reuse the brine for another brining session or enhance other dishes.
Freezer: You can freeze chicken brine in freezer-safe bags or ice cube trays for up to 3 months. Thaw it in the fridge before use, making it convenient for future roasting.
Reheating: If using previously frozen brine, ensure it's completely thawed, then heat gently on the stove before brining new chicken to maintain safety and flavor integrity.
Brining Power: Remember, properly stored chicken brine can still yield delicious results when used again, adding depth of flavor to your meals!
The BEST Chicken Brine Recipe FAQs
How do I select the best ingredients for the chicken brine?
Absolutely! Fresh herbs are key for the best flavor, so opt for parsley, rosemary, and thyme whenever possible. When choosing chicken, look for one that has no dark spots or blemishes, and ensure it's fully thawed if using a frozen bird. Fresh garlic cloves should ideally be firm and free from sprouts, while bright, zesty lemons indicate juiciness.
How long can I store leftover brined chicken in the fridge?
Very! Leftover chicken that has been brined can be stored in an airtight container in the refrigerator for up to 3 days. If you have any pieces left, I recommend shredding them for use in salads, wraps, or soups to avoid waste.
Can I freeze chicken brine for future use?
The more the merrier! You can absolutely freeze chicken brine in freezer-safe bags or ice cube trays for up to 3 months. When you're ready to use it, just thaw in the fridge overnight, then reheat gently on the stove to maintain its flavor and safety.
What should I do if my chicken turns out too salty after brining?
Don't worry—this can happen! If you find your chicken is too salty, you can soak it in cold water for 30 minutes to 1 hour before cooking to draw out some of that excess salt. Just remember to pat it dry afterward for the crispiest skin!
Are there any dietary considerations for my brine?
Definitely! If you're cooking for someone with allergies, be cautious with honey if you're considering a vegan alternative, as some people are allergic to agave syrup as well. Always ask your guests about specific dietary needs before serving any dish.
Can I reuse my chicken brine?
Yes! If you’ve stored your brine properly, you can reuse it for a new batch of chicken within 3 days. Siphon off any solid pieces, then heat it gently before using again. Just remember that the flavor will be more intense each time you reuse it, so adjust your brining times accordingly!
Juicy Chicken Brine for Perfectly Tender Roast Every Time
Ingredients
Equipment
Method
- In a large pot, combine 8 cups of filtered water with ⅓ cup of kosher salt. Heat over low flame for about 2 minutes until dissolved.
- Increase heat and bring the brine mixture to a rolling boil while stirring. Allow it to bubble for 2-3 minutes, then remove from heat.
- Let the brine cool completely to room temperature; refrigerate for about 30 minutes to speed up cooling.
- Fully submerge your clean chicken in the cooled brine for 8 to 24 hours in a non-reactive container.
- After brining, rinse the chicken under cold water to remove excess salt, then pat dry with paper towels.
- Rub softened butter over the chicken, sprinkle with crushed black pepper. Place uncovered in the refrigerator for 15-20 minutes.
- Preheat oven to 400°F (200°C). Roast the chicken for 30 minutes, flip and continue roasting for 30-40 minutes, basting with butter.
- Use a meat thermometer to check that the internal temperature reaches 165°F (74°C). Let it rest for 15 minutes before carving.


Leave a Reply